


THE TRAILER VISION reversing camera system features a colour camera and monitor, and it is also wireless. This means that it’s extremely easy to instal, as I found out when I fitted one to our Sprite Alpine project caravan.
It operates on either 12V or 24V, and has two further advantages – being wireless means that it is interference-free, and it can also be easily transferred between vehicles.
Tools and materials
Cordless drill; 3mm pilot drill; 12mm drill; 20mm dia hole cutter, bradawl; screwdrivers; hammer; cable clips; tywraps; non-setting bedding mastic; turps substitute; 12V 17A yellow and black cable (NB: Although the system doesn’t require 17A, I used cables of this size to minimise the voltage drop).
Warning
Fitting the Trailer Vision involves very simple electrical work well within the capabilities of anyone competent at DIY. However, if you have any doubts about your ability to undertake this work, seek professional assistance.
STEP 1
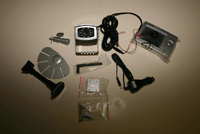
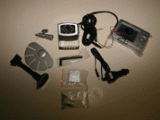
[tl:gallery size=200×134]The Trailer Vision kit comprises the camera and mounting bracket, the colour monitor, 12/24V lead, various mounts for the monitor, and all the necessary screws.
STEP 2
[tl:gallery size=200×134]Before starting the installation I undid the 12S plug on the caravan to confirm that there was a yellow cable connected to tube 1. After reassembling the plug I traced the cable to a terminal block under the caravan.
STEP 3
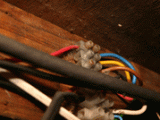
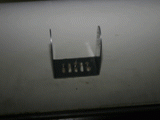
[tl:gallery size=200×134]Having removed the cover protecting the terminal block from the elements, I saw that the yellow cable was connected to the second terminal from the top and the negative – white sheath – was connected to the second terminal from bottom.
STEP 4
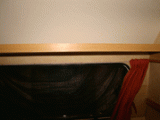
[tl:gallery size=200×134]Inside the caravan there was a shelf fitted above the rear window. This meant that I would be able to run the camera’s cable unobtrusively along the back of the shelf to the rear nearside corner of the caravan.
STEP 5
[tl:gallery size=200×134]Before fitting the camera bracket I spent time calculating how high it would have to be above the window to allow the cable from the camera to pass through into the caravan just below the shelf. I then used my bradawl to pierce holes in the aluminium for the three screws. Before inserting them I filled the holes with non setting bedding mastic.
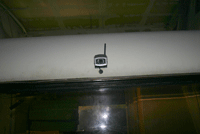
STEP 6
[tl:gallery size=200×134]Having drilled a pilot hole I used a 20mm dia hole cutter to make the hole for the grommet already fitted to the cable. This had two flanges as it was intended to fit into a car body so I cut one of them off and, having filled the hole with non setting bedding mastic, pushed the cable through followed by the grommet. I then fitted the camera.
STEP 7
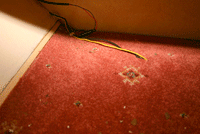
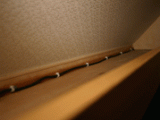
[tl:gallery size=200×134]Inside the caravan I drilled a 12mm dia hole through the shelf and fed the cable up through it. I then ran it alone the back of the shelf securing it with cable clips and down through the shelf again in the corner.
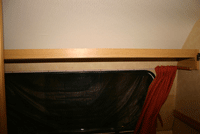
STEP 8
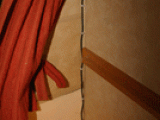
[tl:gallery size=134×200]I used further cable clips to secure it down the nearside corner to below the seat. With the curtain and the seat cushion in place there is very little cable to be seen.
STEP 9
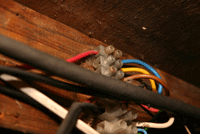
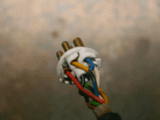
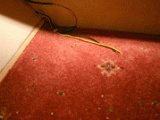
[tl:gallery size=200×134]From under the caravan, I drilled a 12mm dia hole up through the floor and fed a lengths of 17 amp 12 volt yellow and black cables up into the caravan where I used a terminal block to connect them to the live – with fuse holder – and return cables from the camera. Having done so, I used a cable clip to secure them to the floor. At the terminal block under the caravan I connected them, yellow to yellow, and black to white, i.e. live to live and negative to negative. The cables were secured at intervals along the chassis with cable clips and tywraps.
STEP 10
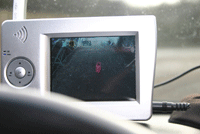
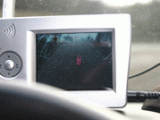
[tl:gallery size=200×134]With the car hitched to the caravan and the monitor connected to the cigar lighter, I switched on the engine and selected reverse gear. Having done so, I turned on the monitor which showed the view behind the caravan. This included the propane cylinder which I had placed behind the caravan.
For further information
RoadPro Ltd, Stephenson Close, Drayton Fields Industrial Estate, Daventry, Northants NN11 8RF.
Tel: 01327 312 233 Fax: 01327 301 198
Email: [email protected]
Web: www.roadpro.co.uk