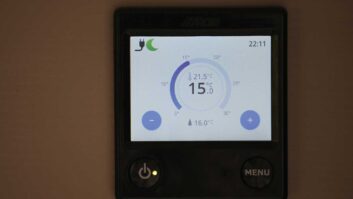

WAKING UP ON a cold morning, many caravanners must, like me, jump out of bed, turn on the heating then jump back in while the van warms up.
Installing a timer switch on the electric heating element in your Truma space heater improves things. It has the equivalent of a ‘sleep’ function to switch it off after you’ve gone to bed, but remember: it only operates when the heater is powered by mains electricity.
Tools and materials
Timer; masking tape; two coloured reels of insulating tape for coding the wires; connector block; suitable insulated screwdrivers.
STEP 1
[tl:gallery size=240×160]You need to source a suitable timer. The best timer I found was the Supplymaster FST 11A 24-hour fused spur time switch from Time Guard Ltd. I paid £37 for mine and it was a good fit in the existing switch surround.
STEP 2
[tl:gallery size=240×160]Switch off the trips and RCD at the fuse box and disconnect any hook-up cable. Locate the Truma’s main power switch. The picture shows the main switch (centre), thermostat and power control (top) and socket (bottom).
STEP 3
[tl:gallery size=240×160]Press some masking tape onto the little covers hiding the switch-retaining screws, then pull sharply to remove them. Undo the screws
and pull the main switch clear of the back-box. This will reveal the two wires connected to it.
STEP 4
[tl:gallery size=240×160]The three cores of one cable go to the ‘feed’ connections on the main switch; the three from the other go to the ‘load’ connections. I’ve marked the ‘feed’ wire with brown tape and the ‘load’ wire with blue. Remove the main switch.
STEP 5
[tl:gallery size=240×160]The FST 11A timer is double-insulated and does not require an earth connection. There must, however, be earth continuity between the ‘feed’ and ‘load’ wires, so join the two earth cores together with the connector block.
STEP 6
[tl:gallery size=240×160]The live and neutral cores of each wire must now be connected to the correct terminals on the timer, marked IN and OUT. IN = ‘feed’ and OUT = ‘load’. Remember: ‘Brown is live, blue is not. Green-and-yellow earths the lot’.
STEP 7
[tl:gallery size=240×160]Check all the screws are tight, push the time switch in and fit its retaining screws. The earth sits at the bottom of the box. Remove the 13A fuse from the timer and replace it with the 10A fuse from the original main switch.
STEP 8
[tl:gallery size=240×160]All done! Hook up and switch on. The timer’s back-up battery takes about four hours to charge but the clock can be set and the timer programmed immediately. Use the ‘Bst’ (Boost) button as a manual/sleep control.
WARNING
This project involves mains electricity. Do not attempt mains system work unless competent to do so. Ensure the battery and mains are disconnected before starting. Work should be checked by a qualified electrician.
Get £50 for a clever fix
If you’ve carried out any DIY, then we want to hear about it. Email [email protected] or write to the address on page 145 with at least 150 words and a couple of photos (digital or print). We’ll pay £50 for any we print.