


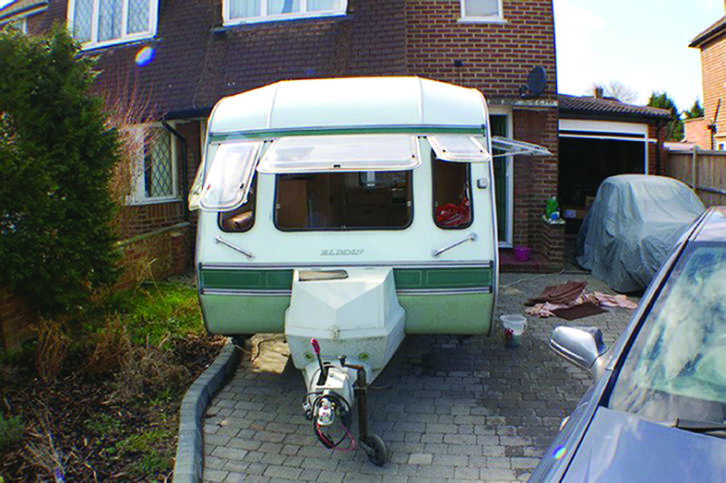
Things with wheels are designed to move, but low-season weather, high-season crowds, coronavirus pandemics and more can mean your caravan becomes something of a garden ornament so make sure you prepare your van for the road.
Idleness causes things to deteriorate, rather than wear out, but being aware of the potential problems and carrying out some preventative maintenance will help to avoid difficulties later on.
With some simple potions and tools, you can give yourself a great chance of ensuring the first trip out this season is memorable for all the right reasons.
We are taking for granted that your van has been serviced in recent memory, and laid up for an extended period.
Take a look at our 10 tips to help you prepare your caravan for spring touring too.
Essential tools and kit
We aren’t doing any heavy lifting here. You won’t need loads of tools or specialised kit, but a few items go a long way in ensuring that first trip is a smooth one.
Depending on what you are planning to do, you should get yourself the following:
- Warm water
- Car shampoo
- WD-40 or equivalent
- Silicone spray
- White lithium grease
- Surgical spirit
- White vinegar
- Cotton buds
- Petroleum jelly
- An old toothbrush
- Microfibre cloths
- A nailbrush
Check and charge batteries
Experienced caravanners know that a neglected battery quickly becomes an expensive annual bill.
If you want to avoid replacing batteries on a regular basis, you need to put some effort into looking after them. If most of your touring is on sites with hook-up, then as long as the battery has enough puff to power the control panel, the hook-up will take care of things.
If you have a motor-mover, or brave stays away from the sanctuary of the hook-up cable, battery health really matters.
Before worrying about the charge level, it makes sense to look at the batteries’ physical condition. All you can really do is visually inspect for bulges or physical damage, check and replenish the level of charge, and ensure the terminals are clean.
There will also be some sort of battery restraining strap. Make sure that is in good shape and tight enough to do its job. You don’t want a loose battery trying to escape from the locker. There is enough weight to cause damage to the locker and cabling.
Flat batteries are the main thing to fear, however. Batteries lose charge while they are in storage, a phenomenon known as self-discharge. Compound that with batteries deteriorating and permanently losing performance when stored in a poor state of charge, and you can see why it’s vital to keep them brimmed.
However, if your caravan is stored on a hook-up at home, or you have a solar panel installed, that’s the big headache, and most common problem, taken care of. If that’s not the case, you will need to keep on top of your battery care.
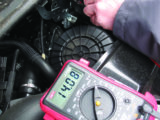
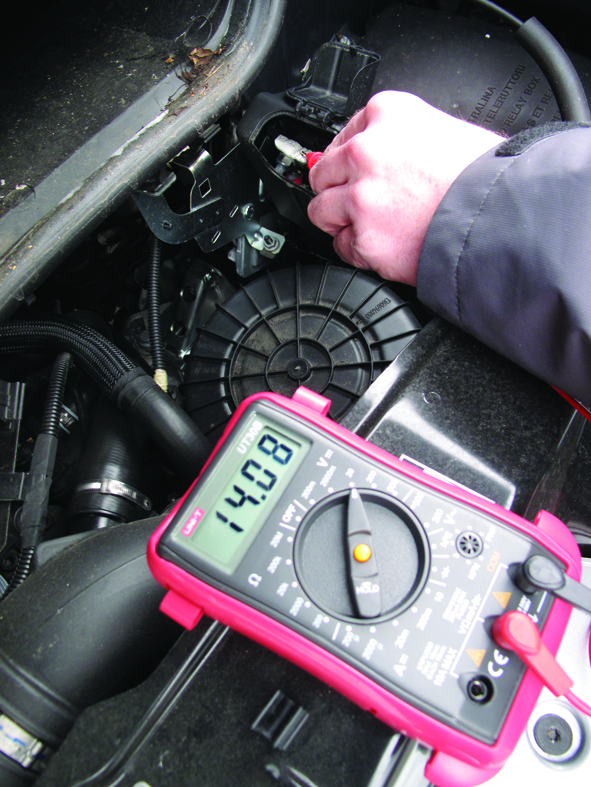
If you have one fitted, you can use the built-in meter on the caravan to check the state of battery charge. If not, hook up a multimeter between terminals to check the voltage. A reading of 12.6 or higher is healthy enough, but anything much lower than that means you want to get the battery on charge.
If your caravan is stored at home, you might be able to get the hook-up connected to recharge things; but otherwise, you are likely to need to remove the battery, which is no bad thing.
Some modern vans have sophisticated multistage chargers to condition and charge the battery, but many more do not. In the latter case, a good standalone charger will do the job.
If the terminals are covered in white fluff, that is oxidation, which will need cleaning off to ensure a good connection. Disconnect the battery leads (negative first) and use an old toothbrush to dust off the powdery lead sulphate.
If it is a bit more persistent, a couple of squirts of diluted vinegar and water (50/50 mix is ideal) will dissolve the remnants. A bit more brushing will have it sparkling.
A smear of petroleum jelly across the top of the terminal, once refitted, will help to prevent recurrence and ensure the battery is able to give its best.
Tyre checks
You read a great deal about tyre safety and you might think you know everything about them, but we make no apologies for covering old ground.
Nothing is as safety-critical or more likely to be ignored than caravan tyres. Unless a tyre is actually flat, many owners wouldn’t know they might have a problem. Ten minutes spent regularly checking them over is time well spent.
The easiest check is the tyre pressure. A small digital pressure gauge is a toolbox must-have and can give you change from a tenner. An analogue one is fine, too, and of course, will never need a battery changed. Check your handbook and ensure your pressures are where they ought to be. If any are low, top them off and then check again a few days later to see whether they are staying in the correct place.

Soft tyres not only cause the tyres to get warmer in use, in severe cases, they can result in stability problems and limit the usefulness of motor-movers if fitted.
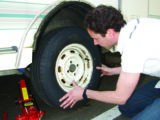
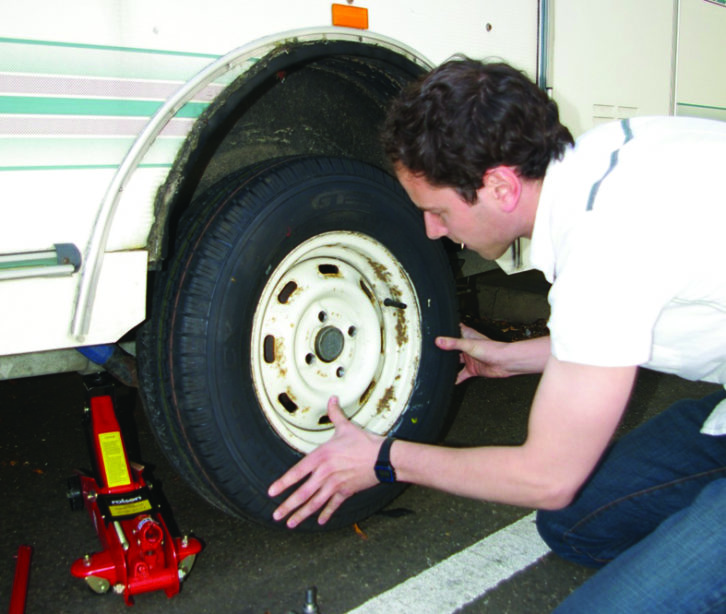
Get an old sponge and a nailbrush, and some car shampoo in a bucket, and give the tyres a wash. Given the muck and grit that can be present, we’d advise keeping this mixture just for the tyres. This is less about actual cleanliness and more about giving your tyres a good inspection.
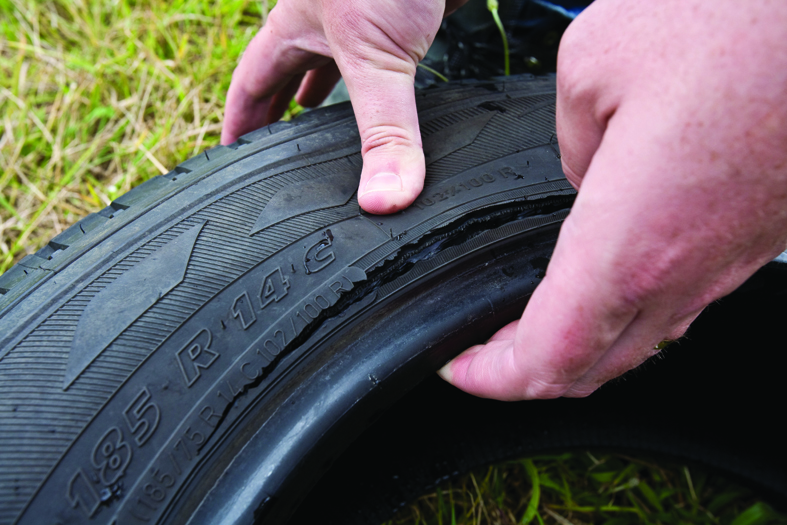
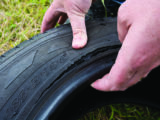
Examine the tyre walls for bulges caused by the tyre structure failing. Look closely for signs of cracking. Walls can crack and this is easiest to spot at the bottom, where the tyre wall is flexed the most.
Radial cracking is harder to spot, but for this, you need to look between the treads and search for cracks running along the radius (hence (‘radial’ cracking). The other thing to spot is cuts in the sidewall, which are caused by an impact of some sort or anything stuck in the tread. Any of these will require immediate investigation by a tyre workshop.
You can’t do this inspection properly with the caravan in one place, either. Roll it forward a few feet and clean the tread that was in contact with the ground.
There is also no alternative to sliding underneath and having a good look at the inward-facing tyre walls. Your mobile is a bonus here – it works as a torch and you can poke the camera into places your eyes can’t reach, to look for damage.
Don’t forget to check the spare tyre, too. Yes, it’s a very unpleasant task to have to clamber underneath the caravan or wind down a carrier, only to discover that all is well, but if you need that spare at some point, you’ll be glad you checked.
While you’re there, ensure the carrier isn’t red-rusty and apply a little grease to the clasp and the telescopic tubes if it is all starting to get a bit scratchy.
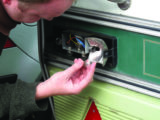
Light units

Vehicle bulbs don’t usually fail through lack of use, although a spell spent on the sidelines can cause connections to get dirty and lights to stop working.
If road lights are not responding, get out the handbook for instructions on how to dismantle the light unit, inspect the bulbs and if needed, clean the contacts. If they are just a bit grubby, some WD-40 and a cotton bud will do the trick. If they are really crusty, a strip of sandpaper might be needed to ensure a good connection is achieved. None of this applies if you have LED lights. Typically, these are not serviceable, but check your handbook for more information.
Ventilation

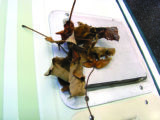
Clean all of the crud from around the vents, grilles and outlets, to ensure that everything that breathes, can. Over the winter, in particular, leaves and debris can build up around the fridge and heater vents, reducing performance and causing leaks or draughts.
If you have the chance, hook up the van and turn everything on. Investigating non-working sockets, a warm fridge or a lack of heating is a lot more comfortable on your driveway or a local site, rather than when you are waiting to board a ferry, or stuck at a remote site.
Now do the same trick, but with all the gas appliances. We assume you have the gas safety checks as part of your regular vehicle servicing, but ensuring that everything works correctly between services and after a lay-up is good sense. Light each appliance to ensure ti starts up easily, has an even blue flame and is functioning as expected. If anything seems odd, it’s workshop time.
Windows
Open windows one at a time, and do it carefully. Window rubbers can stick, and forcing the window open can split the acrylic pane. Sticky rubbers can be treated with silicone spray, squirted on a cloth and applied around the rubber; if you don’t have that, rummage in the bathroom cupboard for talcum powder.
Keeping the rubbers supple minimises the chance of leaks. Do the same for the locker door rubbers, too.
Locks
Caravan locks are not always of the most robust quality, so a bit of care helps ensure that everything works as expected. A little dab of graphite grease introduced to the lock barrels will keep the delicate innards moving freely, without leaving sticky muck behind to snare grit and grime. It’s a dry lubricant that you squirt onto the key blade before working it in and out of the lock a few times. This will prevent seizing, sticking and bent keys, all of which are just miserable.
External locker hinges and latches often don’t like being idle and when they seize, expensive door or body damage can be the result. They are not the easiest things to service, either, although there are things you can do. If they are already getting a bit stiff, a drizzle of silicone based lubricant on the moving surfaces will free things up. If that isn’t working, tip hot (not boiling) water over them to ease the nylon/plastic bushings, and then reapply the lubricant.
Motor movers
Motor-movers are all slightly different so it is difficult to give general advice that is useful. Suffice to say, the vast majority of problems are actually battery issues, and the mover merely a symptom.
Make sure the actuators work and shunt the van back and forth to ensure everything functions.
A visual inspection of the mover units is worthwhile. Look for evidence of things appearing rusty or in danger of seizing up. Scabby-looking surfaces should be cleaned and protected with a coating of light oil. Motorcycle chain oil is good – it is designed to be used in harsh environments.
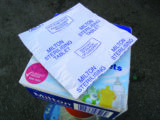
Water systems

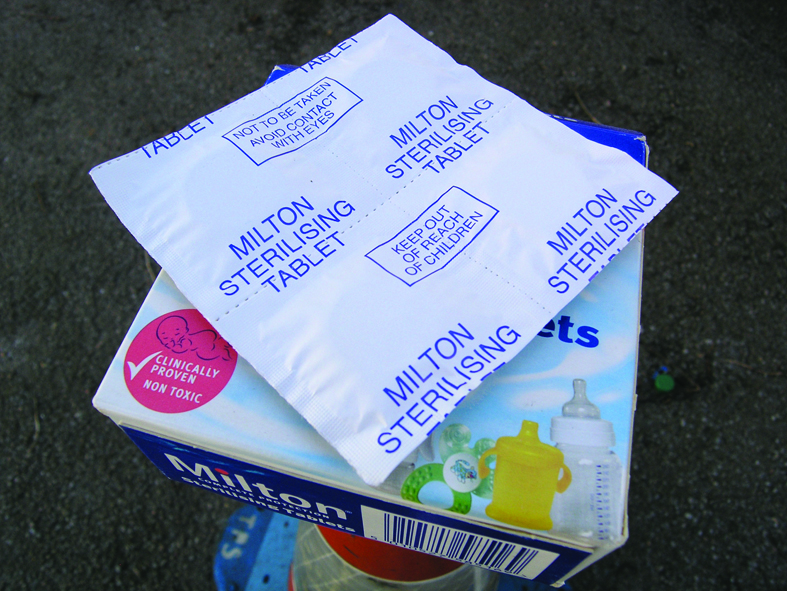
Ensuring your caravan’s water system is fresh and safe is an easy DIY job. Purifying tablets or formula will have instructions about concentrations. Fill the tank or container, depending on your configuration. Now jump in the van and turn on the water system. Go to the tap furthest from the tank and turn it on until the water runs through, then cut it off. Do the same for all of the taps. Leave the system primed like this for a few hours (overnight is fine). Then run the system to drain the cleaning solution. Fill the supply tank or vessel with fresh water and run this through every tap until the solution can no longer be smelt. This will deodorise the pipes and waste tank.
Towball checks
Most caravans have a friction stabiliser, but these are only effective on a clean, dry towball. Even with a cover, grime finds a way in, leaving you with a less effective, noisy stabiliser.
Give the towball a wipe with some paper towel to remove the worst of the grime. If the ball is rusty, flash it over with some emery cloth to restore the shine, then hit it with brake cleaner spray. This stuff is designed to clean brake components to ensure effective operation. It will do the same for your stabiliser. We’d advise doing this every time you tow. A squirt into the hitch head and a wipe around in there helps clean the stabiliser friction pads, too.
If you liked this… READ THESE:
Top towing tips for safe travels
10 caravans to get you out on the road this summer
If you’ve enjoyed reading this article, why not get the latest news, reviews and features delivered direct to your door or inbox every month. Take advantage of our brilliant Practical Caravan magazine SUBSCRIBERS’ OFFER and SIGN UP TO OUR NEWSLETTER for regular weekly updates on all things caravan related.
Future Publishing Limited, the publisher of practicalcaravan.com, provides the information in this article in good faith and makes no representation as to its completeness or accuracy. Individuals carrying out the instructions do so at their own risk and must exercise their independent judgement in determining the appropriateness of the advice to their circumstances. Individuals should take appropriate safety precautions and be aware of the risk of electrocution when dealing with electrical products. To the fullest extent permitted by law, neither Future nor its employees or agents shall have any liability in connection with the use of this information. You should check that any van warranty will not be affected before proceeding with DIY projects.
If you have a motor-mover, or brave stays away from the sanctuary of the hook-up cable, battery health matters