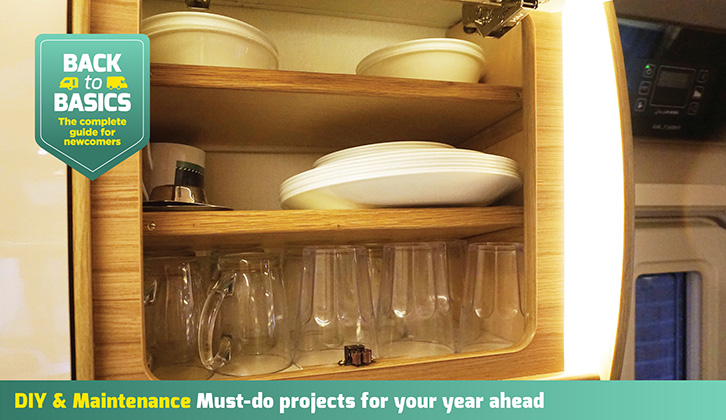
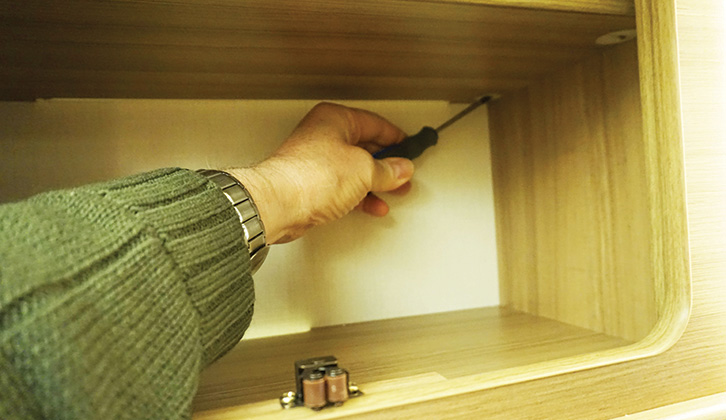
Crockery is often kept in a top cupboard in the caravan kitchen, where manufacturers provide plastic-covered wire racks for storage.
Unfortunately, plate racks are often fitted in cupboards facing in the direction of travel, and have doors that come with non-positive catches.
In the event of an emergency stop, all of your plates might land on the floor in a heap of fragments. Even if not placed in this direction, wire racks usually waste a great deal of the available space.
Wire cupholders
In our caravan, I did think the original wire cupholders looked promising, but when I reached my destination, I found the top cup had been jumping up and down on the one stored below, with quite disastrous results.
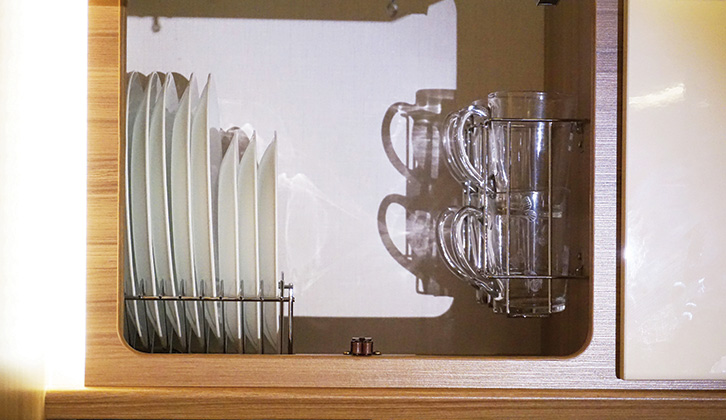
A much better system would be to remove the fitted shelves from the cupboard, preferably side-facing, and fit your own shelving, which can be made to suit the specific dimensions of your plates and cups.
A weight-saving solution would be to fit wooden shelf support strips to the side of the cupboard, but to carry out this project without drilling any holes into the caravan, and to ensure that it is totally reversible, I chose to make templates for the cupboard sides and cut plywood sides to a loose fit.
This has the advantage of allowing you to glue the shelf support strips on the bench, before putting the sides in place. The only thing that retains these pieces is the shelves themselves, which keep them pushed to the sides.
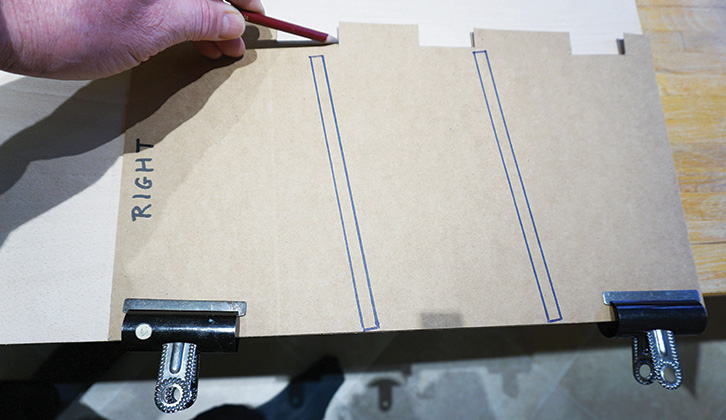
Make the templates
Stiff paper is ideal for the side templates, which can be cut to fit around any corner fittings or wiring, and marked with the shelf supports, which are better when they can be angled down towards the back.
Next, transfer these to the plywood. I used 9mm hardwood ply, which takes a better finish when varnished than that of softwood ply. Some weight could be saved by using thinner ply, but our much loved Corelle tableware, although thin and stacking-compact, is heavy and will become, in effect, heavier when we go over a bump.
Cut out the plywood sides and mark them up together, back to back, so that all of the measurements for the shelf supports are matching.
Just a quick tip. When gluing on the shelf supports with PVA adhesive, or in fact, bonding any two pieces, knock a couple of tiny panel pins partly into one side of the proposed glue joint, then cut them off with wirecutters. This will leave a small prong protruding, which can prevent side-slip when the joint is clamped.
Measure and cut
Temporarily fit the sides, then measure and cut the shelves. If these are planned as an easy fit, they can be tightened later by using thin packing on the back of the side pieces. Now you just need to sand, and add a couple of coats of varnish.
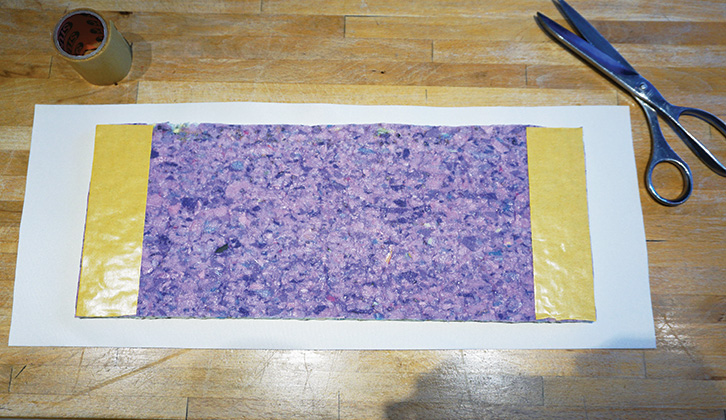
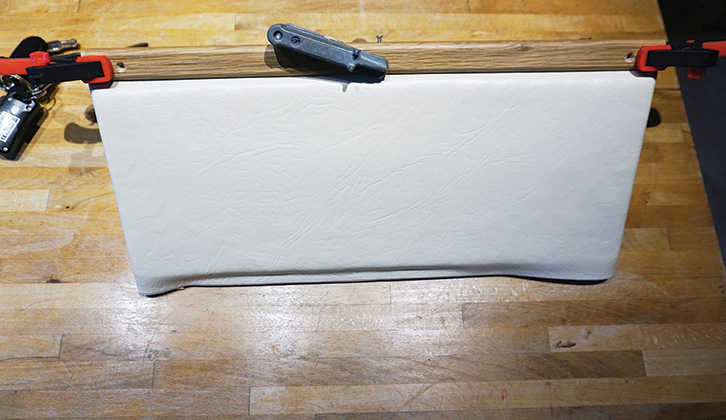
By upholstering your shelves with vinyl over carpet underfelt foam, you can take out some of the bounce experienced when going over bumps with the caravan. However, it is best
to fix your hardwood angle or aluminium angle edge trim with screws after upholstery is complete, so the vinyl can be replaced later if necessary.
After more great DIY inspiration? Then head to our Back to Basics: DIY & Maintenance category, where you’ll find some brilliant projects and ideas to try out.
Future Publishing Limited, the publisher of practicalcaravan.com, provides the information in this article in good faith and makes no representation as to its completeness or accuracy. Individuals carrying out the instructions do so at their own risk and must exercise their independent judgement in determining the appropriateness of the advice to their circumstances. Individuals should take appropriate safety precautions and be aware of the risk of electrocution when dealing with electrical products. To the fullest extent permitted by law, neither Future nor its employees or agents shall have any liability in connection with the use of this information. You should check that any van warranty will not be affected before proceeding with DIY projects.
If you’ve enjoyed reading this article, why not get the latest news, reviews and features delivered direct to your door or inbox every month. Take advantage of our brilliant Practical Caravan magazine SUBSCRIBERS’ OFFER and SIGN UP TO OUR NEWSLETTER for regular weekly updates on all things caravan related