Polishing a caravan is a huge undertaking, as the surface area is three or four times that of a car. However, the benefits of carrying out this maintenance task are that it’s a great way to protect your investment and keep it looking spic and span, which will come in particularly handy if you decide to sell it on too. As a result, knowing how to polish a caravan is going to be an important task for van owners.
Practical Caravan is supported by its audience. When you purchase through links on our site, we may earn an affiliate commission. Learn more.
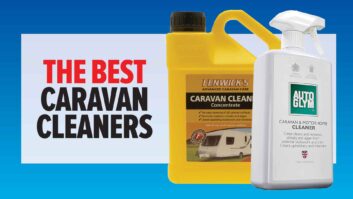
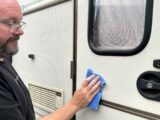
Start by cleaning a caravan thoroughly, ensuring you remove any grit and dirt from the surfaces. I recommend using one of the best caravan cleaners – at Practical Caravan, we recommend using either Fenwicks Caravan Cleaner or Autoglym Motorhome & Caravan Cleaner, both of which are easy to use and super-effective.
Failing to clean your tourer first could lead to rubbing contaminants into the bodywork when polishing, which causes micro-scratch swirls in the surface finish.
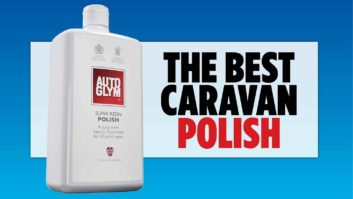
When your caravan is clean, we’d recommend reaching for the best caravan polish, from the likes of Autoglym, Silky or Care-avan. Ok, you don’t need to pick a specific ‘caravan polish’, as the ingredients are very similar for cars, boats or tourers. However, the better (premium-priced) brands are likely to contain more of the good stuff.
Use a sponge pad or a clean cloth to apply the polish. Most suggest rubbing the polish on in a circular motion, working the solution into the surface. Let the polish dry for a few minutes, then buff it off with a clean microfibre cloth. On hot days, do this in the evening when the surface temperature of the caravan is going to be lower.
Polishing will help to make your caravan walls and roof hydrophobic, so rain water will bead and roll off the surface. It will create a microscopically-thin protective shell too, protecting from the damaging effects of bird poo and tree sap, and making both easier to remove.
You could go one step further, by protecting your van with a ceramic coating from the likes of Diamondbrite or Paintseal. These are typically applied by a technician and create a tough-but-invisible layer of protection that lasts for several years, resists dirt and makes cleaning much easier.
Finally, if the fibreglass finish on your old tourer has started to dry out and go powdery, a good dose of a quality polish will hide the worst of the deterioration and recreate a shiny finish. Alternatively, consider using Owatrol Gelcoat & Surface Restorer, a ‘repair solution’ for dull or faded surfaces. Expect to pay around £22 for 500ml on Amazon.
While you’re sprucing up your tourer, one area you will not want to overlook is the roof – it can be the dirtiest part of your tourer. If you’re unsure about the steps involved, don’t miss my guide to how to clean a caravan roof to ensure you get it looking its best.
Future Publishing Limited, the publisher of Practical Caravan, provides the information in this article in good faith and makes no representation as to its completeness or accuracy. Individuals carrying out the instructions do so at their own risk and must exercise their independent judgement in determining the appropriateness of the advice to their circumstances and skill level. Individuals should take appropriate safety precautions and be aware of the risk of electrocution when dealing with electrical products. To the fullest extent permitted by law, neither Future nor its employees or agents shall have any liability in connection with the use of this information. You should check that any van warranty will not be affected before proceeding with DIY projects.
If you’ve enjoyed reading this article, why not get the latest news, reviews and features delivered direct to your door or inbox every month. Take advantage of our brilliant Practical Caravan magazine SUBSCRIBERS’ OFFER and SIGN UP TO OUR NEWSLETTER for regular weekly updates on all things caravan related.