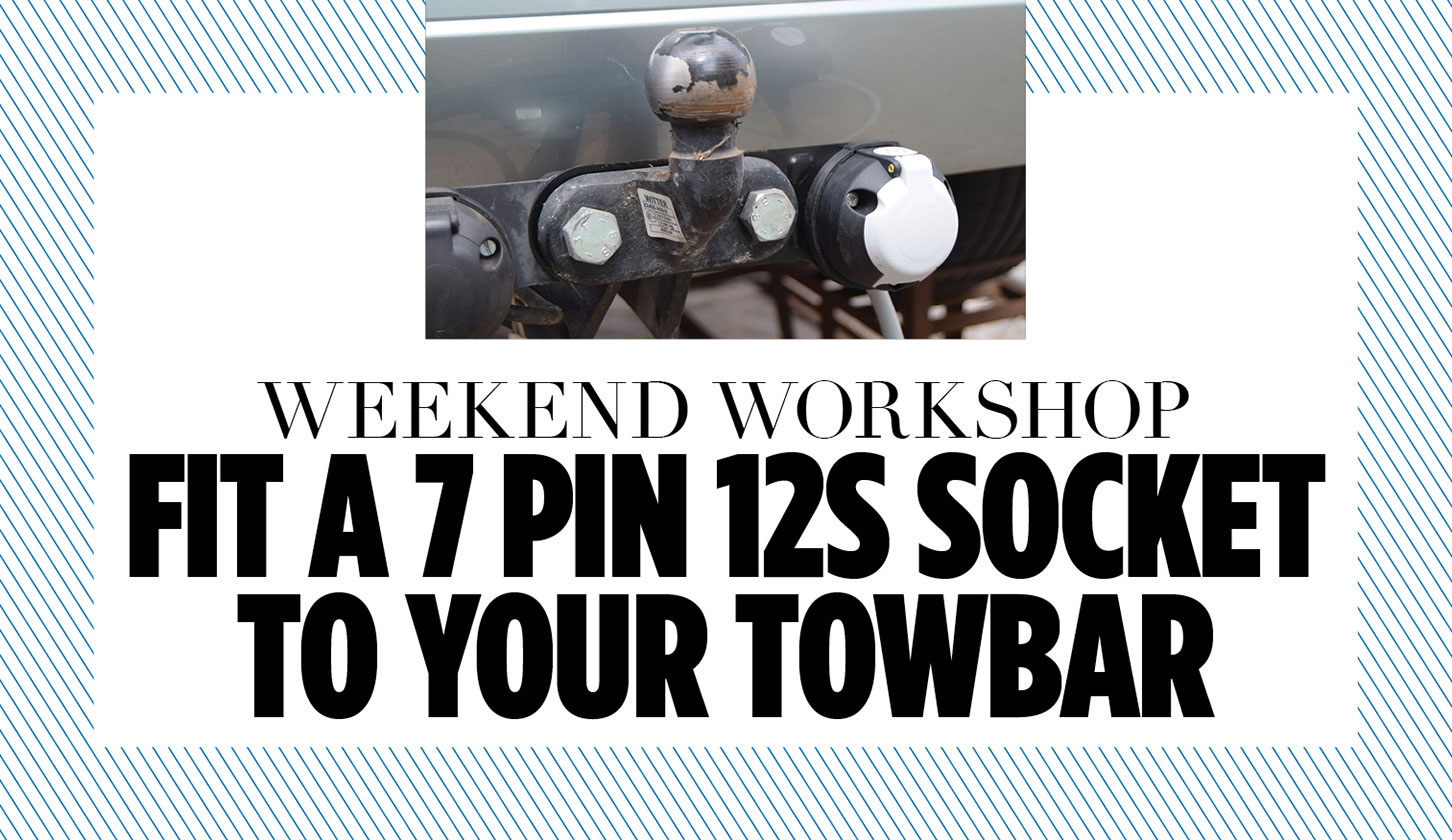

I recently bought a van with a 12N and 12S connector configuration. Although I have a seven-pin 12N socket fitted to my car, previously used to tow a trailer, I now require the seven-pin 12S 12V feed from my car to the caravan, to charge the leisure battery and to keep the fridge running on the move.
But having been quoted £200 plus VAT for a professional fitter to do the job (and told there was a three-week wait for the appointment), I decided to have a crack at doing the job myself.
This article outlines how to fit a seven-pin 12S socket to your towbar. To make things easier, I bought a seven-pin 12S kit on eBay for just over £20, which comes with all of the items needed to carry out the task.
That said, I have deviated from the parts provided in the installation kit as follows:
1. Instead of running one wire from the positive battery terminal to the rear of the car and relying on an earth provided by a hole drilled into the car body and a self-tapping screw and eyelet, I bought a suitable length of twin 30A cable, which meant I could supply the high current 12V+ needed, as well as a good earth to the relay, directly from the battery via the second wire.
2. Instead of using the fuse carrier supplied in the kit, I bought a waterproof variant on eBay, as the underbonnet conditions might prove to be quite wet on occasions.
However, if your battery is in a watertight area, the non-waterproof fuse carrier supplied can be used.
3. If the caravan is heavier than 750kg, it is mandatory to have a reversing light.
This can be achieved by splicing the grey wire running from the seven-pin 12S socket into the feed wire of the reversing lights on the towing vehicle. The wire might need to be lengthened, depending on circumstances.
The splicing can be easily achieved by using one of the insulation-displacement connectors supplied in the kit.
CAUTION There are several important points to consider before taking on the task:
1. You need to get under the car to run the 30A cable. This should only be done if the car is over a pit, on a vehicle hoist or properly jacked up onto axle stands.
Do not rely on vehicle jacks as the only support – we all know how long the waiting time is for an ambulance!
2. The 30A cable run to the rear of the car must be kept away from hot exhaust pipes, along with steering and moving suspension arms. In the engine bay, do not attach it to any part of the engine, however tempting. Engines move when running and also get hot.
3. Avoid running the cable over sharp edges. If a hole is drilled into the car interior, a grommet must be inserted into the hole before the cable is passed through. It should also be sealed afterwards.
I found a convenient plastic plug beneath the right-hand rear light cluster void on my car, so I drilled through that instead of the bodywork, making my task easier. This void also had the capacity to house the TEC3M relay and its associated wiring.
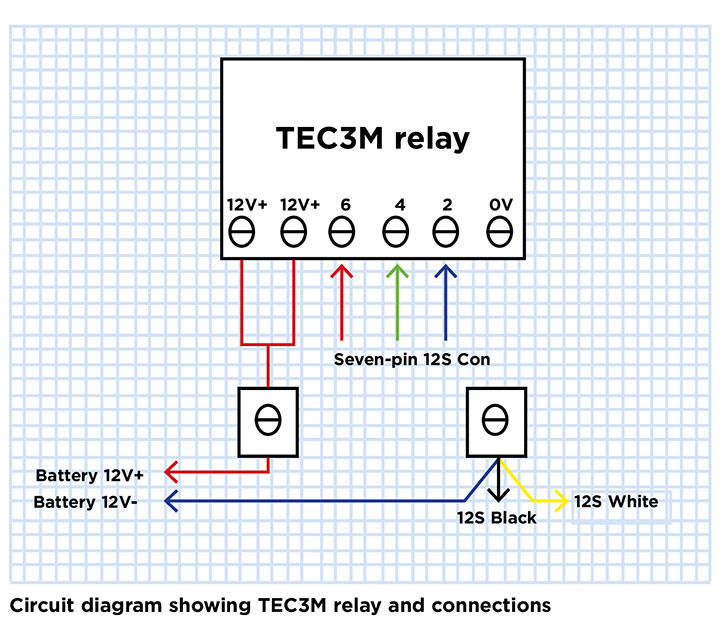
TEC3M relay
Ordinarily, some form of recognition that the towing vehicle is running (that is, charging) is needed before connecting the van refrigerator and the leisure battery.
This is necessary because the refrigerator can require in the region of 10A of operational current on 12V, added to which, the leisure battery’s charging requirements will depend on
its charge state to begin with.
In any event, you do not want the caravan drawing current from the towing vehicle while in a non-charging state – this would result in a flat battery and the inability to start the vehicle after a comparatively short time.
Some systems tap into the ignition switch, such that as the ignition is turned on, it activates a relay, which connects the 12V feeds from the towing vehicle.
This approach requires the additional chore of finding a suitable feed point from the ignition, as well as running an additional feed to the relay, which is usually situated at the rear of the vehicle.
The TEC3M relay overcomes this problem and automatically operates when the towing vehicle is charging, by sensing the voltage on the 30A feed from the battery.
At rest, the towing vehicle battery will have a voltage of around 12V to 13V across its terminals. However, when the vehicle is started, this voltage rises to around 14.5V, which
is the voltage at which most 12V vehicle systems operate while the engine is running.
The TEC3M relay is designed to turn on at any voltage over 13.5V and off at anything lower, thereby preventing any undue drain on the vehicle battery when not being charged.
Construction tip
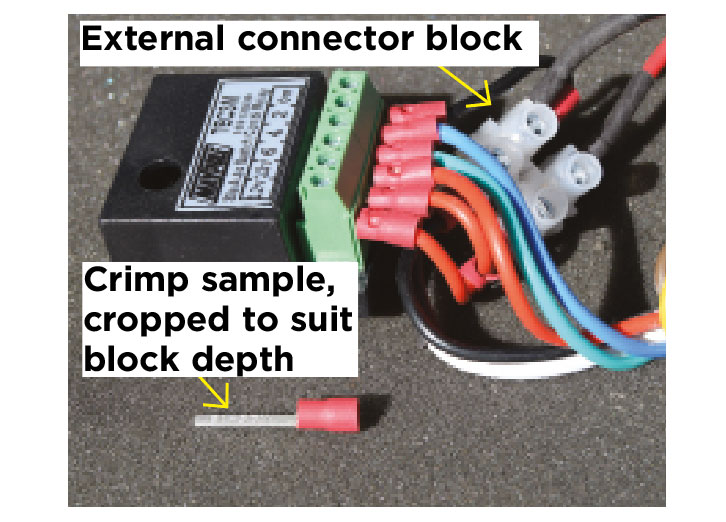
Getting all of the wires into the TEC3M terminal block would prove impossible.
To alleviate the problem, I used two segments of a 10A ‘chocolate block’ connector and terminated all of the earths on one side and all of the 12V+ feeds on the other externally to the TEC3M relay, thus leaving the provision for single feeds to the relay terminals themselves (see the circuit diagram below for more details).
Tools
- Conventional toolbox comprising screwdrivers, pliers and so on
- Crimping tool
- Metal drills
- Axle stands/jacks
- Sealant gun plus sealant (I used clear silicon)
- Tools to remove the towing ball
- Soldering iron plus solder
Parts list
- Seven-pin 12S adaptor kit (comes with seven-pin connector pre-wired)
- Cable crimps
- Two segments of 10A ‘chocolate block’ connector
- Heat shrink sleeving
- Waterproof fuse holder
- 30A thin wall twin multicore cable (length to suit – when ordering cable, allow for the extra bends and twists it will need to do on its way to the rear of the car)
- Rubber grommets to suit cable sizes
- Nylon cable ties
- 25A spade fuse
All parts are readily available on eBay.
Step-by-step guide: how to fit a seven-pin 12S socket to your towbar
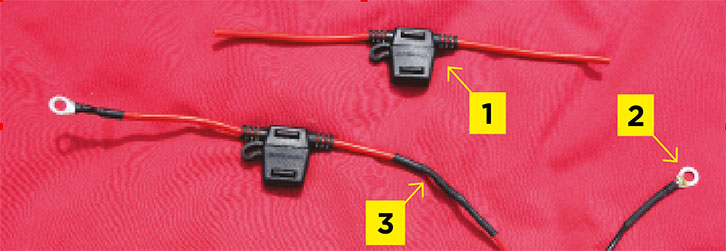
1. 1) Waterproof fuse carrier as purchased ready for splicing. 2) Eyelet to suit battery connection. 3) Solder fuse to positive 30A red wire and insulate (I used heat shrink sleeving).
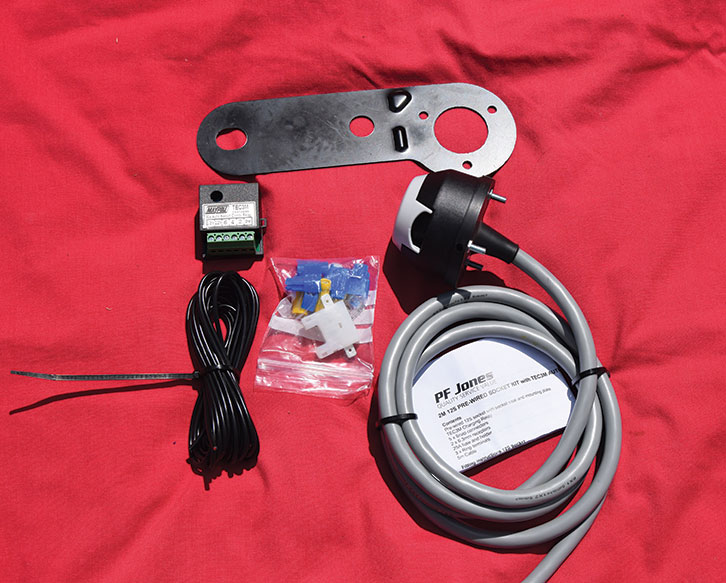
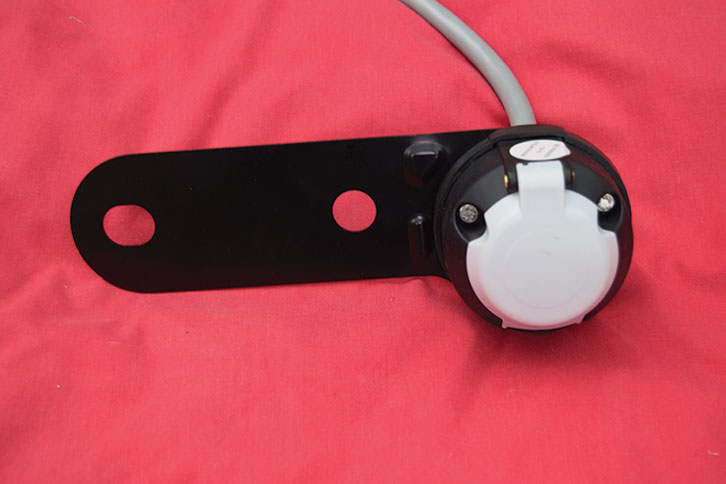
2. Complete seven-pin 12S pre-wired socket kit.
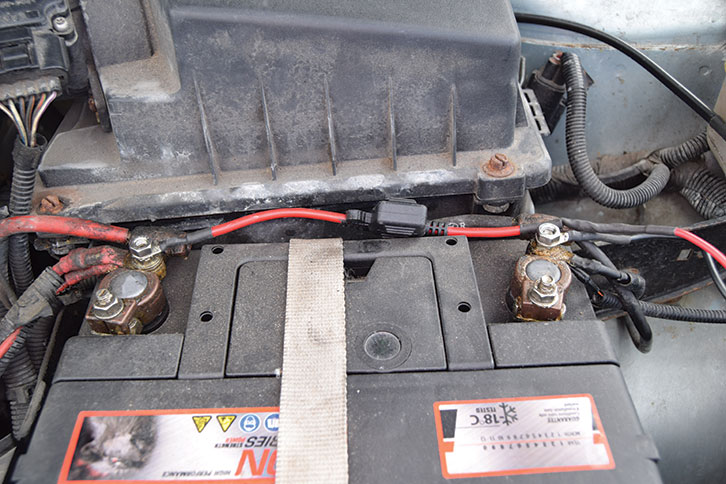
3. Battery connections for 30A cable and fuse holder.
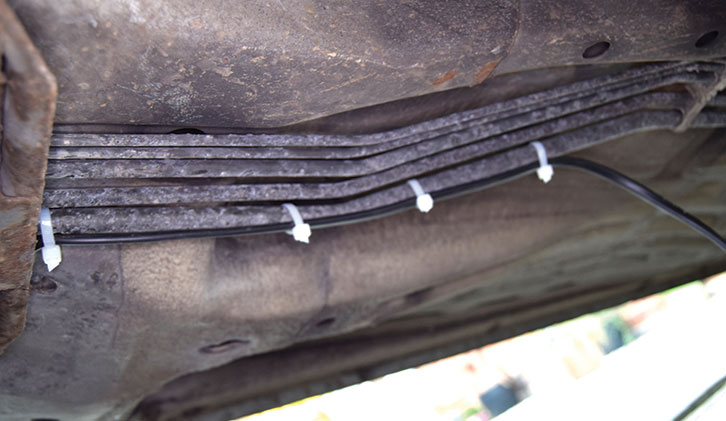
4. Attach cable to brake pipe running front to rear of car.
5. Attach 12S socket to bracket; match orientation of 12N socket.
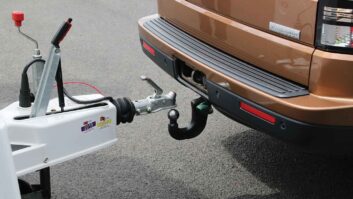
6. Remove the towing hook.
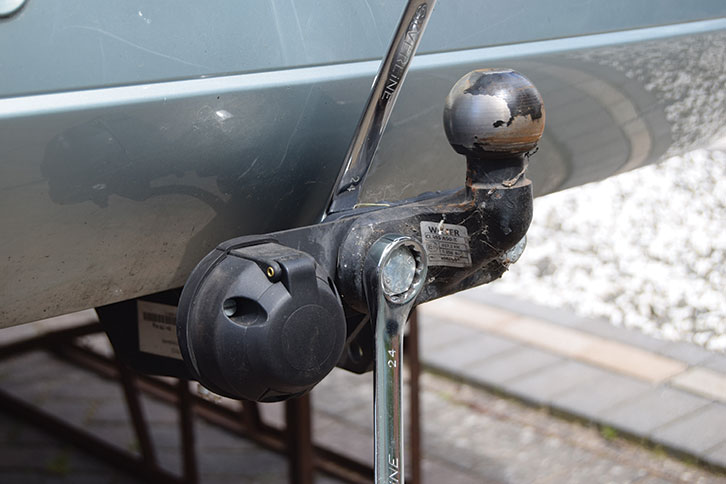
7. Fit the 12S socket and then reattach towing hook.
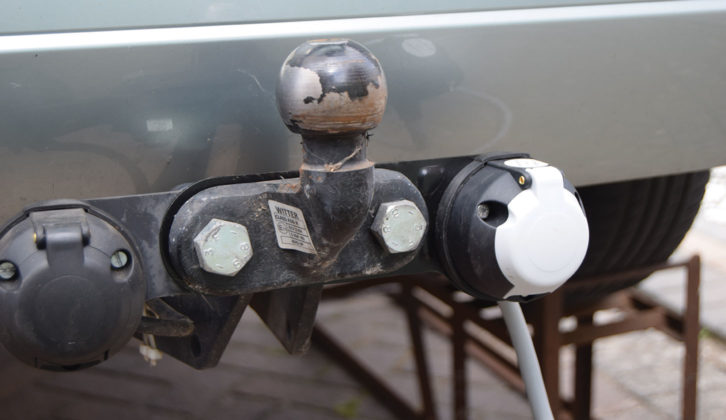
8. Relay after wiring completed.
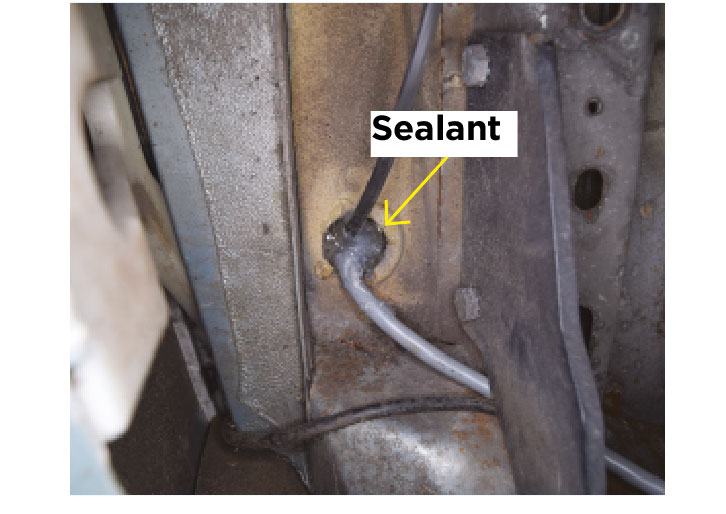
9. Seal any points where the cables enter the body
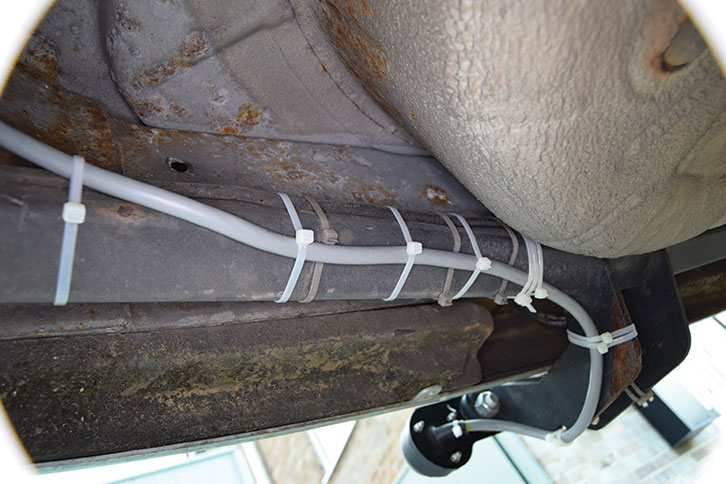
10. Cable-tie seven-way cable from 12S socket to towbar
11. Fit a 25A fuse to the waterproof fuse holder

Future Publishing Limited, the publisher of Practical Caravan, provides the information in this article in good faith and makes no representation as to its completeness or accuracy. Individuals carrying out the instructions do so at their own risk and must exercise their independent judgement in determining the appropriateness of the advice to their circumstances. Individuals should take appropriate safety precautions and be aware of the risk of electrocution when dealing with electrical products. To the fullest extent permitted by law, neither Future nor its employees or agents shall have any liability in connection with the use of this information. You should check that any van warranty will not be affected before proceeding with DIY projects.
If you enjoyed this, why not take a look at these:
- We explain how to install QC 3.0 USB fast chargers and 8-way fuse panel
- We talk you through the process of buying a used awning
If you’ve enjoyed reading this article, why not get the latest news, reviews and features delivered direct to your door or inbox every month. Take advantage of our brilliant Practical Caravan magazine SUBSCRIBERS’ OFFER and SIGN UP TO OUR NEWSLETTER for regular weekly updates on all things caravan related.