These days, we are all the possessors of multiple devices and gadgets, such as mobile phones, tablets and the like – most of which are rather power hungry and require regular charging.
When this is carried out at home, it is usually achieved via a charger plugged into a mains socket on the wall; in the car, with a USB 5V socket running on the vehicle’s 12V system.
But when you are in your caravan (especially if it is an older model), periodic charging of these devices is often not nearly so convenient.
If you are not on a hook-up, for example, there is the lack of mains power supply to be considered, and then there’s the 12V interface if you use a plug-in style 5V charger.
In addition, when USB charging points are supplied, they are most probably of the standard fixed 5V 2A variety, which although adequate, will not provide optimum charging.
Rapid charging
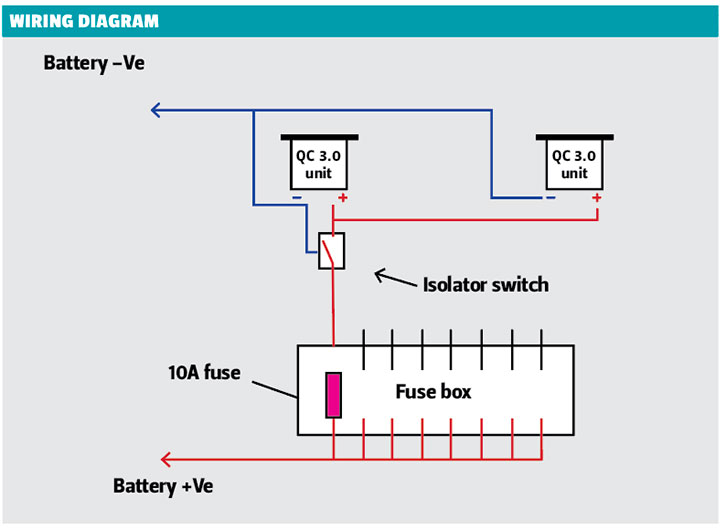
This article explains how to fit four QC 3.0 fast-charge USB outlets.
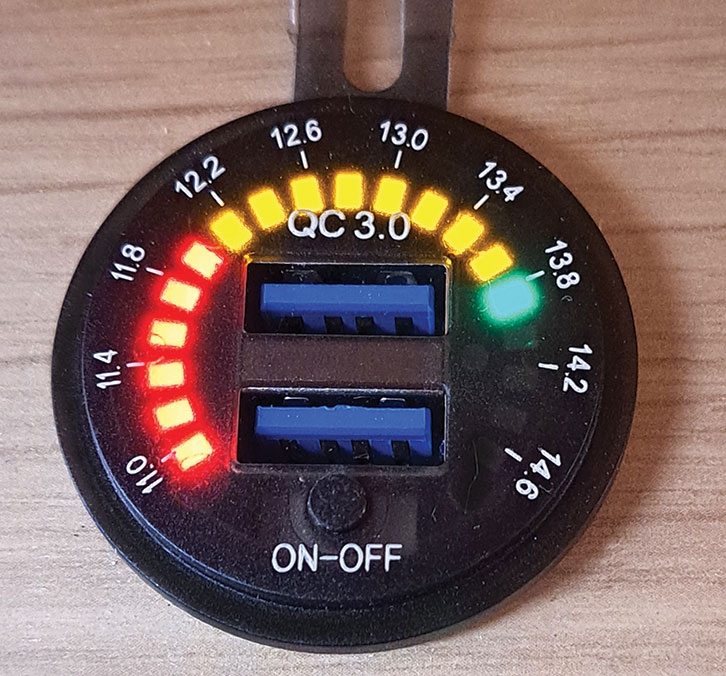
They are connected to the leisure battery and capable of safely and rapidly charging QC 3.0 compatible devices. Non-compatible devices can also be charged, but not at the fast rate. An additional feature is an LED battery condition indicator, which gives a voltage reading of the leisure battery.
Fuse panel
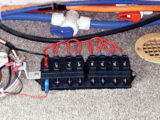
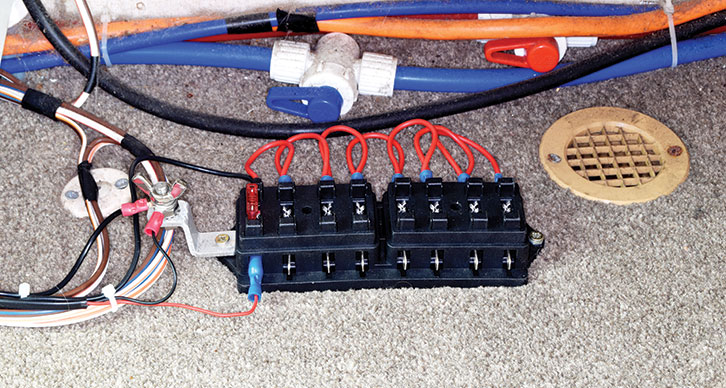
These chargers require fuse protection, so I have also outlined the installation of an eight-way blade fuse (normal car-type fuse) carrier.
Although only one position will be needed with a 10A fuse for the supply to the QC 3.0 chargers, the other seven are available for any subsequent 12V gizmos that might require a fused supply from the leisure battery at some later date.
Naturally, if only the QC 3.0 chargers are being installed, a single in-line blade fuse holder can be used.
Safety Notes
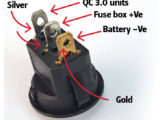
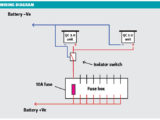
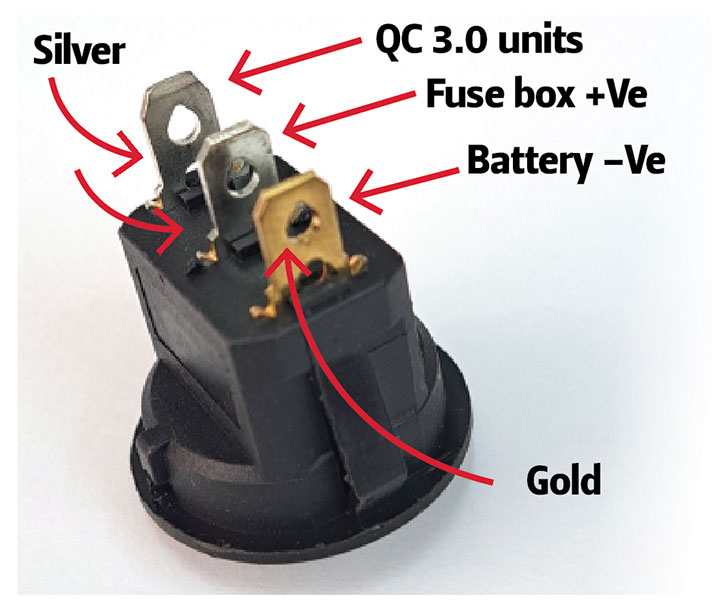
1 Any fuses must be fitted in the 12V +Ve wire adjacent to where it leaves the battery. This minimises the risk of fire in the event of a short circuit happening anywhere along the charger’s feed wire.
2 The battery’s –Ve terminal should be safely disconnected while making connections to it, as an inadvertent short circuit of an unfused supply will result in high currents and possible fire.
What is QC 3.0?
Developed by Qualcomm, QC 3.0 is an intelligent battery-charging protocol that allows compatible devices to be charged using higher voltages and currents.
Device and charger interact to control charging conditions and any overheating that might occur.
The device must be compatible with the fast charger (details for individual devices can be found online) and a fast-charge high-current interfacing USB cable must also be used. On average, compatible devices can be fully charged in a fraction of the time taken by older systems.
Tools Required
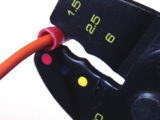
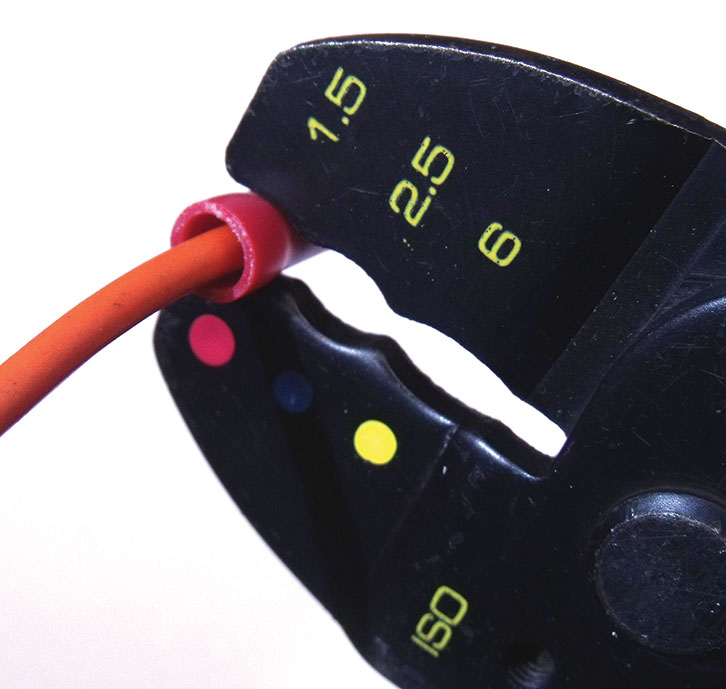
- Crimp tool (about £10 on eBay)
- Standard toolkit (wirecutters, strippers, screwdrivers and so on)
- Hole cutters
- Power drill
- 4mm drill
Parts List
- 1 x 12/24V eight-way heavy-duty fuse box (compatible with standard car blade fuses), £9
- 1 x 10A 6.3mm blade fuse
- 2 x QC 3.0 dual USB fast charger socket power outlets with LED voltmeter, £8 each
- 1 x round 12V/20A rocker switch with LED indicator
- 1 x M6 x 16 screw
- 1 x M6 nut
- 2 x M6 washers
- 1 x M6 locking star washer
- 1 x M6 wing nut
- 13 x 6.3mm crimp spade connectors (for charger and fuse box connections)
- 3 x 4.8mm crimp spade connectors (for rocker switch)
- 2 x 6mm crimp eyelets (for battery and charger earth returns)
- Length of 11A flat twin thin-wall cable, to suit installation being undertaken
- Cable clamps. I used self-adhesive ones, although the type used will depend on the installation being undertaken
Skills Required
The ability to carry out rudimentary wiring and basic carpentry (hole cutting in panels)
Note: QC 3.0 charger units can be fitted on any flat surface capable of accommodating required wiring connections behind them
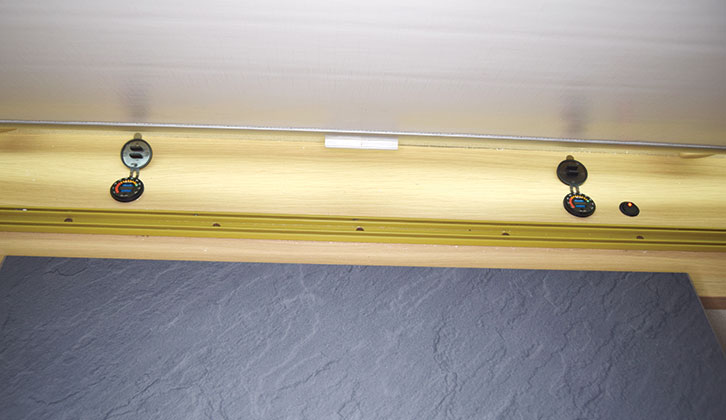
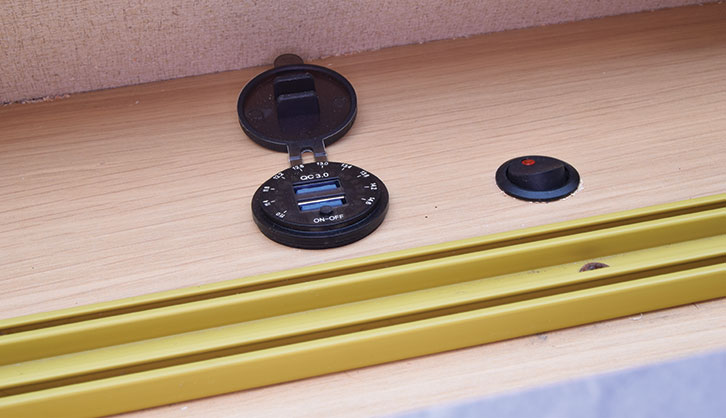
- One of the two QC 3.0 USB fast chargers fitted to the front windowsill.
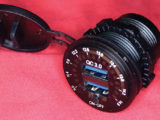
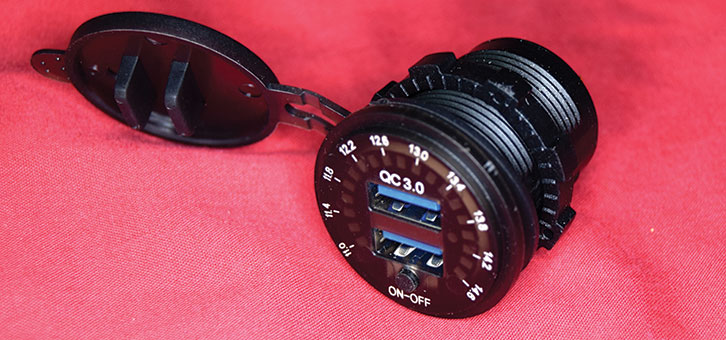
2. QC 3.0 USB charger unit before installation on caravan windowsill.
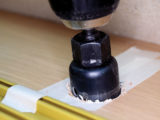
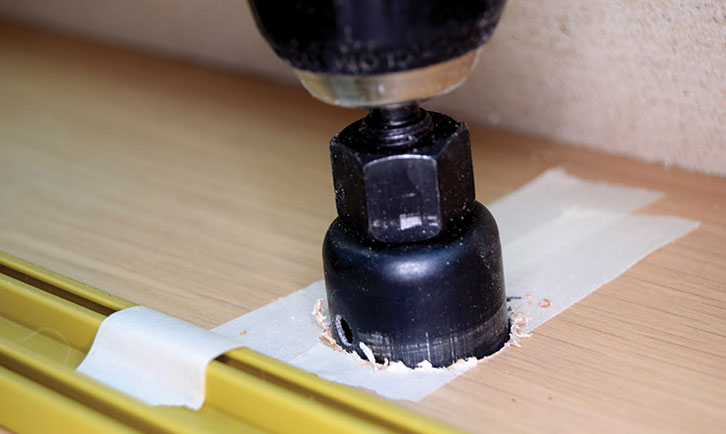
3. Mark location points on masking tape, then drill 4mm pilot hole.

4. Use 28mm hole cutter to cut a hole for each of the chargers.
5. By charger fed from fuse box, cut a 21mm hole for isolator switch.
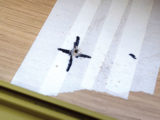
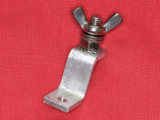
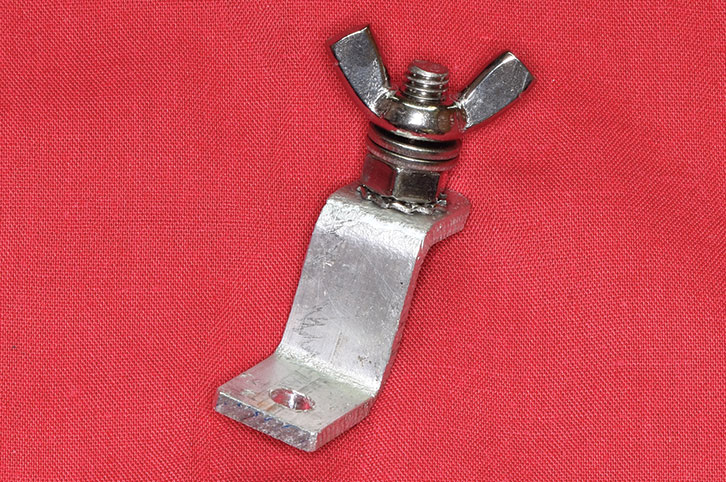
6. Earth post of scrap aluminium; dimensions are not critical.
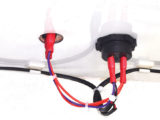
7. Wiring underneath USB charger and isolator switch.

8. Rear of isolating rocker switch showing connection details.
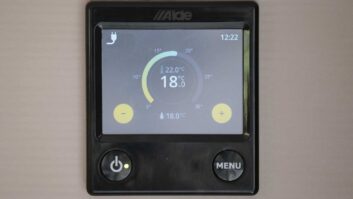
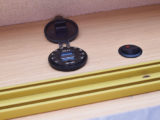
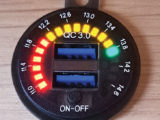
9. Charger installed, with LED display showing battery status.
10. Fuse box with earth post secured by fixing screw to the floor.
11. Securing the crimp connectors using the crimp tool.
Future Publishing Limited, the publisher of Practical Caravan, provides the information in this article in good faith and makes no representation as to its completeness or accuracy. Individuals carrying out the instructions do so at their own risk and must exercise their independent judgement in determining the appropriateness of the advice to their circumstances. Individuals should take appropriate safety precautions and be aware of the risk of electrocution when dealing with electrical products. To the fullest extent permitted by law, neither Future nor its employees or agents shall have any liability in connection with the use of this information. You should check that any van warranty will not be affected before proceeding with DIY projects.
If you enjoyed this, why not take a look at these:
- We explain how to care and repair for your tourer’s rubber seals
- John Sootheran explains how to load up a caravan
If you’ve enjoyed reading this article, why not get the latest news, reviews and features delivered direct to your door or inbox every month. Take advantage of our brilliant Practical Caravan magazine SUBSCRIBERS’ OFFER and SIGN UP TO OUR NEWSLETTER for regular weekly updates on all things caravan related.