A couple of years back, Alde was working on a new product, and while I was in the Yorkshire Dales, their team asked me to collect a sample of water from a local stream for them. That product, the AquaClear UV-C water purifying system, has now been launched.
Interestingly, the AquaClear can be fitted to any caravan water system, not just those with Alde heating.
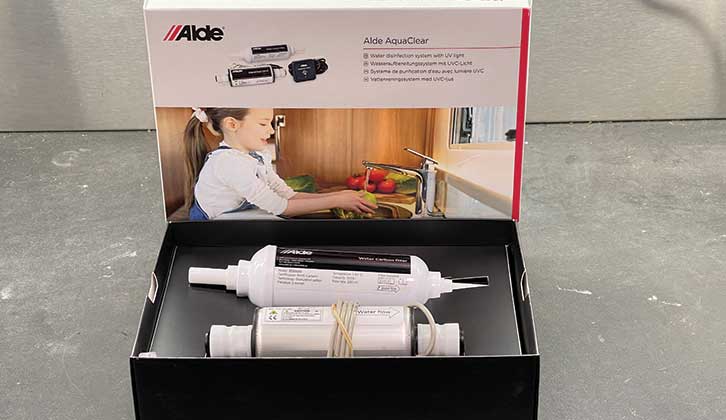
The AquaClear is in two parts – the UV-C unit, which uses ultraviolet light to eliminate bacteria such as Legionella and E. coli (among many others), and a carbon filter to get rid of unpleasant tastes and odours, including chlorine.
Long lasting
The UV-C unit should last for about 300 hours of water flow. The average flow in a day is in the region of 10 minutes, so it should work for several years before needing replacement. The carbon filter, like any other filter fitted in caravan water systems, should be swapped annually.
There are two Alde AquaClear UV-C kits. One is designed for use with the Alde 3030 system (I recently explained how to change the Alde 3030 control panel screen display), and the other is for any other water system, including the earlier versions of Alde. The difference is that the kit for the 3030 integrates with the control panel, which tells you how long is left before a replacement is needed, and when water is being pumped through.
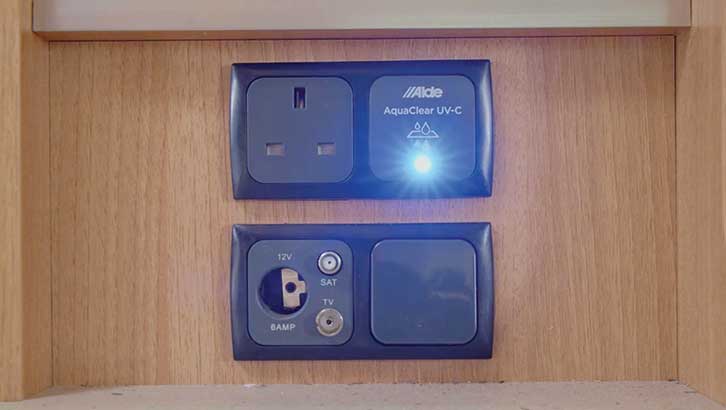
The other kit has a unit that matches caravan plugs, sockets and so on, with an LED that shows when water is flowing through it – blue when the pump is running, and red when it reaches the end of its life.
The good news is that the Alde AquaClear UV-C is a relatively easy DIY fit. You can simply have the water that is going to the kitchen tap pass through the unit (if the plumbing on your caravan is suitable), which was my original intention.
That would extend the longevity of the unit, because the countdown would only happen when water was being pumped to the kitchen.
However, in our case, it is a pressurised system, so wherever a tap is turned on, the pump starts, and that would activate the countdown whether or not water was going through the AquaClear, so we chose to have all of the water entering the caravan pass through the unit. If your van has microswitched taps, these would be suitable for the AquaClear fitting to
that water outlet only (that is, the kitchen).
Choose a location
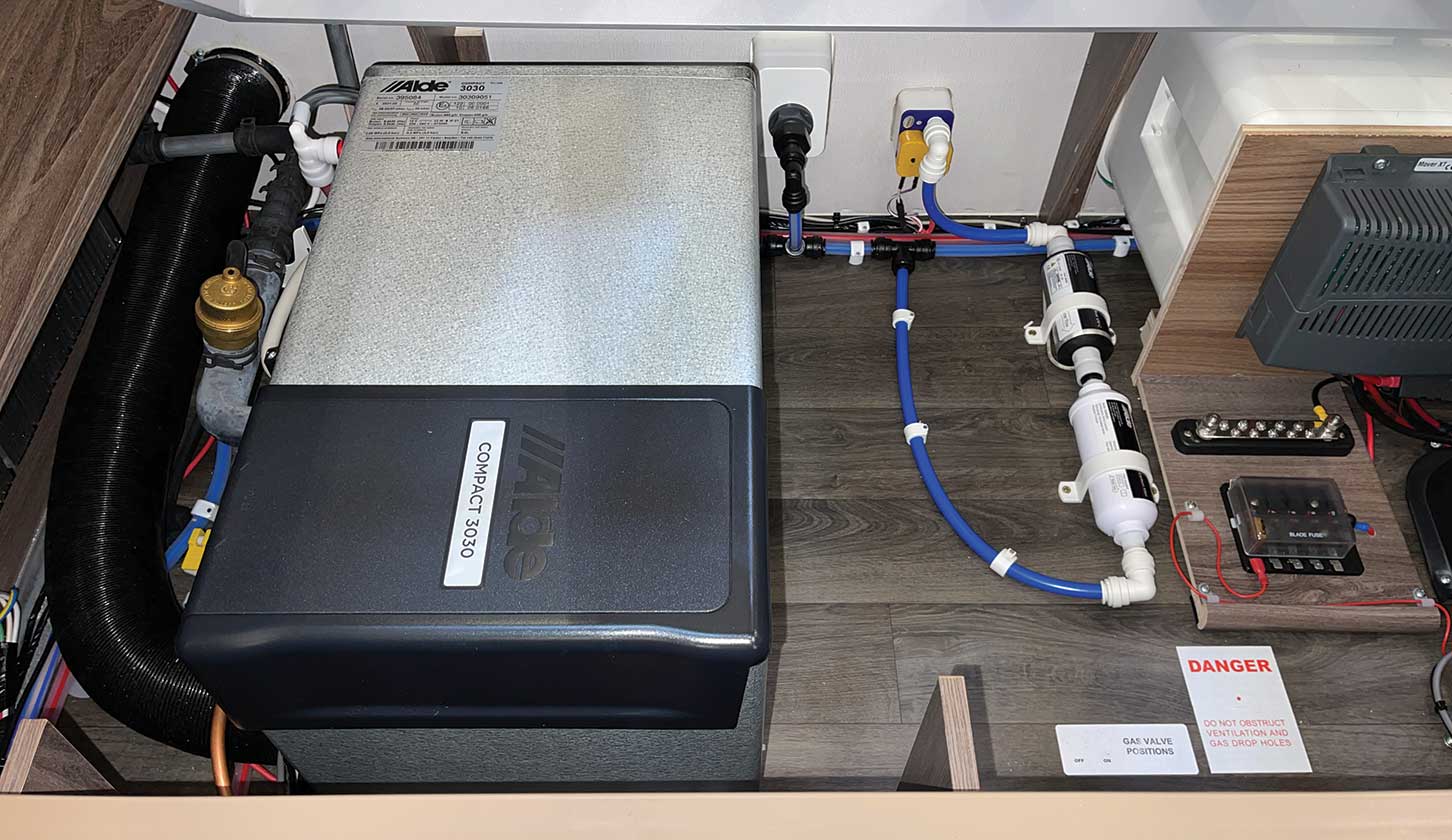
The first step is to decide on the most suitable place to fit the AquaClear. Ideally, it needs to be positioned as close to the water inlet as possible.
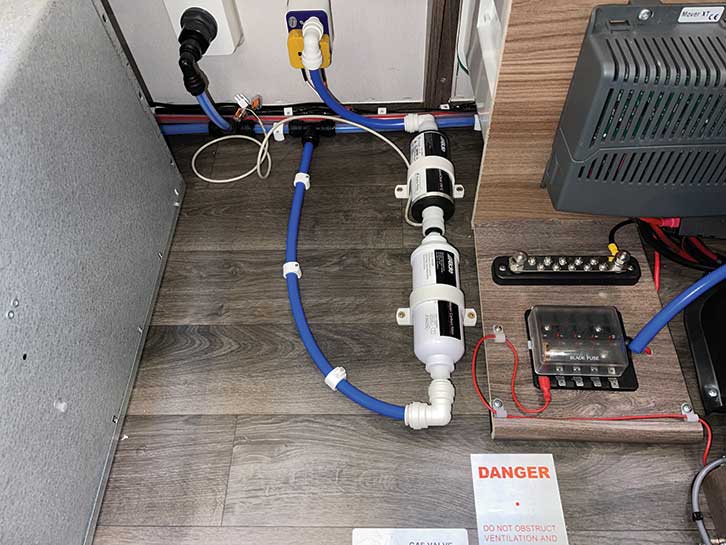
The water connection on the back of the inlet was removed from its feed to the caravan plumbing. This was replaced by a connection from the water inlet to the UV-C part of the AquaClear, and then another connection from the end of the carbon filter back to the original T-piece, thus keeping the plumbing as simple and original as possible.
Try to avoid putting too many right-angle connections into the feed, because each one will slightly reduce the water pressure at the taps.
Now secure the AquaClear, using the clamps provided.
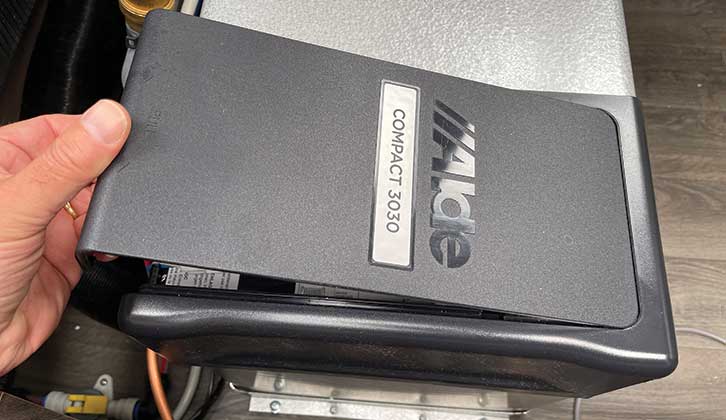
If you are fitting the unit to the Alde 3030 system, unclip the black plastic lid on the boiler unit. Connect the white plug on the AquaClear to the extension cable provided, plugging the other end of that into the port at the boiler unit, labelled External Start.
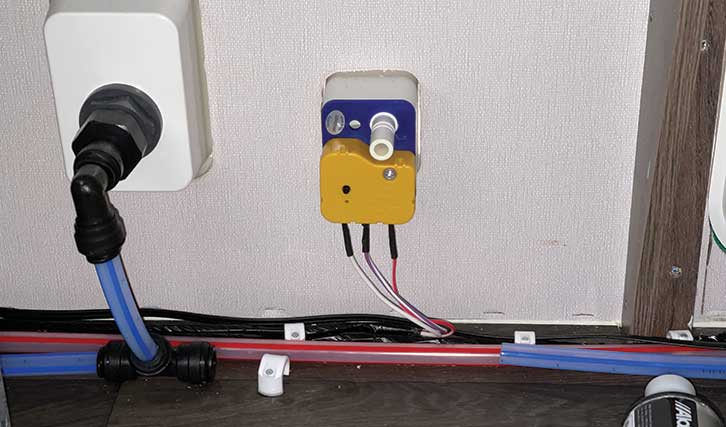
If using any other system, the LED unit needs mounting where it can be seen, and then the extension lead from the AquaClear will plug into the back of that.
The next stage is to connect the other cables from the AquaClear to the water pump housing. To reduce unnecessary activation of the AquaClear, the supply must only come on when the pump is running.
Our caravan’s wiring is such that white cables are the -ve side of the 12V system. There are three wires attached to our water inlet unit, and the white one is the -ve, but using the multimeter, I tested the other two connections.
Check the wiring
With an assistant operating a tap to turn the water pump on and off, one was permanently live, while the other was switched. It was the switched one that was needed.
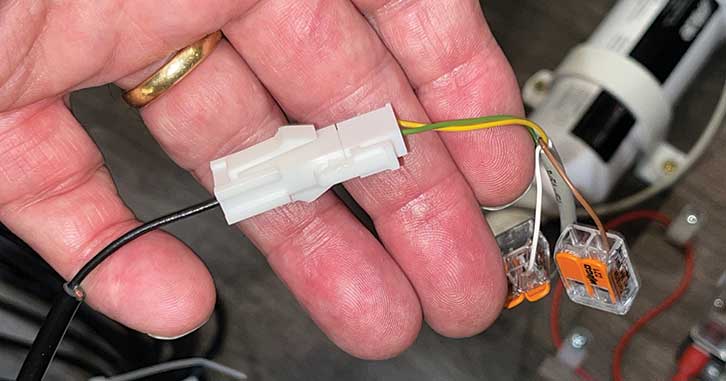
Just to confuse things a little, the wires from the AquaClear are white and brown. The white is the +ve feed, and the brown the -ve! Rather than using the clip-on plugs provided, the wires were hardwired together and then reconnected to the water inlet. The cables were secured with cable ties.
If you are using the non-3030 version, that’s it. Test the LED works by pumping water through the system. It should only come on when the pump is working.
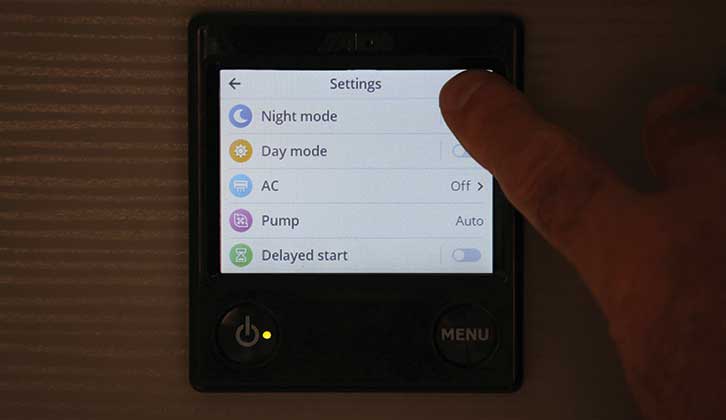
If using the 3030 version, on the control panel, press the Menu button twice. That will take you to Settings, and you then need to go to Page 3/3.
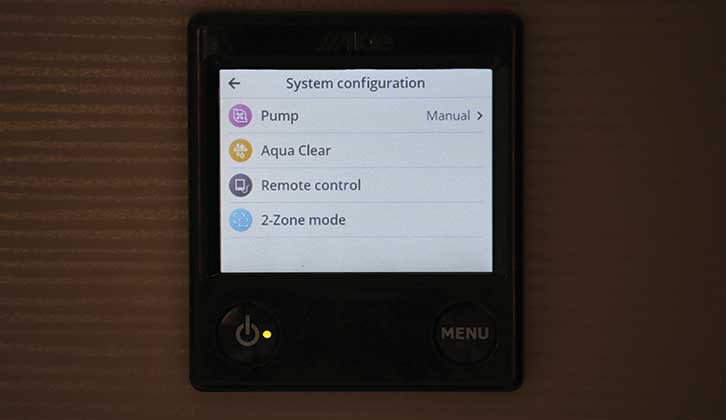
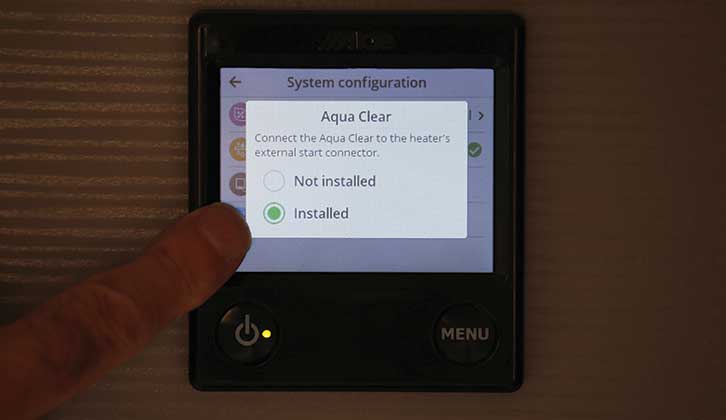
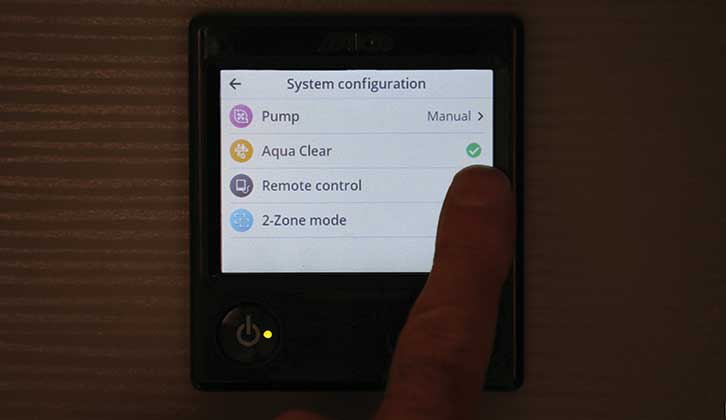
Tap the System Configuration icon and select AquaClear. This will bring up a sub-menu. Select Installed and you’ll see a green tick at the side of AquaClear on the System Configuration page. Press the Menu button twice to return to the Home screen.
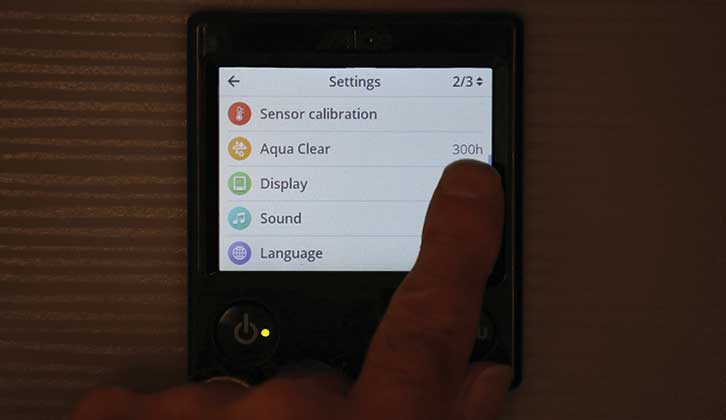
Next, go to Page 2/3 of the Settings (press Menu twice and then 1/3 in the top right corner), and AquaClear will be displayed with the countdown of hours (when new, this will be 300).
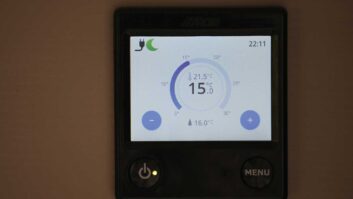
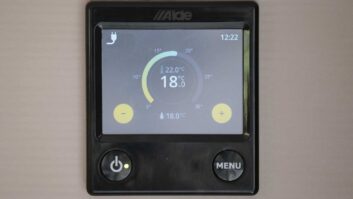
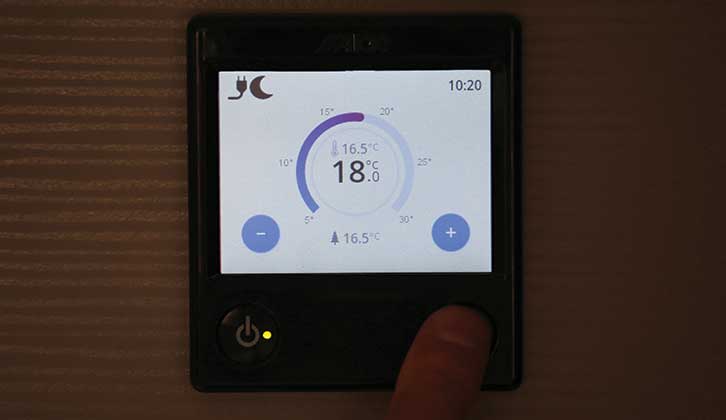
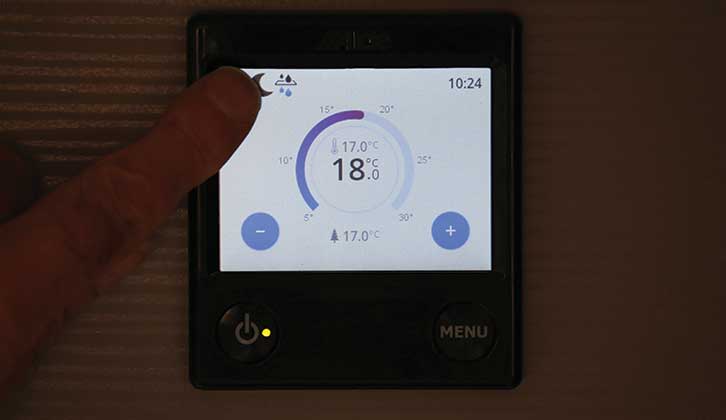
With water in the system, you’ll see an icon that looks like water drips on the Home screen of the control panel. This shows when the pump is working and water is flowing through the AquaClear unit.
We now look forward to enjoying pure drinking water and a bacteria-free system.
Wondering what else you can do with your Alde 3030 system? I talk you through the steps involved in setting a delayed start on the Alde 3030.
The step-by-step guide to fitting an Alde AquaClear UV-C
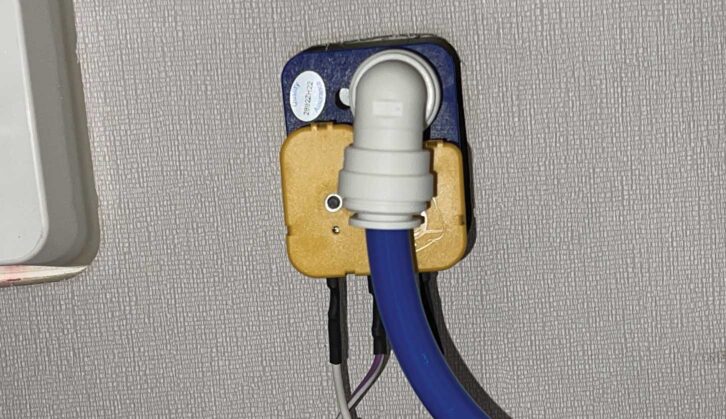
1. The back of the water inlet housing with the pipework removed.
2. The AquaClear UV-C unit plumbed into the caravan water system.
3. Unclipping the lid on the Alde Compact 3030 boiler.
4. Connect extension cable to white plug from the AquaClear UV-C unit.
5. Plug other end of extension cable into the port labelled External Start.
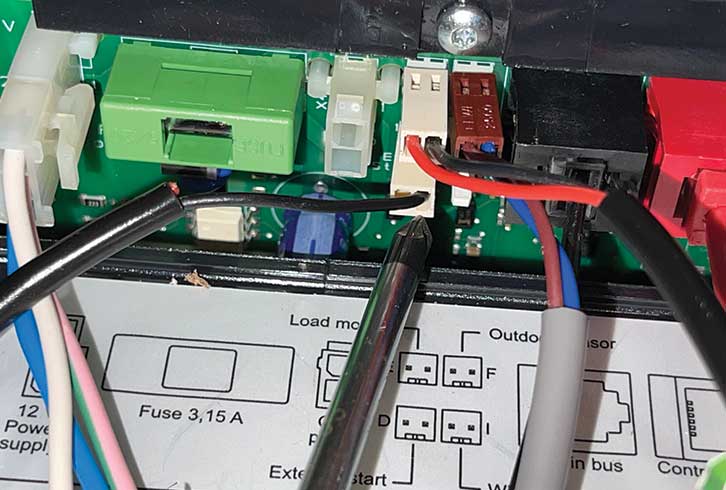
6. The white wire to the water inlet unit is the 12V -ve connection.
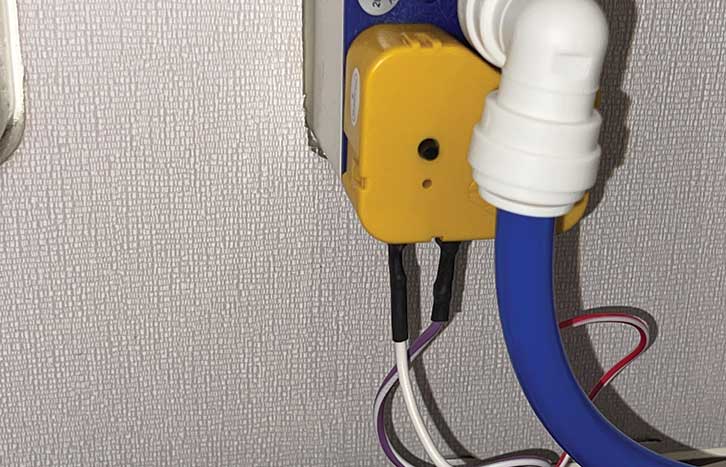
7. Wire on right-hand side of water inlet unit is the 12V +ve switched connection.
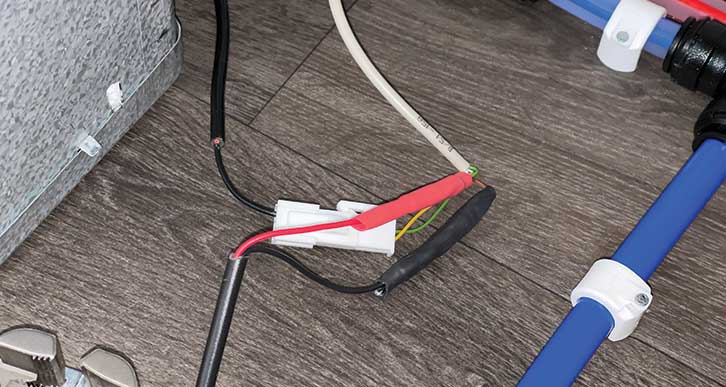
8. Nigel chose to hardwire the connections, rather than using the supplied clips.
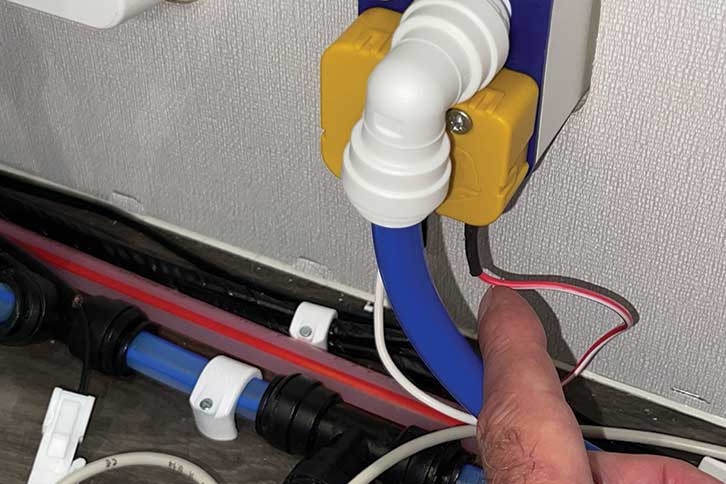
9. The electrical connections on the water inlet unit.
10. The completed job.

The step-by-step guide to the control panel
1. For non-3030 systems, LED unit mounted where it can be seen.
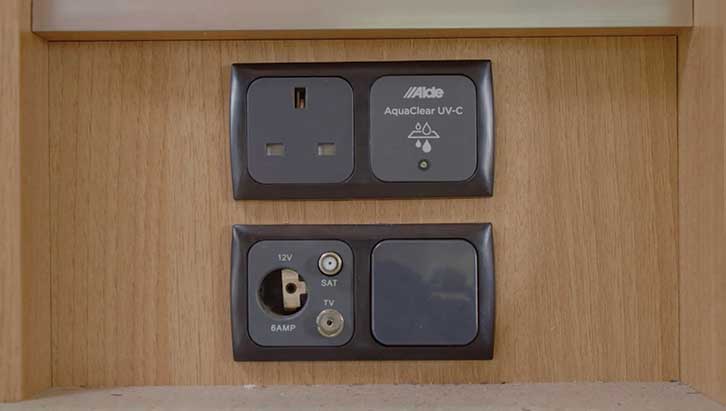
2. The blue LED illuminates whenever the water pump is operational.
3. On the Alde 3030 control panel, press the Menu button twice.
4. Go to Page 3/3 of Settings.
5. Select System Configuration.
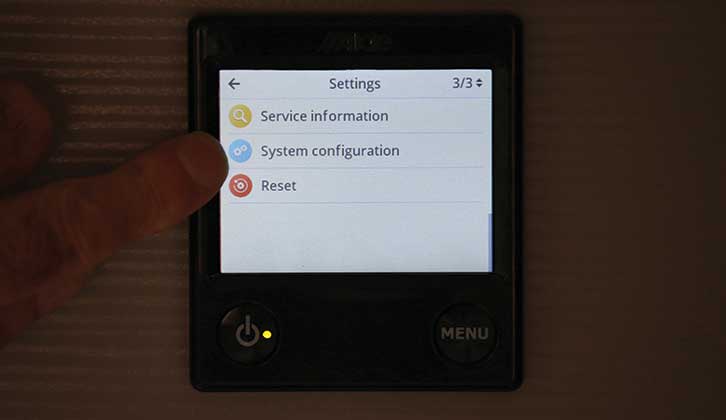
6. Select AquaClear.
7. Check Installed.
8. AquaClear should have a green tick.
9. On Page 2/3, AquaClear is displayed with a countdown in hours from 300.
10. The ‘drip’ icon appears in the top left corner when the pump is running.
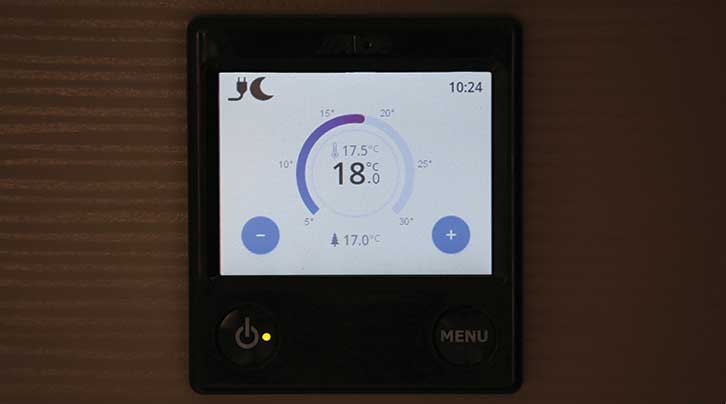
11. The ‘drip’ icon disappears again when the pump stops operating.
Nigel Hutson is a Brand Ambassador for Alde International
You may also like:
- We explain what you should expect from a caravan service
Future Publishing Limited, the publisher of Practical Caravan, provides the information in this article in good faith and makes no representation as to its completeness or accuracy. Individuals carrying out the instructions do so at their own risk and must exercise their independent judgement in determining the appropriateness of the advice to their circumstances. Individuals should take appropriate safety precautions and be aware of the risk of electrocution when dealing with electrical products. To the fullest extent permitted by law, neither Future nor its employees or agents shall have any liability in connection with the use of this information. You should check that any van warranty will not be affected before proceeding with DIY projects.
If you’ve enjoyed reading this article, why not get the latest news, reviews and features delivered direct to your door or inbox every month. Take advantage of our brilliant Practical Caravan magazine SUBSCRIBERS’ OFFER and SIGN UP TO OUR NEWSLETTER for regular weekly updates on all things caravan related.