
A few years back, a journalist friend of mine bought an old Elddis, for fun weekends away with her husband. “It’s a bargain,” she said, “just £800!”
To be fair, the two berth caravan looked quite smart, with no signs of damage or decay. But while I wasn’t going to say anything negative, I was a little sceptical that a van so old would not have a few hidden gremlins, just waiting to devour her savings.
In the end, though, that caravan never left her driveway. Crestfallen, she soon revealed that her cute tourer was riddled with invisible damp, something to be aware of when buying a used caravan. Having sneaked in through failed seals, the moisture was lurking between its sidewalls and internal panelling, gnawing away at its wooden structure, creating a trail of decay and unjustifiable expenditure.
Dangers of damp in a caravan
That unfortunate caravanning incident was a salutary lesson in the dangers of damp and the malevolence of moisture, something everyone should be aware of, even if buying one of the best used caravans.
Aesthetically sound leisure vehicles can be consumed by damp and mould without anyone knowing. But there’s no need to despair, for salvation is at hand!
Of course, 100% body integrity is the Holy Grail for all caravan manufacturers, but despite their best endeavours over decades of building leisure vehicles, the problem still hasn’t been eradicated.
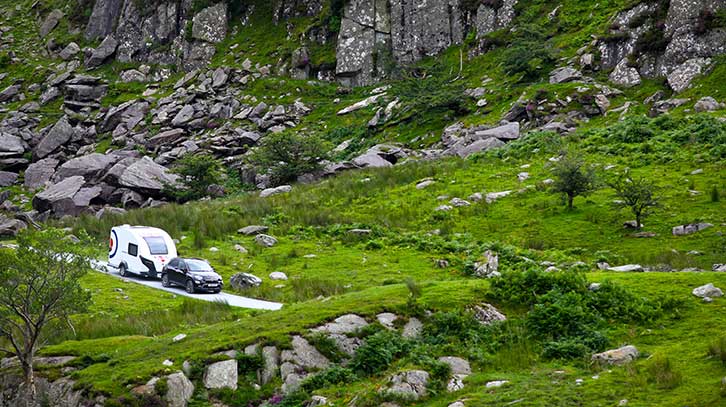
These days, the evolution of impressive new materials and clever construction methods has helped to improve things quite dramatically – although bouncing a big box along our pothole-riddled roads while we’re on our way to one of the UK’s best caravan sites can still reveal nasty flaws in a tourer’s build, even in this age of aviation-quality adhesives and sealants.
What’s the cause of caravan damp?
There are many ways in which water can find its way through the exterior panels of a caravan and into the internal structure.
In fact, any screw-hole, panel joint seal, window aperture or other type of addition to the van’s walls has the potential to let water through.
Until around a decade ago, traditional methods of construction meant that most vans were fixed together with hundreds of steel screws along the length of each panel join and the awning rail.
Of course, every one of those holes had the potential to let in moisture, creating corrosion and mould.
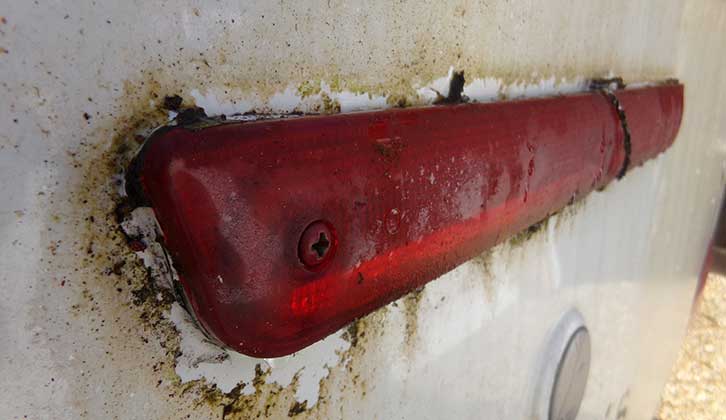
Likewise, the joins where wall panels met, or any appendage that penetrated the exterior wall (grab handles, external sockets and lockers, or cable entry points, for example) were potential weak spots.
Often unseen, damp can work its way through any tiny gaps, past the caravan’s first line of defence. Heavy rainfall will make it worse, and the jet-wash effect of towing at 50mph or more in a rainstorm means that water can be forced through even the smallest gaps.
Once inside, the water will run down and spread out, being soaked up by the soft wood framework of the caravan’s structure, and the absorbent wall panelling and floor. And there it will sit, the porous wood sucking it up, then staying damp long after the rain has stopped. Within weeks, the wood will discolour and the moisture might well be topped up. In a few months, rot sets in.
Meanwhile, unwitting caravanners are still enjoying their tours, completely unaware that their beloved van is already being attacked by the moisture menace.
Some time later, the owner might step inside their caravan to be met by a musty, mildewy smell; they might notice some discoloration of an interior wall panel, or their annual service will highlight the fact that water has penetrated the van.
And that’s where all too easily, things can start to get very expensive indeed.
However, there is at least some good news. If you catch water ingress early enough, it’s a fairly straightforward job to find the leak, seal it and dry out the woodwork. Delays, though, can lead to entrenched and extensive rot, and then you’re facing a much bigger challenge.
Caravan construction
For the best part of a century, touring caravans were made in pretty much the same way, with internal panelling and external walls fixed to a framework of wood. This was attached to a wooden base atop a metal chassis.
In the early days, this worked well, as the vans had excellent airflow (they were draughty), so condensation wasn’t such a big issue. Dampness dried out quickly, and perhaps people weren’t as fussy!
However, as caravan design grew more sophisticated, they became sealed boxes, minimising airflow and enabling moisture to be trapped indefinitely.
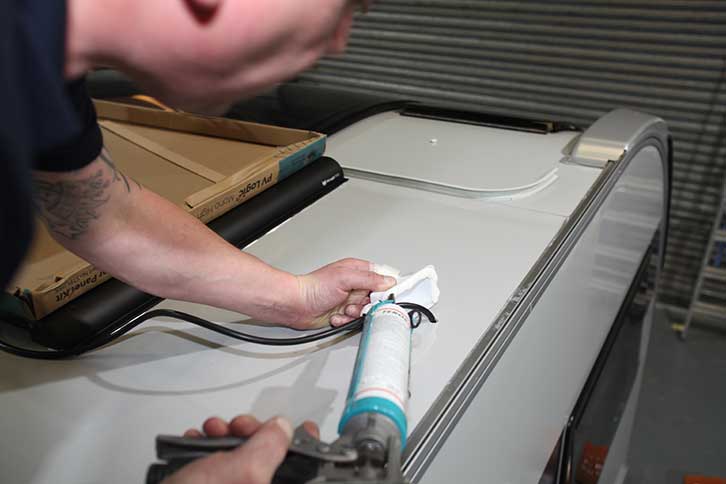
Sealants have always been used to fill all of the panel gaps and wall joints. Until quite recently, these were prone to drying out and cracking, but in recent decades, high-quality silicone sealants, which remain flexible for years, have been used.
Eventually, the major manufacturers began to embrace innovative construction methods, to make their caravans more waterproof and less susceptible to damp if it did manage to find its way in.
Bailey was an early innovator, with its launch of Alu-Tech in 2009. This features a rigid aluminium structure, instead of wood, creating an extremely strong shell that’s impervious to moisture.
Shortly after that, Elddis introduced its SoLiD construction method. This replaced those hundreds of potentially leaky screw-holes with state-of-the-art panel bonding, using aircraft-grade adhesives. Yours truly underwent SoLiD training and I have to say it was pretty impressive, sealing and fixing in one. Just never use the word ‘glue’ around an Elddis technician!
Swift also modernised, introducing composite materials instead of wood into its caravan walls and floor. In this way, even if any water does creep in, it won’t be soaked up and begin to cause rot.
Meanwhile, Coachman teamed up with the adhesive gurus at Bostik, fixing its water-repellent polyurethane framework together with adhesives in what they call ABC – Advanced Bonding Construction.
Caravan water ingress today
So did all these high-tech materials and methods actually work, and improve things?
We spoke to Gary Lucas, Chief Technician at Raymond James Caravans, to find out: “Caravan water ingress isn’t as big a problem as it was a few years ago, as a lot of manufacturers have got to grips with it. We still get the odd case, where the awning rail’s not properly fixed to the side of the caravan and water finds its way in, but it’s nowhere near as bad as it used to be, when rails had a screw every few inches. That was often the weak point.”
“These days, there’s a lot more bonding construction, so there are fewer holes. The use of composite materials has also made a huge difference, as they don’t hold water and they don’t rot. In the old timber frames, the water would get in and just stay there, until you had to cut it all out and replace it. Now, if you get damp with composite materials, you may just have to replace a bit of wallboard and the wallpaper.”

“It’s usually easy to identify a leak. Once you find a damp area and get the paper off, you can trace it back to discover where the water’s getting in.”
“Caravanners should look out for discoloration in the wallpaper. Usually, if water is getting in, the paper starts to turn blue. If you see a blue stain, you can be pretty sure water is present.”
“If a customer suspects their van has water ingress, we do a full Damp Report. We take all the damp readings, and if there’s anything over 20%, we’ll start investigating the cause and the location.”
“If the van’s under warranty, we send photos and the report to the manufacturer, who’ll send us the relevant parts.”
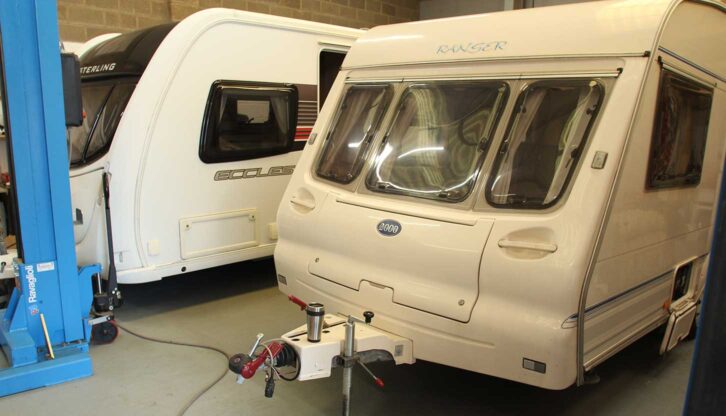
“The most frustrating thing for the customer is the wait, while we get authorisation for the warranty claim, which can be up to three weeks. Then we have to get the parts, which can take three to six months. I’d advise anyone purchasing a cheaper or older van to get a full Damp Report before they buy.”
How can I detect water ingress in a caravan?
There are three main ways you’ll discover caravan water ingress: you might spot dampness and discoloration in the interior walls, or notice a musty, mildewy odour. A service technician may note its presence, using the best caravan moisture meter.
If there’s significant damp in a caravan, you’ll smell it when you return to your tourer after it has spent the winter in caravan storage. Of course, if you can smell it, the rot has already set in; likewise if you spot stained panels. Far better, then, to have a technician test for damp at each annual service – and any time you suspect a leak. Damp tests should be a standard part of any caravan service, and are essential in services by AWS-registered technicians.
To carry out a damp test, technicians use a small device with two metal prongs. These are gently pressed against the wall panels (they don’t leave a visible mark) and the current between the two indicates if there is excessive moisture in the panel.
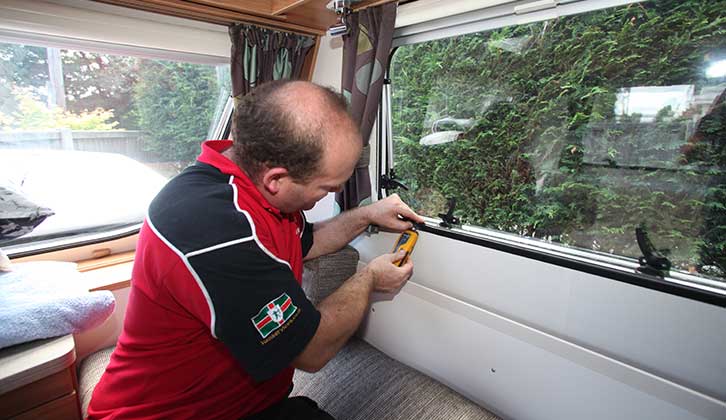
The readout gives you a moisture percentage, with any reading around 15-20% being fine, but alarm bells might ring, especially if a reading is very high.
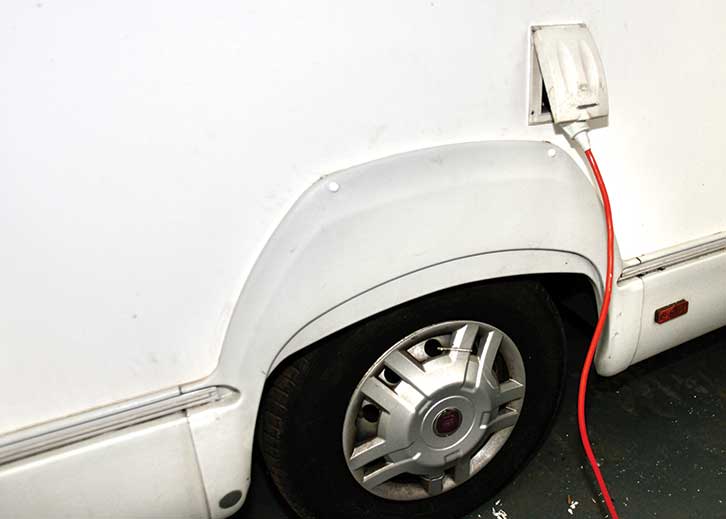
The key places to test are around the window seals and wheel arches, and on inside wall panels where they align with external joints, especially lower down behind sofas, furniture and radiators, and in lockers and cupboards. Check around skylights and roof vents, too, and pay particular attention around the front panel, as this area is blasted with water when you’re towing in bad weather.
If you do detect signs of damp, or you get a high meter reading, contact your caravan dealer or technician for further investigation.
Preventing caravan water ingress
There are several ways to minimise the chances of water leaks into your caravan. The most important is regular servicing, which should be carried out annually to maintain any new-caravan warranties.
Warranties covering water ingress tend to be for extended periods, but are contingent on regular servicing, often within tight timescales. With new and warrantied tourers, book your next year’s service when paying for the current one.
The condition of the sealant should be carefully checked, especially on older vans.
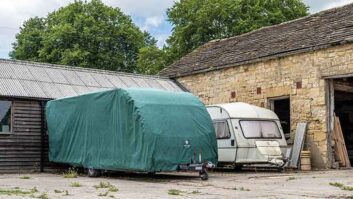
Fitting the best caravan cover can help to protect your tourer in bad weather, and will protect sealants against UV degradation. Covers made with breathable fabrics minimise condensation build-up between cover and caravan. Sitting water on the van’s roof makes water ingress and panel damage more likely.
Airflow around a caravan is important, so an ideal scenario is to store your tourer under a carport-style structure, which protects it from the worst of the weather, but provides good ventilation.
Indoor storage is excellent, although the van should always be put away dry.
It also makes sense to air your van’s interior as often as possible. Efficient ventilation is a benefit, whatever the age of the caravan.
Check your window and door seals regularly and keep them supple by using a silicone spray. If you don’t have any of that many seasoned caravanners swear by olive oil as a lubricant.
Cracked and crazed rubber seals can let moisture in, so it’s important to keep an eye on them.
The causes of caravan water ingress
Seal degradation
Over time, rubber seals around windows, doors and rooflights or vents can deteriorate, allowing water to seep through. As a result, you may need to carry out some rubber seal repairs,
Breakdown of sealants
Joints that are sealed with silicone sealant are prone to leaking over time, because sealants can perish owing to age, extreme weather and UV rays in sunlight.
Cracks or damage
External damage, including cracks or holes in the caravan’s outer shell, can create entry points for water.
Poor maintenance
Neglecting regular maintenance, such as resealing seams and inspecting vulnerable areas, can lead to water ingress.
The effects of caravan water ingress
Structural damage
Water ingress can compromise the wooden framework of the caravan, causing rot and weakening the structure.
Mould and mildew
Damp conditions create an ideal environment for mould and mildew to thrive, posing health risks and resulting in unpleasant odours.
Aesthetic damage
Stains, bubbling wallpaper and peeling paint or veneer are visible signs of water damage, affecting the caravan’s appearance and resale value.
Electrical issues
Water infiltration can damage the van’s electrical systems, leading to malfunctions and potentially serious safety hazards.
Prevention and Remedies of water ingress in a caravan
Regular inspection
Routinely inspect your caravan’s exterior, seals and seams for any signs of wear or damage.
Sealing maintenance
Reseal seams, joints and openings with a high-quality sealant, such as CT1 or Sikaflex, to help prevent water penetration.
Proper storage
Store your caravan in a dry, covered area when it’s not in use, or buy a good cover for your tourer.
Rapid repairs
Address any water ingress issues promptly to prevent escalation.
Dehumidification
Consider using a caravan dehumidifier and ensure good ventilation to reduce moisture inside the caravan.
Professional help
If severe caravan water ingress is suspected, consult the professionals for a full Damp Report and repairs.
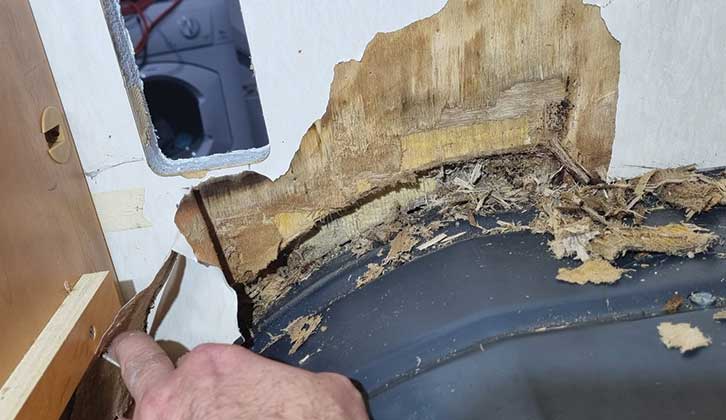
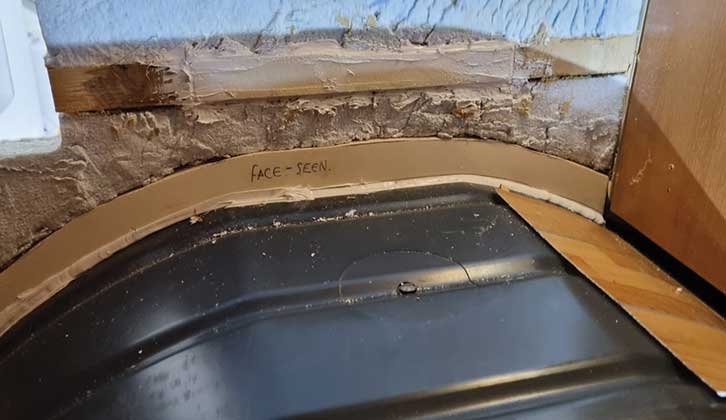
How to deal with water ingress
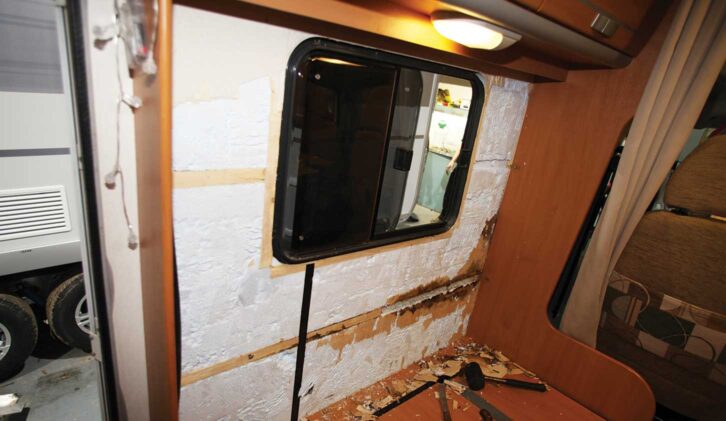
We visited Downtide Caravans & Leisure, in Norfolk, to watch their expert technicians repairing the damage caused by water ingress. It’s a painstaking (and therefore costly) task.
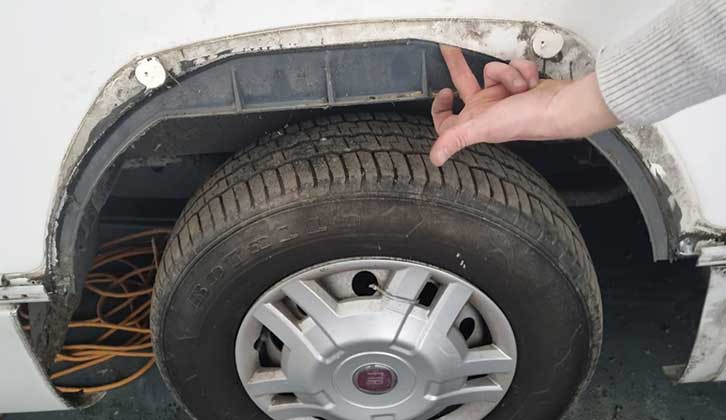
1. Wheel arches are a common source of damp.
2. Even a small gap can allow water in. Working externally, the leaky area is fixed and sealed
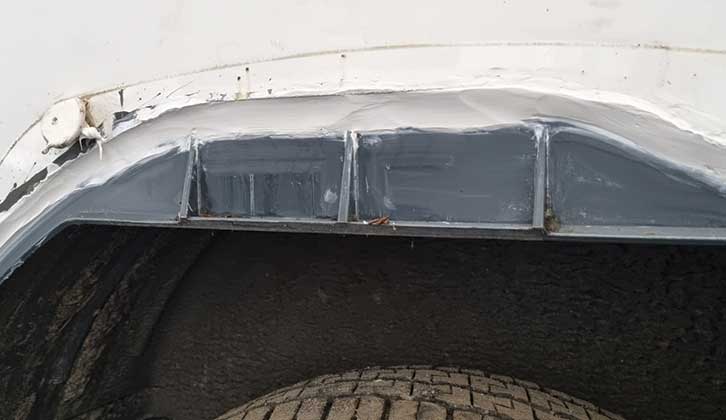
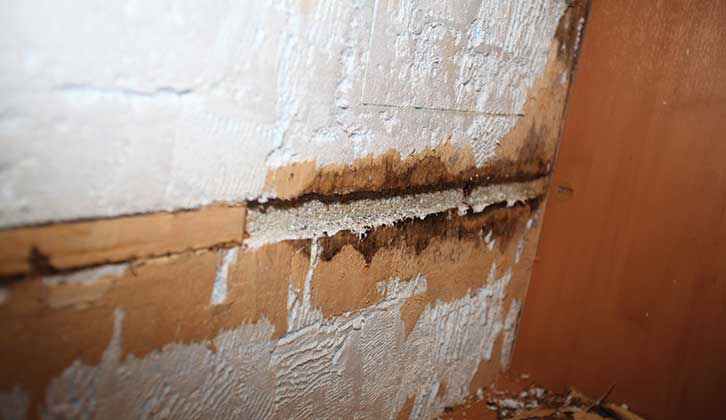
3. Inside, the area of dampness is quickly identified,
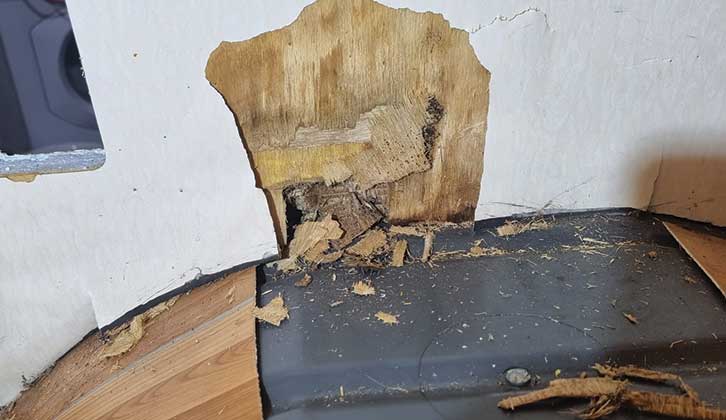
4. The rotten timber has to be removed. Often, this means having to replace an entire panel.
5. The rotten wood panelling is cut out.

6. Finally, the framework can be replaced.
7. Interior panelling is stripped away to access the leak and rotten woodwork.
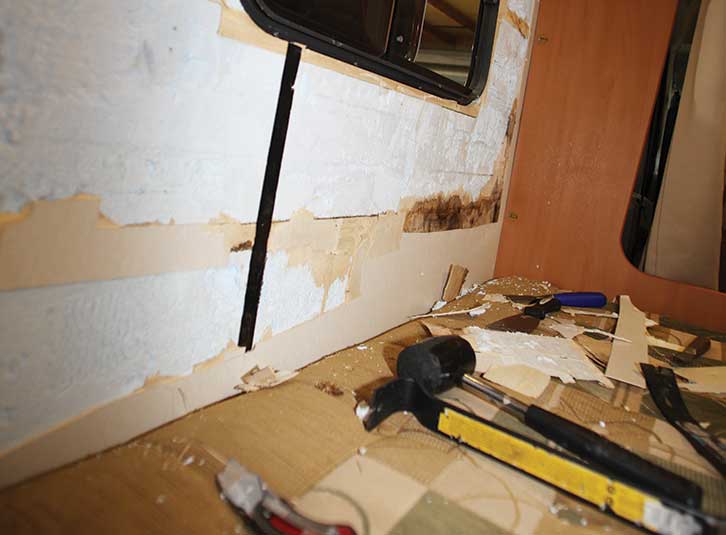
8. With the panel stripped off, the mould can be seen.
9. Rotten framework is stripped out.
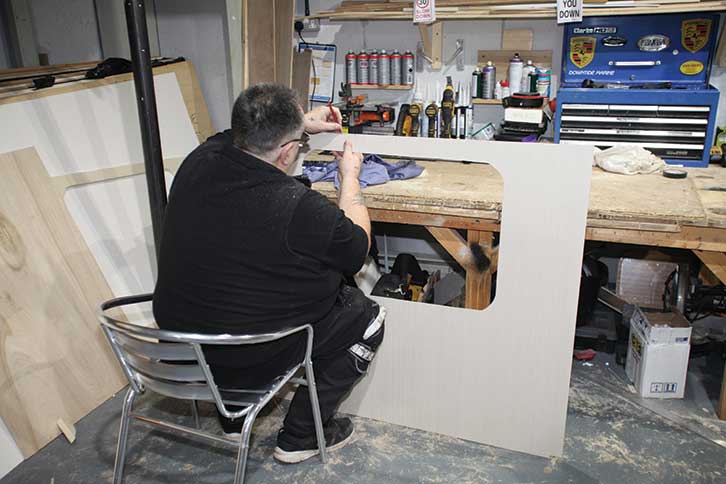
10. Matching wood panelling is cut to size and shape.

11. The wall panel is carefully copied to the exact shape of the damaged one.
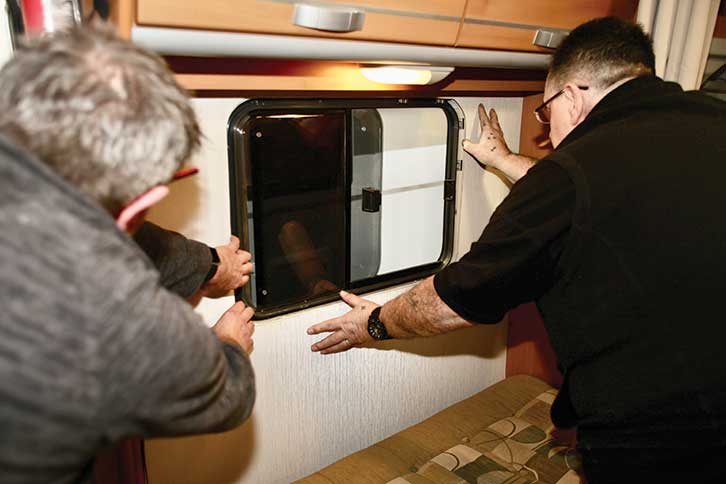
12. The replacement panel is offered up to the interior wall.
Future Publishing Limited, the publisher of Practical Caravan, provides the information in this article in good faith and makes no representation as to its completeness or accuracy. Individuals carrying out the instructions do so at their own risk and must exercise their independent judgement in determining the appropriateness of the advice to their circumstances. Individuals should take appropriate safety precautions and be aware of the risk of electrocution when dealing with electrical products. To the fullest extent permitted by law, neither Future nor its employees or agents shall have any liability in connection with the use of this information. You should check that any van warranty will not be affected before proceeding with DIY projects.
If you’ve enjoyed reading this article, why not get the latest news, reviews and features delivered direct to your door or inbox every month. Take advantage of our brilliant Practical Caravan magazine SUBSCRIBERS’ OFFER and SIGN UP TO OUR NEWSLETTER for regular weekly updates on all things caravan related.