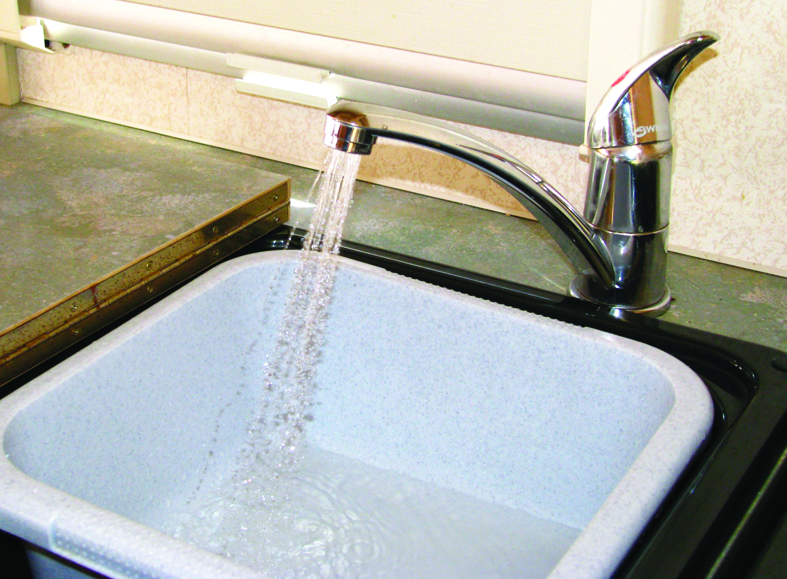


When it comes to creating a really home-like environment of luxury and convenience, caravans have been transformed in recent decades. One of the biggest factors is the availability of hot and cold running water, and the ways in which it reaches your van. Foot pumps, buckets and boiling kettles are long gone. With this guide, you can find out about caravan water systems and how we get our water on tap.
Water to the tourer
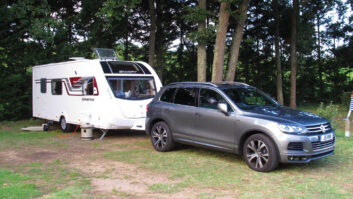
These days, most people use a portable water-carrier to bring fresh water to their caravan. The term ‘Aquaroll’ is now to caravanning what Hoover is to vacuum cleaners: a catch-all term for the brilliantly simple rolling water-barrel.
Few people would be able to carry 50 litres of water (that’s 50kg!) from tap to tourer, so rolling carriers are brilliant in their simplicity, usability and storability (we keep ours in the shower cubicle when we’re out on the road).
Simply fill it up, wheel it back to the caravan and drop in the Truma or Whale submersible pump (depending on your caravan’s spec).
The impeller inside the pump is lubricated by the water, so don’t let it run for extended periods when the barrel is empty. New pumps are easy to find, but cost in excess of £50, so you want them to last.
One problem with these submersible pumps on flexible rubber pipes is that they can often curl up inside the barrel, meaning that the pump on the end is not fully underwater.
A smart fix for this, devised by DIY guru Rod Farrendon, makes use of a product called Pipesnaps. These are rigid, split plastic tubes, designed to be clipped on to household pipes for decorative purposes.
However, clip one onto your pump tube and it will hold it straight and keep it submerged. They only cost from around £10 a pack – so share them with caravanning friends!
Once in place, the pump will activate automatically whenever a tap is turned on in the van.
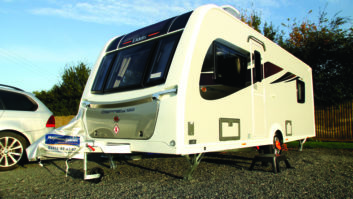
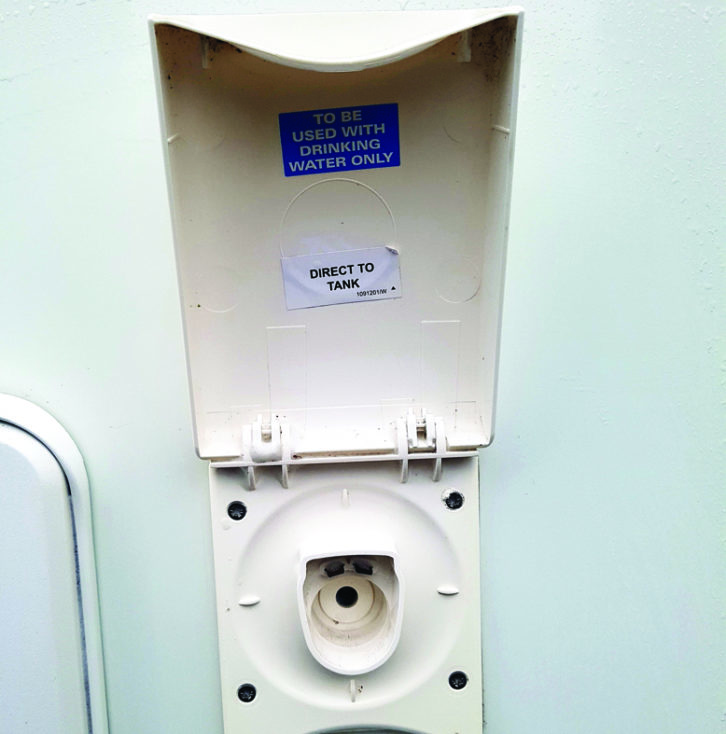
Some luxury caravans have an onboard water tank, which needs to be filled with clean water. Depending on the size of the vehicle, these vary from around 40 litres upwards.
Most will be filled from an external water-carrier through a second port on the side of the caravan. Others are like some motorhomes, and can be filled with a hosepipe, through a filler cap on the side of the vehicle.
Once filled, the water tank feeds fresh water to the water heater and the cold-water taps, when selected.
While this might not save a lot of effort, having a secondary water tank can mean that one ‘water-filling’ session will last you the whole day, or perhaps even a weekend if you’re frugal.
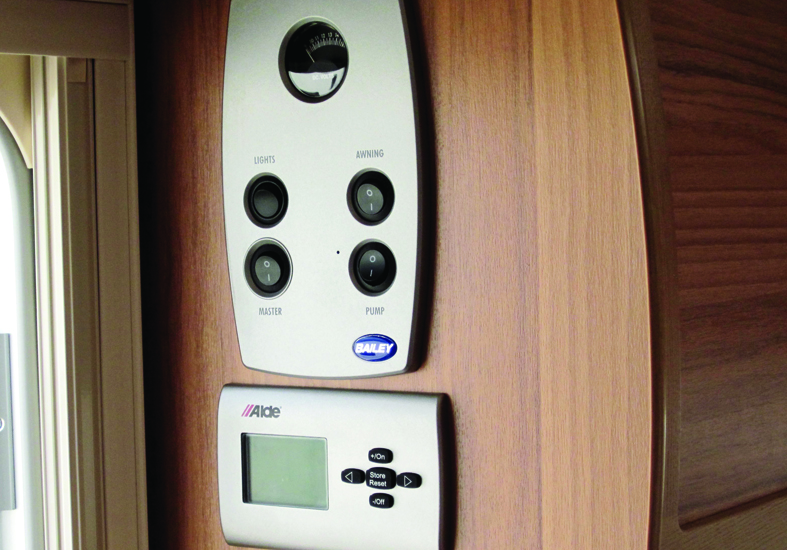
Systems vary between van brands, but the logic is usually similar. Many feature a selector switch, which changes the water source from an external one (Aquaroll/Waterhog) to the internal fresh-water tank.
On site, I prefer to use a direct-feed water pipe, ideal for longer stays on a fully serviced pitch – just fit and forget them.
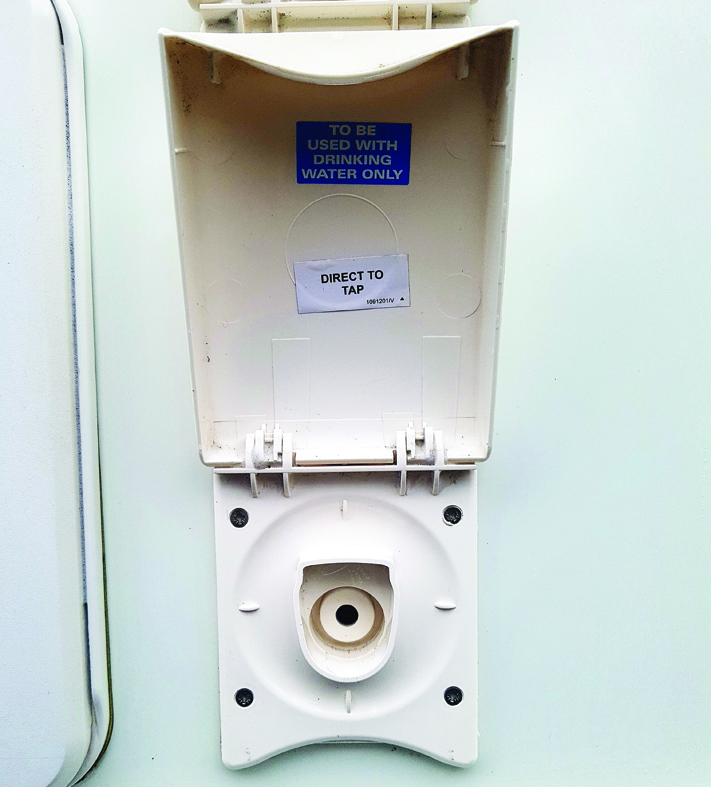
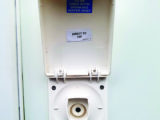
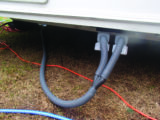
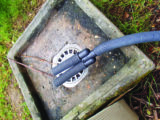
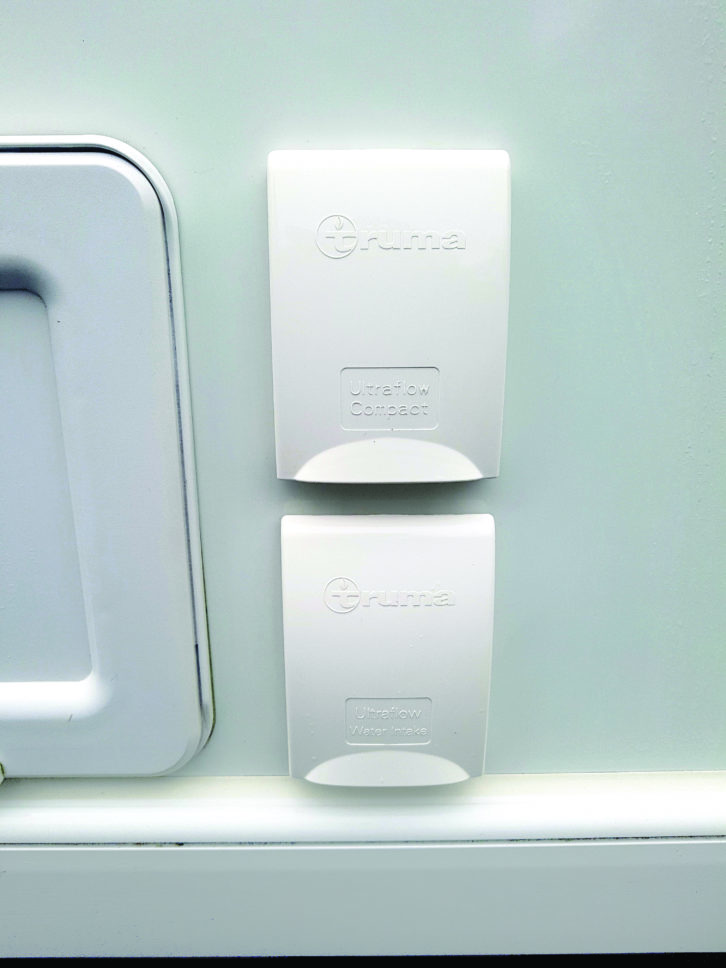
The direct-feed waterline takes water straight from the pitch tap to the caravan’s external water socket. Truma makes the 15m Ultraflow Mains Waterline, while Whale offers the 7.5m Watermaster (with optional 7.5m extension). On some websites, this product is called Whale Aquasource.
Simply attach one end to the pitch tap (we keep a range of connectors in the caravan) and clip the other end into the pump inlet on the van sidewall. Ensure there are no kinks in the pipe and that it’s run on a safe route, where, for example, nobody will drive over it. Now you have a permanent water source, just like home.
On one pitch, in France, we found that the water system was somewhat ‘industrial’ and the pressure so high, it kept blowing the pump connection out of the side of the van. In this case, turn the tap until the flow is reduced to a compatible level and all will be well.
Water heating
These days, combi heating systems are most popular, and they are efficient, heating both the water and the internal space (hence the name) throughout the caravan.
These systems are compact and relatively lightweight, and can be powered by gas, mains electricity, or a combination of the two.
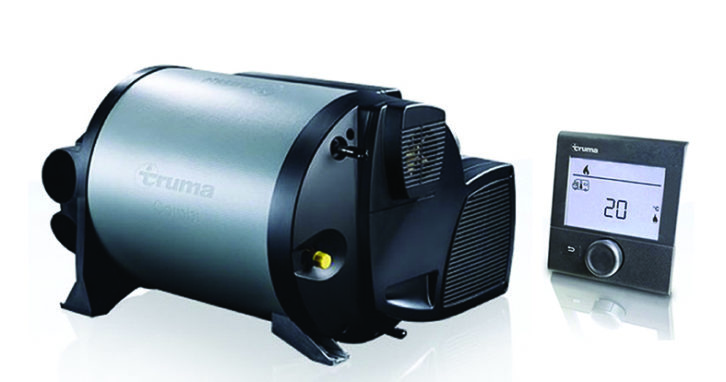
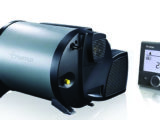
Every few years, the heating power of these devices has increased, from 2kW to 4kW to 6kW, and now there’s a high-powered 8.7kW system from Alde. The control panel allows you to select the power source, although the highest output usually requires both gas and electricity.
The Truma Combi 4E offers up to 4kW of heating power, while Truma’s Combi 6E creates 6kW. The higher wattage means water in the boiler system will heat up more quickly, delivering longer hot showers, or shorter (or no) breaks between people taking showers.
The Whale Expanse water-heating system operates on similar principles to the Truma, but the unit is hidden under the floor, freeing up locker space in the caravan.
Whale has tested its system and found it can heat enough water for a 14-litre shower in 11 minutes, and then takes only a further eight minutes to provide the water for a second hot shower. If you account for drying-off time, Whale Expanse delivers consecutive showers with virtually no waiting time.
Alde wet systems are rather different. Where Truma and Whale use hot air to heat the vehicle, Alde uses a domestic-style radiator set-up – pumping hot liquid around the caravan to radiator panels that are hidden behind the furniture.

Alde also heats the water, and its 3020 model has a high output of 8.7kW when gas and electric are combined. Alde claims its hot water system can heat its 8.4-litre tank to 50°C in 30 minutes, when used on the Boost setting.
How they work
These systems tend to be hidden away under a caravan sofa and look like a compact barrel or box, with pipes and wires going in and out.
Inside the casings is a gas combustion chamber at the core, which is surrounded by a stainless-steel water jacket with a heat-exchanger system. The heat exchangers are usually metal-finned units providing a large surface area, over which the water flows.
In this way, the heat will be transferred efficiently from the combustion chamber, through the metal fins, into the water. The more efficient this process is, the more quickly you can have your shower!
Heat exchangers used to have a 10-year lifespan. Brands like Truma have extended this to 30 years, but since June 2005, any heater with an E1 mark on its type plate (European Directive approval) no longer has a specified lifetime.
Water is pumped in at one end, through the heating system and over the heat-exchanger fins, then out of the other end to your tap, when the required temperature is achieved.
Hot water systems
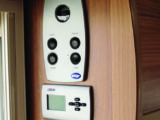
Using the hot-water system begins with you entering your requirements on the control panel, be that space heating or water heating. You can then select the level of heat that you want and the power source to achieve it. This will cause the boiler to fire up.
For fast hot-water heating, air and gas enter the combustion chamber and are ignited by an electronic ignition system (often there are two igniters).
The hot gases resulting from combustion flow back between the flame tube and the inside wall of the heat exchanger, raising its temperature. These used exhaust gases are then emitted from the caravan via the exhaust cowl.
Heat is conducted through the exchanger, and thanks to its huge surface area, quickly radiates into the water in its stainless-steel jacket.
To supplement these hot gases, many systems have additional electric elements, to boost the heating or provide electric-only heating for those who want to save gas.
The heated water is mixed as it flows through the boiler to ensure an even temperature, rather than just bursts of very hot and very cool water – not much fun in the shower!
Temperature sensors adjust the heating to give the required flow of hot water, and the hot water supply is carried in pipes to the tap in use.
All of these systems are protected by a thermal jacket, which provides insulation.
Turn on the tap
In modern caravans, the boiler kicks in automatically when a tap is turned on. It does this by sensing pressure changes in the system, either through a microswitch built into the tap, or via a pressure-switching system. When a tap is turned on, the pressure drops. The sensors recognise this and trigger the heater to kick in.
Emptying the tank
To avoid it stagnating, water should not be left in any water tank for more than two or three days if it’s not being circulated, because there’s the potential for microbes to build up.
Ideally, an onboard water tank should also be drained down before driving. Each litre of water in the tank weighs 1kg, so a full 40-litre tank is the equivalent of a child passenger!
This will increase your fuel consumption and might affect handling, especially if it is located towards the rear of the caravan, where the ‘pendulum effect’ is most potent.
The method of emptying the tank varies from caravan to caravan. Most vans drain down via a small inline valve located close to the heating system. A few tanks sit under a hatch in the floor. With these, you’ll often find a handle and pull-cord, which, when tugged, opens a valve and drains the tank. Other vehicles have an external drain tap, which sits under the edge of the caravan.
Draining the internal tank is sufficient for towing, but for winter storage, you should consider draining down the entire system.
To do that, with the pump off, turn on all of the internal taps, including the shower tap, and set them to cold, before opening the tank drain valve, or the general drain valve.
When all of the cold water has drained away, turn the taps to the hot setting; in this way, the maximum amount of water will be evacuated.
The boiler should also be drained, especially before any frosts are due. This is because freezing water in the pipes or boiler will expand and could cause expensive damage.
To achieve this, locate the drain tap, which is found close to the pump/heater.
The inline switch is usually yellow and is in its drain-down setting when it’s in the upright position. When putting your caravan into winter storage, you should leave the valve in this position.
One important point to bear in mind is that on grass pitches, you should never drain very hot water straight onto the grass before you leave – for obvious reasons!
Priming the system
As internal tanks should ideally be empty when you’re on the road, the system needs to be primed when it is refilled.
This is a simple procedure – fill the tank or plug in your water source (a water-carrier or waterline), then, with each hot-water tap open in turn (or mixer taps switched to the hot setting), turn on the water pump. The heater holds up to 15 litres of water, so might take a minute or so to fill.
Each tap will splutter as the air is evacuated from the pipes and replaced by water. After a few rather ‘splashy seconds’ (stand well back!), the flow of water will become constant through the tap.
Now turn the tap to cold and let the same thing happen. Repeat this process with the basin and shower, too.
The flow of hot and cold water around the van should then be constant and smooth.
Cleaning the tank
There are specialist chemicals available for caravan tank and pipe-cleaning – you could try Puriclean (around £10 for a 400g tub), for example – but many caravanners believe that a dilute acid solution, such as citric acid (lemon juice) or acetic acid (vinegar), will do just as good a job.
Both of these solutions should also help to clear limescale from the hot-water pipes and boiler. Of course, you might need to run the taps for a minute or two with fresh water after cleaning, to get rid of any vinegar residue. Sarson’s-flavoured tea, anyone?
Grey waste
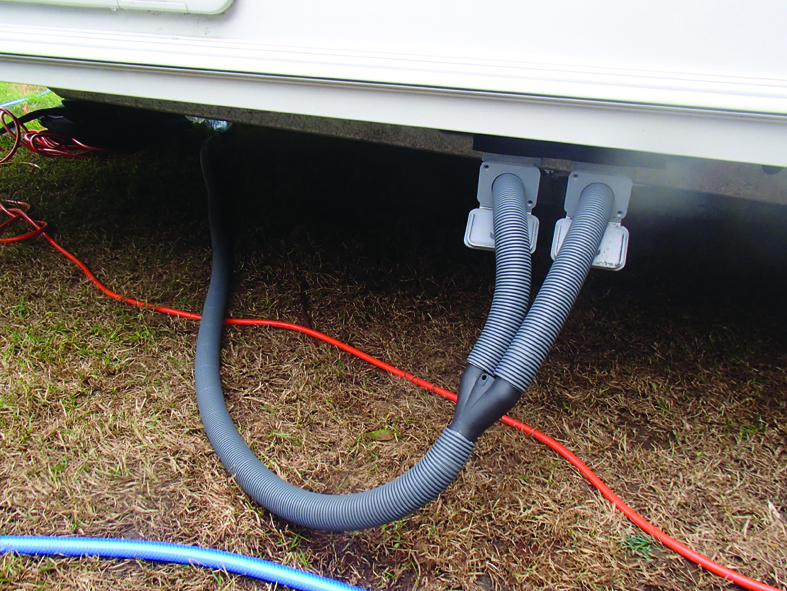
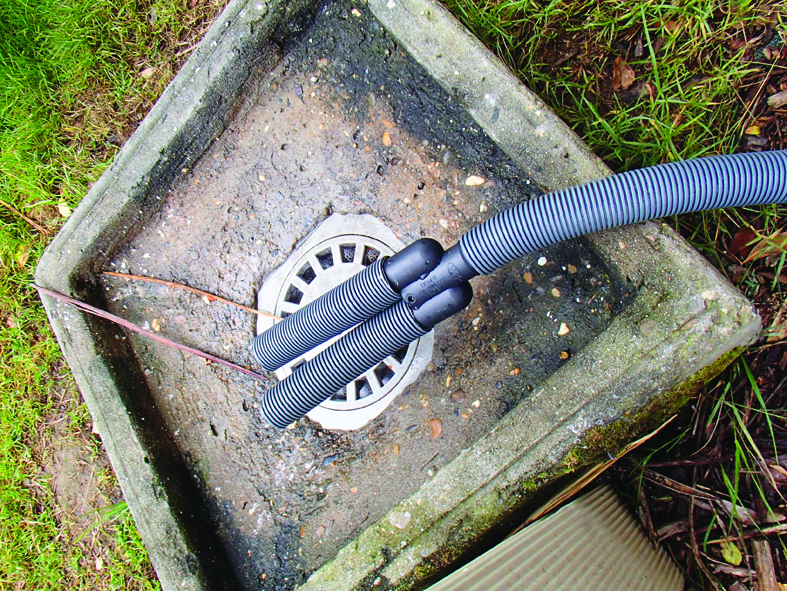
Grey water – waste from the sink, handbasin and shower – leaves the caravan from two pipes located under the bottom edge of the van.
You have two options here: you can attach the standard short length of hose to direct the water into a grey-water carrier (which needs to be emptied every day); or you can fit a longer hose, which reaches all the way to your pitch drain. The second option is more convenient if you’re on a fully serviced pitch.
Drinking water
It’s perfectly safe to drink UK tap water in a caravan with a well-maintained water system, but we use a large bottled-water canister for drinking water, to ensure a perfect cup of tea!
This started with our frequent trips abroad, and worries about the water quality on some sites, but now we do it all the time.
If you liked this… READ THESE:
What you need to know about gas
If you’ve enjoyed reading this article, why not get the latest news, reviews and features delivered direct to your door or inbox every month. Take advantage of our brilliant Practical Caravan magazine SUBSCRIBERS’ OFFER and SIGN UP TO OUR NEWSLETTER for regular weekly updates on all things caravan related.
Future Publishing Limited, the publisher of practicalcaravan.com, provides the information in this article in good faith and makes no representation as to its completeness or accuracy. Individuals carrying out the instructions do so at their own risk and must exercise their independent judgement in determining the appropriateness of the advice to their circumstances. Individuals should take appropriate safety precautions and be aware of the risk of electrocution when dealing with electrical products. To the fullest extent permitted by law, neither Future nor its employees or agents shall have any liability in connection with the use of this information. You should check that any van warranty will not be affected before proceeding with DIY projects.
The availability of hot and cold running water, and the ways in which it reaches your van, has been transformed