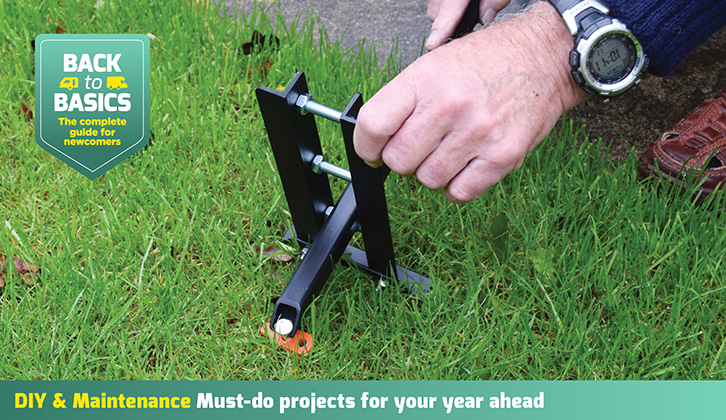
There have been any number of times when I’ve arrived at a pitch, only to be confronted by awning pegs still embedded in the ground, abandoned there by the previous occupants.
Having hammered in their pegs, they find that they can’t get them out when they are ready to depart, so they just give up and leave them behind.
The pegs are invariably in the way for the next occupants of the pitch, and the main option has been to hammer them right into the ground until they are completely flush.
However, I have also been forced to abandon pegs that have locked themselves solid in the ground and won’t come out, for love nor money.
Nail-style pegs
So, what to do? Usually, the main culprits are the widely used (because they are good and work well) 25cm nail-style pegs, which have a plastic collar on top.
Made from hardened steel, these are the only type that perform well in hard ground conditions – the bent-wire ones just curl up and die.
You can, of course, purchase ready-made tent-peg pullers, but these only seem to cater for the curly wire or plastic variety of peg.
The nail type do not seem to be catered for (or if they are, I have yet to find one).
Bearing that in mind, this project details what I consider to be a very practical solution to the problem. This tent-peg puller is of very robust design (rather bordering on being over-engineered, for which I make no apologies!) and will help you to extract a nail-style peg with ease, irrespective of the type of ground it’s been hammered into.
This tool also provides three fulcrum points, allowing it to deal with pegs that put up a fight until the very last inch.
Although it has been designed mainly for extracting nail-style pegs, it could be adapted for use with other pegs by profiling the lever end accordingly, or by having multiple levers
if an assortment of different pegs is being used.
Materials
- 0.5m of 20mm x 20mm x 2.5mm wall thickness box-section mild steel
- 1m of 25mm x 25mm x 3mm mild steel angle section
- Three M8 x 55 steel bolts
- Nine M8 steel nuts
- Two M6 x 12 steel bolts
- Two M6 nuts
- Two M4 x 6 cap-head screws
- One 22mm bicycle handgrip
- Spray primer and matte black paint
Tools
- Hacksaw
- Square with 45-degree facility
- Marker pen
- Cordless drill and metal bits
- Centre punch
- Hammer
- Two mole-style grips
- Round and flat files
- M4 tap and tap wrench
- Two 13mm spanners
- Two 10mm spanners
- 3mm AF hex key
- Thread lock
- Masking tape
Skills
Basic metalwork
Time and cost
Three hours and approximately £20
What I learnt
How to craft metal and tap threads.
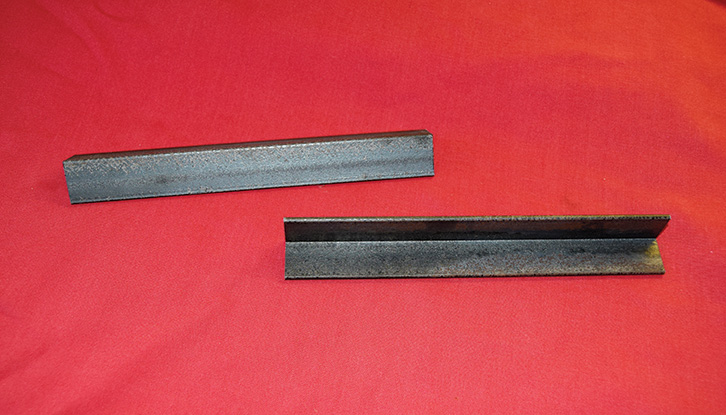
1 Cut two pieces of the angled steel, each measuring 210mm.
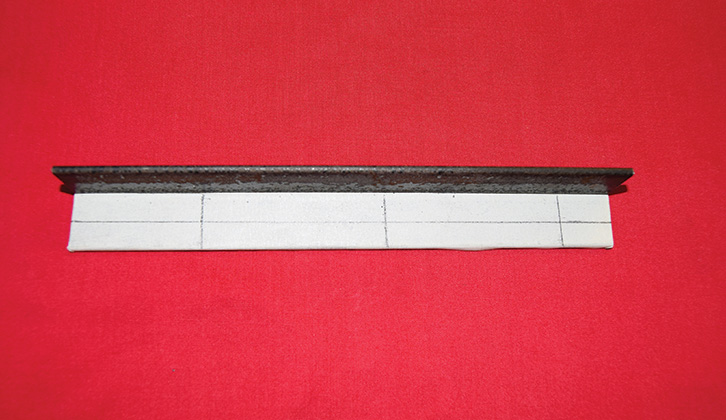
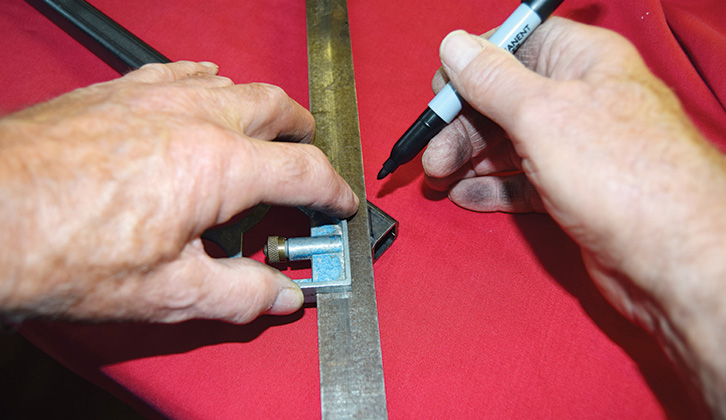
2 Put masking tape on one inner surface of one piece. Mark the centre line and points at 50mm, 120mm and 190mm.
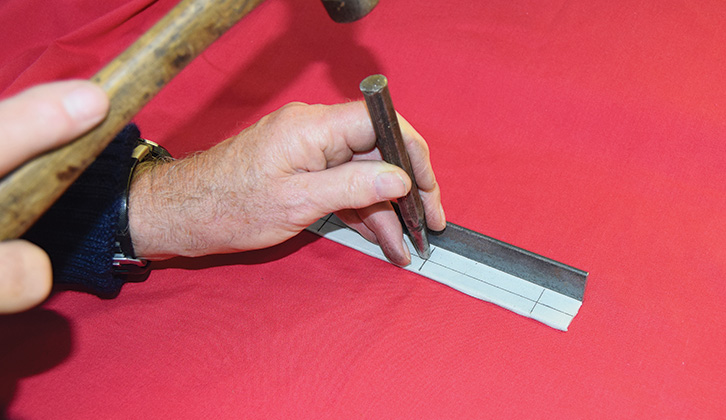
3 Centre pot the three marks.
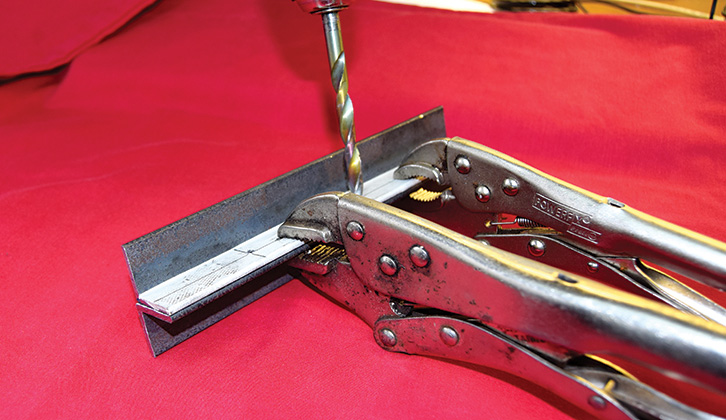
4 Using grips, clamp the pieces of steel together, then drill through three points using 3mm drill.
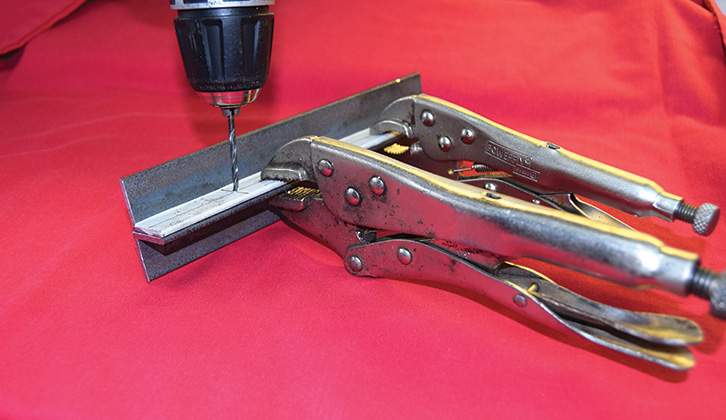
5 Enlarge holes using 8mm drill.
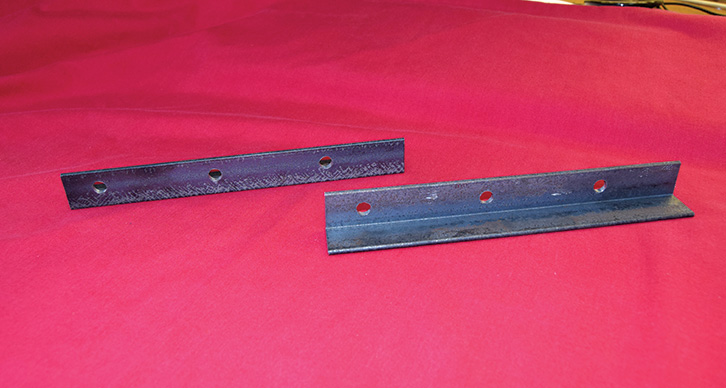
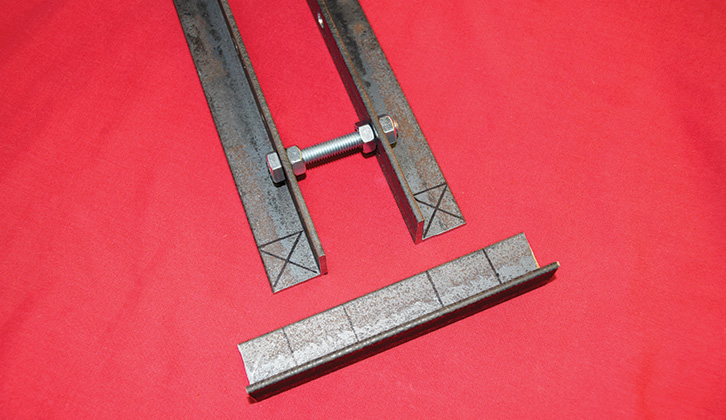
6 The pieces of steel after drilling. These form sides of the puller.
7 Cut a 130mm piece of angled steel to form bottom member.
8 Temporarily assemble the side members with M8 x 55 bolts and nuts. Place 130mm strip of steel centrally and mark either side of the side members.
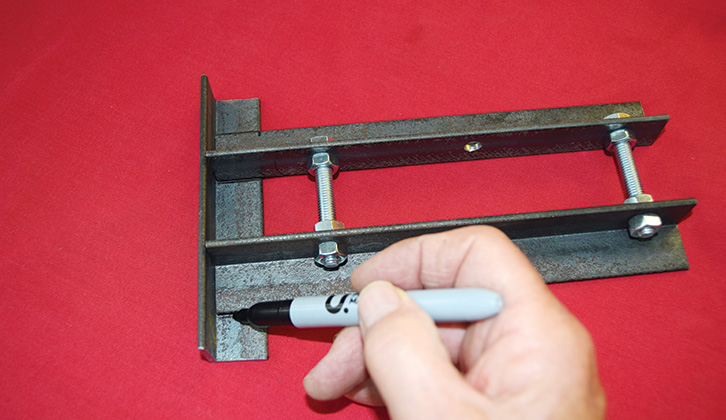
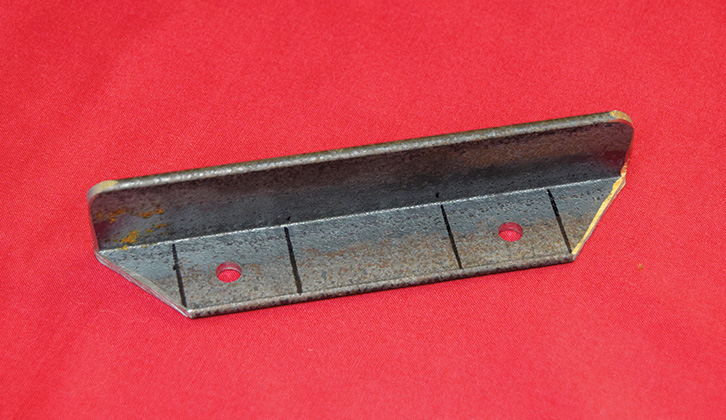
9 The bottom member after marking up. Note marked-up area on bottom of the two side members, with centre identified.
10 Clamp bottom member on one side; centre pot and drill through opposite centre with 3mm pilot drill, before enlarging to 6mm.

11 Clamp together with M6 x 12 bolt, then drill the other side in the same way.
12 Measure and cut away 45-degree sections from support bottom.
13 Mark 45-degree angle on end of 20mm x 20mm steel box section.
14 Using the hacksaw and file, create a profile as shown.
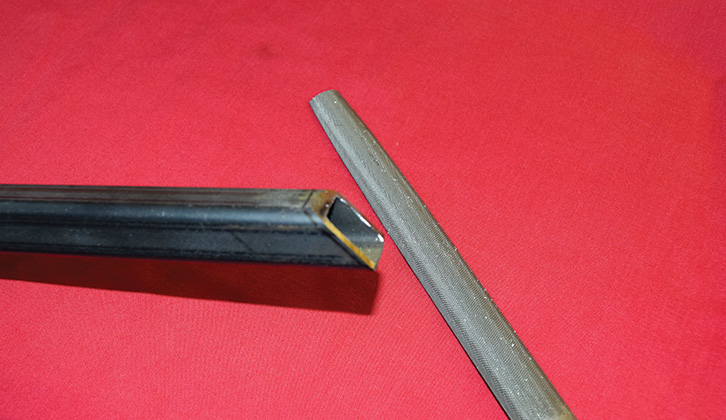
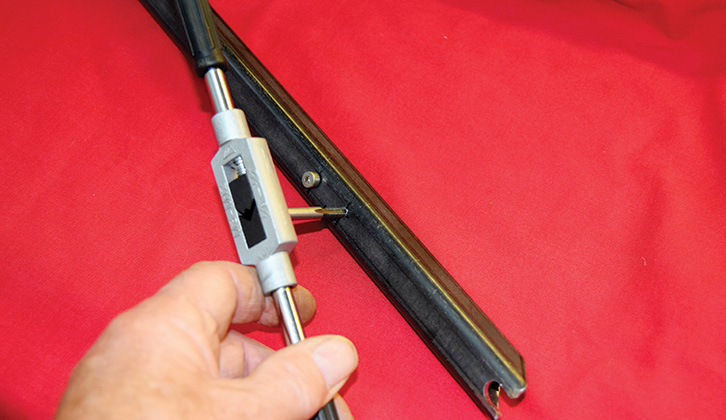
15 Using a round file, make a slot in the end. This should comfortably accommodate end of steel peg.
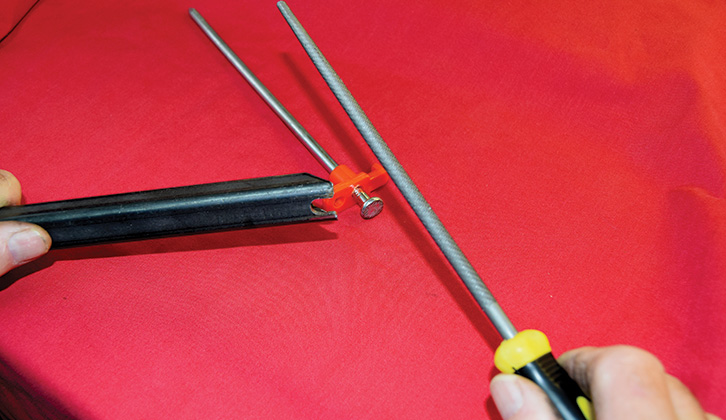
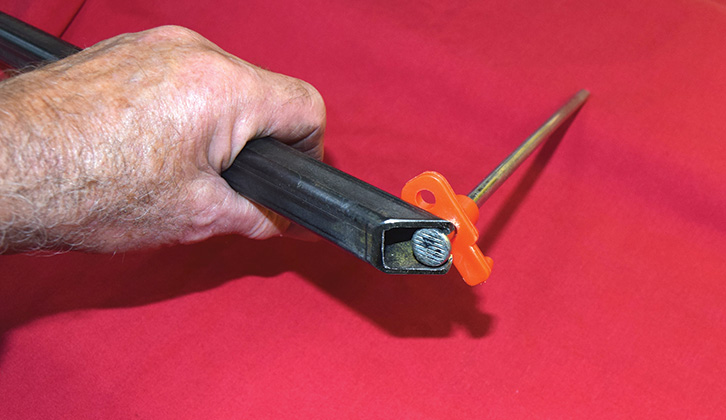
16 End of peg located in slot.
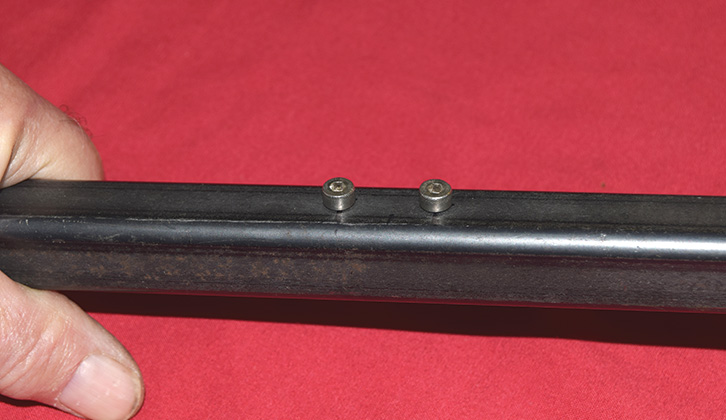
17 Mark up 20mm x 20mm box steel at 110mm and 130mm.
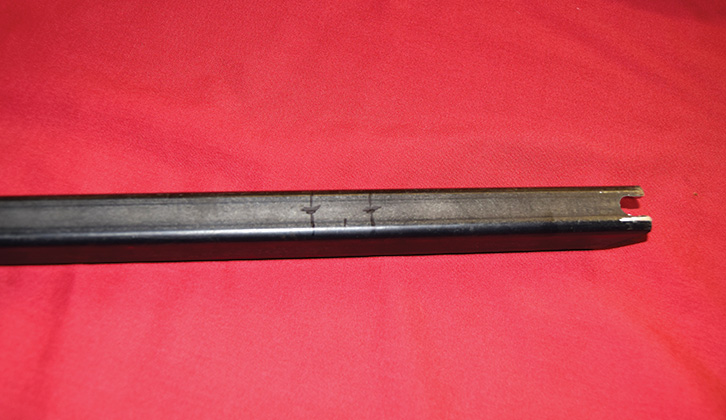
18 Centre pot then drill both holes with 3.5mm drill; tap M4 thread in each.
19 M4 x 6 cap-head screws, placed temporarily in tapped holes, used to locate lever on support fulcrum bolt.
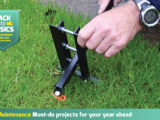
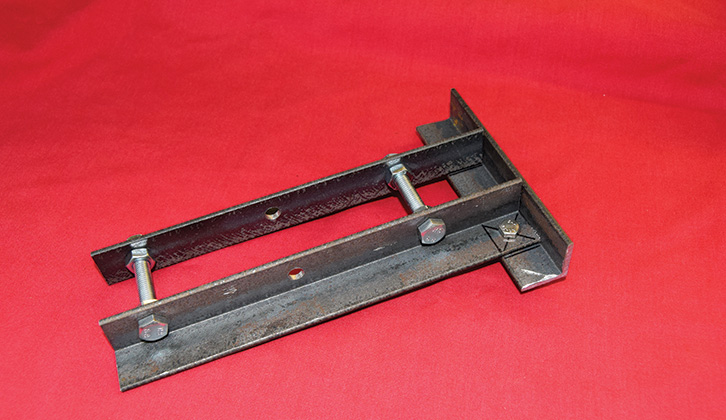
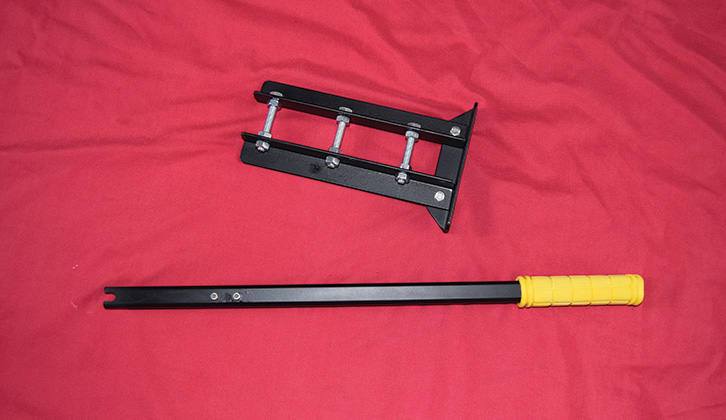
20 The completed peg puller!
After more great DIY inspiration? Then head to our Back to Basics: DIY & Maintenance category, where you’ll find some brilliant projects and ideas to try out.
Future Publishing Limited, the publisher of practicalcaravan.com, provides the information in this article in good faith and makes no representation as to its completeness or accuracy. Individuals carrying out the instructions do so at their own risk and must exercise their independent judgement in determining the appropriateness of the advice to their circumstances. Individuals should take appropriate safety precautions and be aware of the risk of electrocution when dealing with electrical products. To the fullest extent permitted by law, neither Future nor its employees or agents shall have any liability in connection with the use of this information. You should check that any van warranty will not be affected before proceeding with DIY projects.
You’ve got your caravan in order – it’s now time to find the ideal place to head to for your tour! If you need a helping hand, our guide to the best caravan sites is full of ideas.
If you’ve enjoyed reading this article, why not get the latest news, reviews and features delivered direct to your door or inbox every month. Take advantage of our brilliant Practical Caravan magazine SUBSCRIBERS’ OFFER and SIGN UP TO OUR NEWSLETTER for regular weekly updates on all things caravan related