
Many of us will have had the annoying experience of having to change a caravan road wheel after sustaining a puncture.
This is never pleasant and, more often than not, happens at the most inconvenient times, in the most awkward spots and the most untoward weather.
The majority of caravans are fitted with wheels held on with four or five bolts, screwed into threaded holes on the main brake drum hub assembly.
Wheel attachment
In my experience, the current method for attaching the wheels results in one or two annoying problems. When you are trying to remove or reattach the wheel to the hub, it is pretty difficult to manoeuvre a wheel and tyre weighing about 25kg while you are trying to get a wheel bolt out of or into the hub; the weight of the wheel takes over, making it unwieldy. It is particularly difficult to reattach the wheel – taking its weight requires two hands, while trying to align and screw the bolt back into the hub can be arduous (one of those times when a third hand would be, well, handy!).
Fortunately, there is a fairly straightforward way to get around this annoying problem. The alignment spigots described here offer a simple, cost-effective solution to the problem of aligning the caravan wheel. All in all, the task is easy, too, requiring just two M12 bolts, a few basic tools and half an hour’s labour.
Safety provisos
1. Before trying to remove the wheel, always apply the caravan brake. If possible, leave the van attached to the braked tow car, for extra stability. Lower the four corner steadies, but do not try to use these to raise the van off the road. An appropriate wheel-jack should be used, placed under the chassis (see: how to fit an Al-Ko side-lift jack).
2. Do not place any part of your body underneath any part of the caravan; in the event of it falling off the jack, serious injury or worse could result.
3. Stow some latex gloves with the jack and wheel-brace. This can be a very grimy operation!
Parts needed to make alignment spigots to replace a caravan wheel
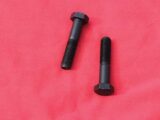
Two M12 x 60 part-threaded high-tensile steel bolts with fine thread (1.5mm pitch). I sourced mine from eBay for £6.50.
Note: This thread size is the usual for wheel studs, but check the size you have before buying. It’s advised not to opt for stainless-steel bolts, as cutting and filing them will be difficult.
Tools
- Hacksaw
- File
- Bench vice
A step-by-step guide to using alignment spigots to replace a caravan wheel
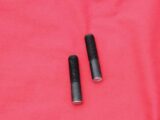
1. M12 x 60 bolts before cutting off hex portion with hacksaw.
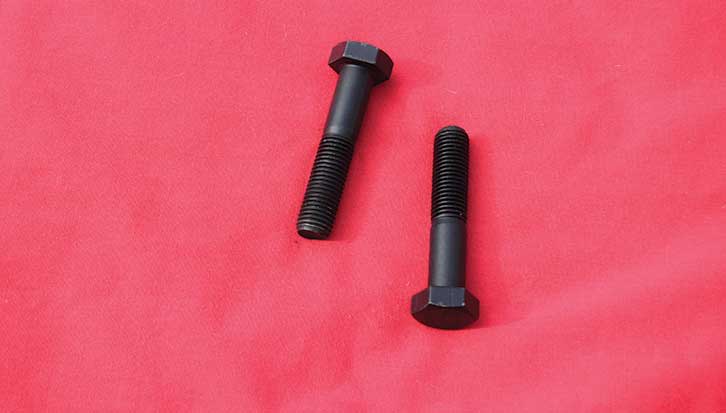
2. With hex portion removed, use file to deburr cut edge.

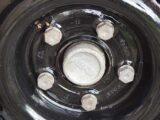
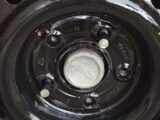
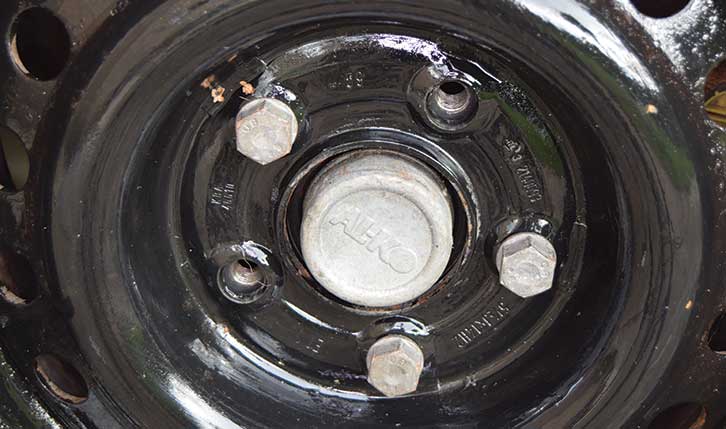
3. Wheel before removal, with securing bolts in place.
4. Remove two of the wheel bolts in the case of a five-bolt wheel. For a four-bolt wheel, remove the two opposing bolts.
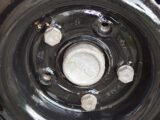
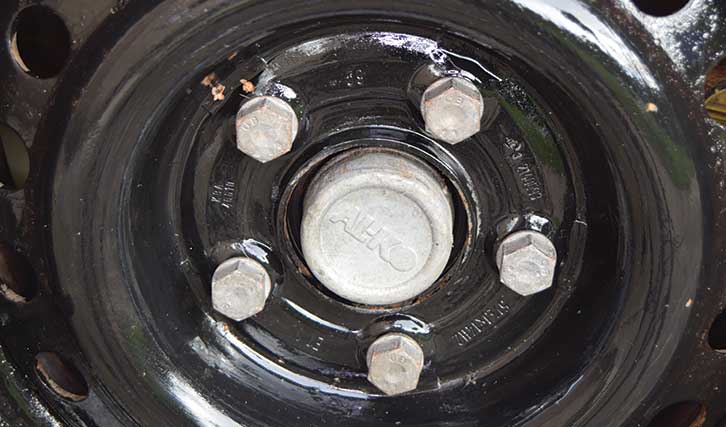
5. Insert sawn-off bolts (spigots) into threaded holes vacated by the wheel bolts. They only need to be finger-tight.
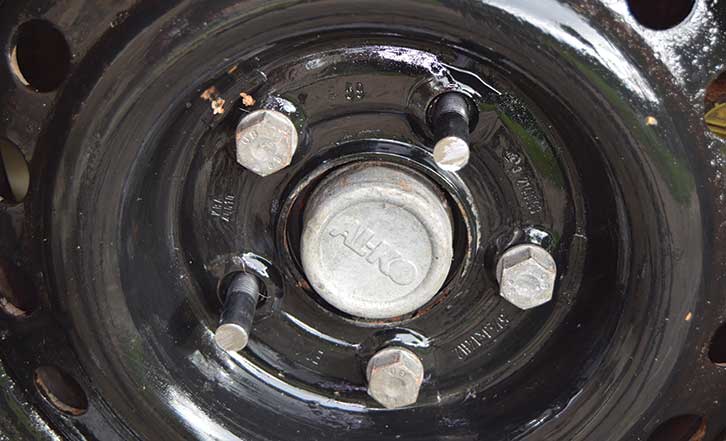
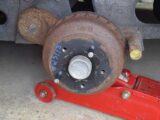
6. Wheel still located after remaining wheel bolts have been removed. Wheel can now be pulled away from hub.

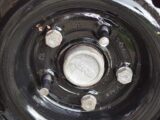
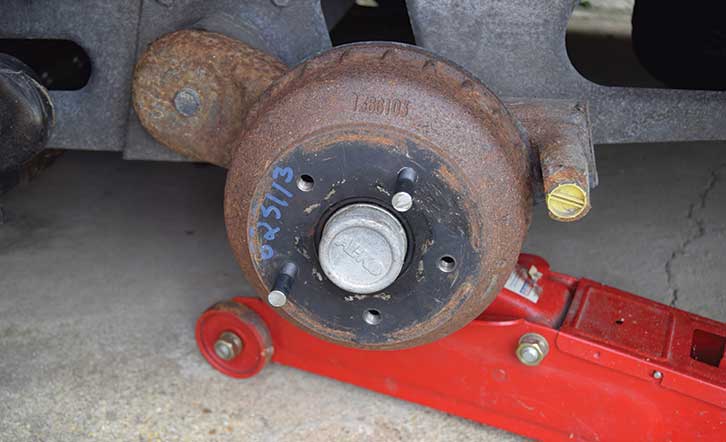
7. Hub with locating spigots in place, ready to receive wheel on replacement. Remaining three holes will be aligned, ready to receive securing bolts. Once in place, remove spigots and screw in two remaining wheel bolts. Check for tightness all round.
Interested in some more DIY? Then find out how to fit low-cost wheel-stands, ideal for when your van will be inactive for periods of time.
Future Publishing Limited, the publisher of Practical Caravan, provides the information in this article in good faith and makes no representation as to its completeness or accuracy. Individuals carrying out the instructions do so at their own risk and must exercise their independent judgement in determining the appropriateness of the advice to their circumstances. Individuals should take appropriate safety precautions and be aware of the risk of electrocution when dealing with electrical products. To the fullest extent permitted by law, neither Future nor its employees or agents shall have any liability in connection with the use of this information. You should check that any van warranty will not be affected before proceeding with DIY projects.
If you’ve enjoyed reading this article, why not get the latest news, reviews and features delivered direct to your door or inbox every month. Take advantage of our brilliant Practical Caravan magazine SUBSCRIBERS’ OFFER and SIGN UP TO OUR NEWSLETTER for regular weekly updates on all things caravan related.