
Many caravans spend a great deal of their life standing stationary, parked up on the drive or in some ‘away from home’ storage venue.
This creates a knock-on problem, in that if the caravan is not moved periodically, the tyres can ‘flat spot’ – that is, the profile flattens where it meets the ground, which can create unwanted wheel vibrations once you’re on the move.
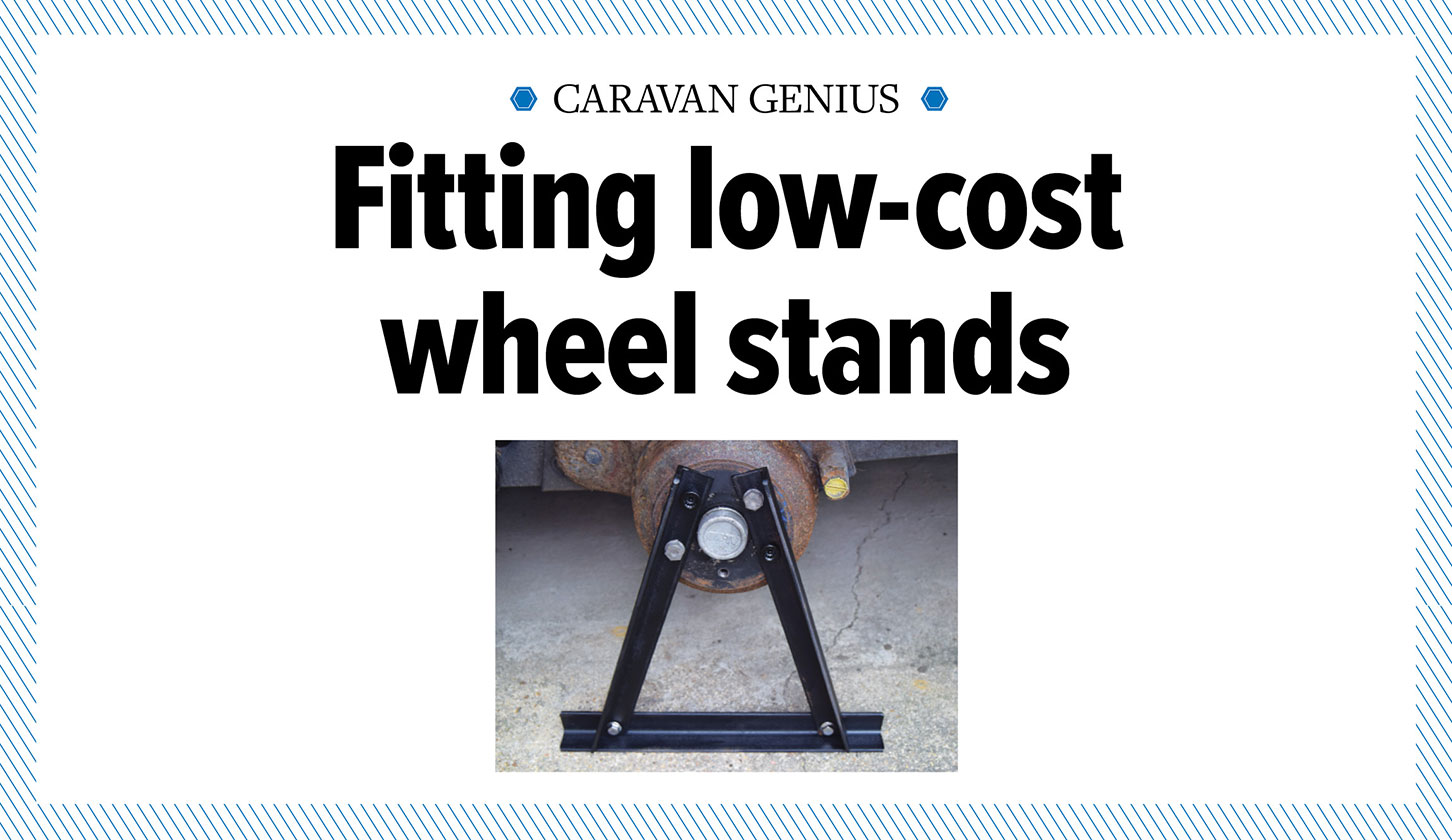
To offset this problem, many van owners remove the wheels during long periods of inactivity and replace them with wheel stands (sometimes referred to as ‘winter wheels’, because this is the season when they are commonly deployed).
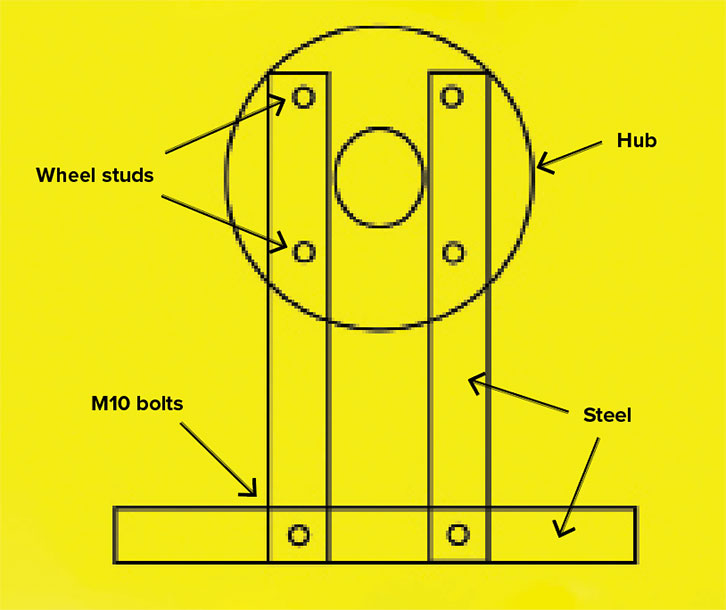
These wheel stands usually comprise a universally drilled plate, suitable for four- and five-stud wheels, to which is attached a metal stand, which is designed to sit on the ground and support the plate.
These units are bolted to the wheel hub in place of the wheel, before being lowered to the ground, whereupon they take the weight of the van.
The wheel, meanwhile, can be stored away from the van in a secure, dry environment, ready for use once the van is needed.
There are two advantages to deploying a wheel stand. First, it eliminates the flat spotting mentioned above. Second, it also provides an additional layer of caravan security, in that any would-be thief will have to supply their own wheels before they can tow it away, which decreases the options open to them.
Commercially available wheel stands can also incorporate lockable plates, which will act as an additional deterrent.
As commercially available sets cost upwards of £100 per pair, I have outlined an alternative, low-cost wheel stands option. I have also included a simple security feature, which costs less than £3.
Note: My van has 14” five-stud wheels, which form the basis for this article. Different-sized caravans may, of course, have different wheels, in which case the dimensioning will need to vary accordingly. I have also included a sketch outlining the approach to be taken if your vehicle has four-stud wheels.
Safety: To install these low-cost wheel stands, it is necessary to lift the van and remove the wheels. It is ESSENTIAL that the chassis is safely and securely supported on axle stands for the duration. It may be tempting to leave it on the jack, but it will only end in tears. DO NOT use corner steadies as support. They are for steadying, not main support.
- We talk you through the process of fitting an Al-Ko side-lift jack
Tools needed to fit low-cost wheel stands
- Power drill
- Hacksaw or angle grinder with metal cutting disc
- Method of holding steel during cutting and drilling (I used a Workmate)
- Wheel brace to suit wheel nuts/bolts
- 17mm AF spanners (for M10 bolts/nuts)
- Centre punch (for pilot hole drill location)
- 5mm HSS drill (for drilling the pilot holes for the larger drills)
- 10mm HSS drill
- 12mm HSS drill*
- Appropriate files for deburring and possible hole enlargement
- Jack capable of lifting the chassis weight of the caravan
- Axle stands
- Right angle
- Marker pen
*This is for the wheel bolt clearance holes. The size may vary according to the bolt/studs on your van. Many power drills will only accommodate 10mm drills, so you may need to drill 10mm holes, then enlarge them, using a round file, until the wheel bolts/studs pass freely.
Parts list
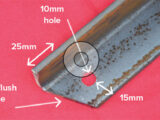
Mild steel angle 40 x 40 x 6mm to suit
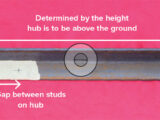
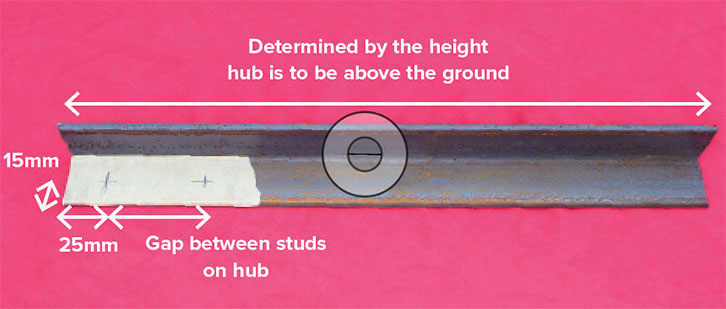
The lengths required will be decreed primarily by the distance above the ground the hub is to be suspended. Needless to say, these dimensions will vary between caravans, so it will be necessary to provision accordingly.
I bought scrap off-cuts from a metal fabricator for an all-up price of £10.
Alternatively, suitable steel lengths can be bought from eBay, costing in the region of £40.
- 1 roll of masking tape
- 4 M10 x 25 stainless steel flange bolts (£7 for 10)
- 4 M10 stainless steel flange nuts (£3 for 10)
Note: Zinc-plated steel variants can be used, which will be cheaper, but not quite so weather resistant as stainless steel.
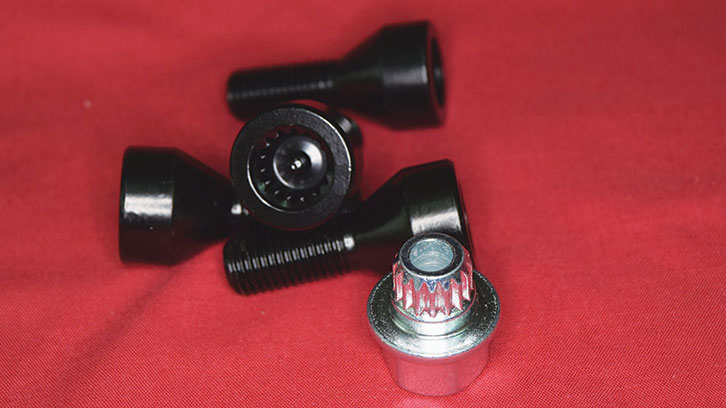
- 4 M12 x 1.5 locking wheel bolts, tapered seat (black) (£2.66)
Note: The locking wheel bolts were chosen to fit my van, that is, they are bolts and the threads are M12 x 1.5mm thread pitch, matching the bolts in use.
You’ll need to note the thread size and pitch on your caravan before buying suitable locking bolts/nuts.
Total expenditure for two wheel supports with locking wheel bolts was £22.66.
All parts, apart from the steel, were readily sourced from eBay. Even resorting to eBay for the steel, the price is still substantially below commercial variants.
Step by step guide to fitting low-cost wheel stands
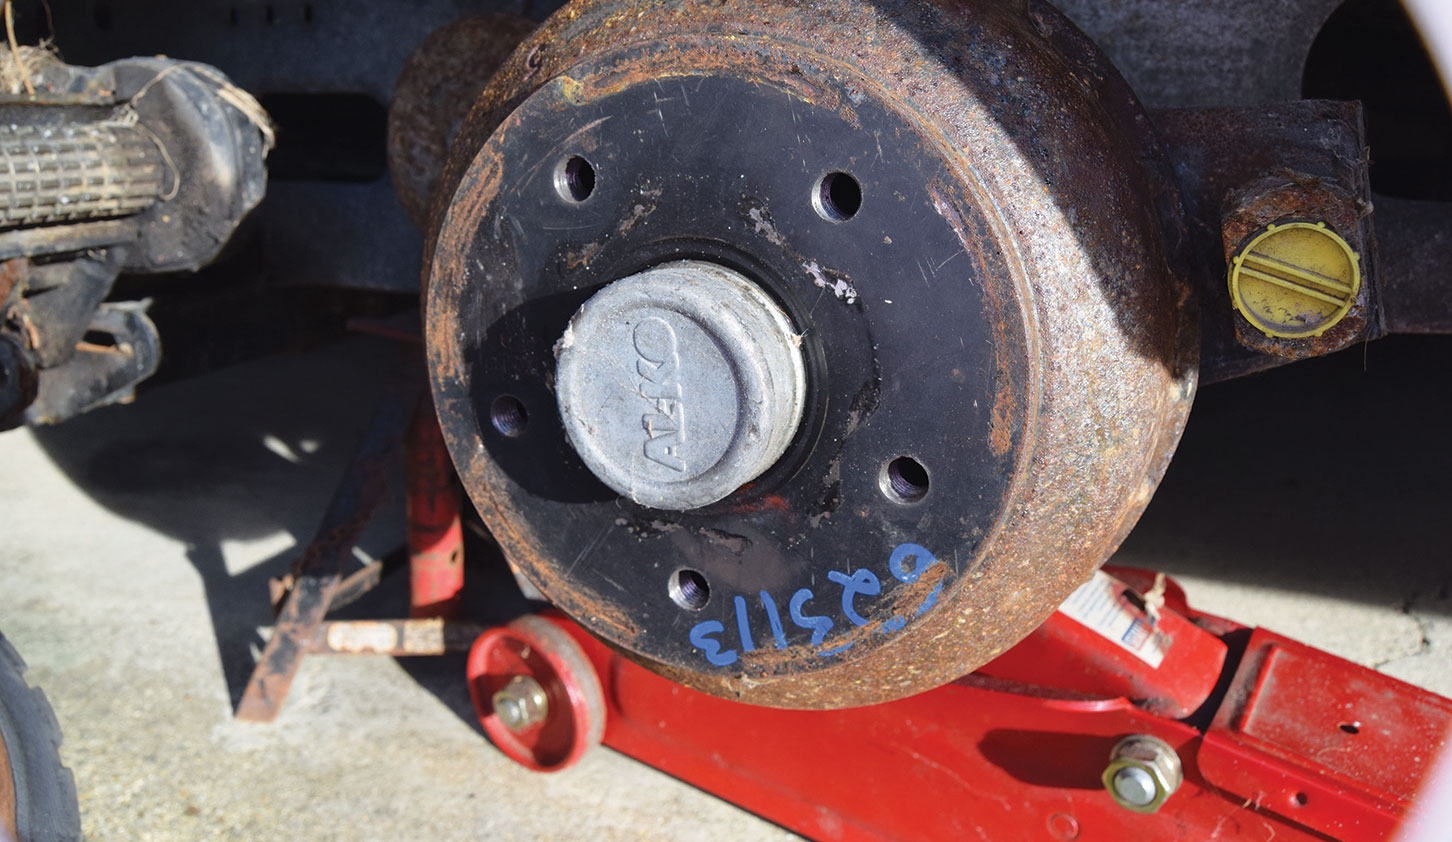
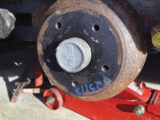
1. Wheel hub with wheel removed. Note secure axle support.

2. Support leg. Two are required per wheel station. Centre the pilot hole locations before drilling hole to suit stud size. Note that second one is to be a mirror image.
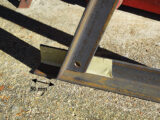
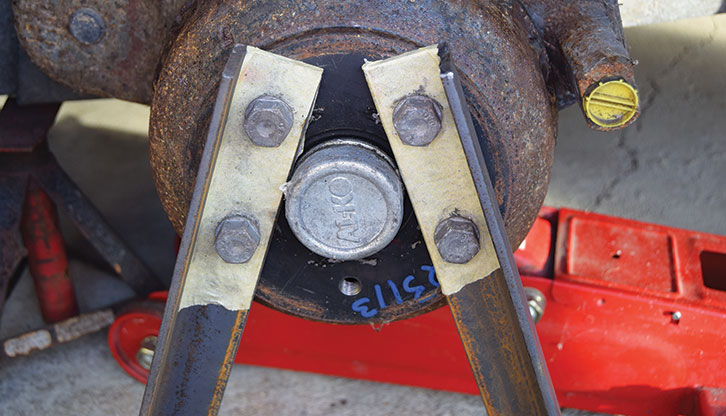
3. Support legs mounted on hub to check they fit.
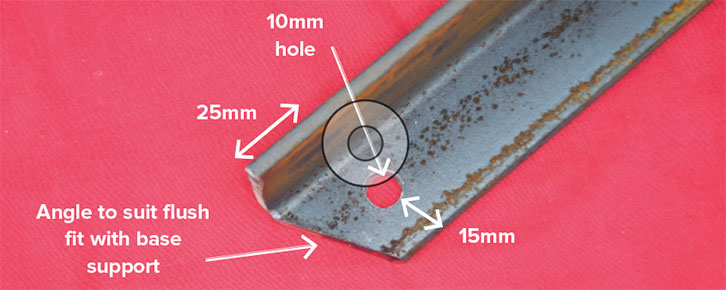
4. Cut and drill support leg as shown. Note the opposing leg will be a mirror image.
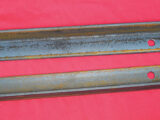
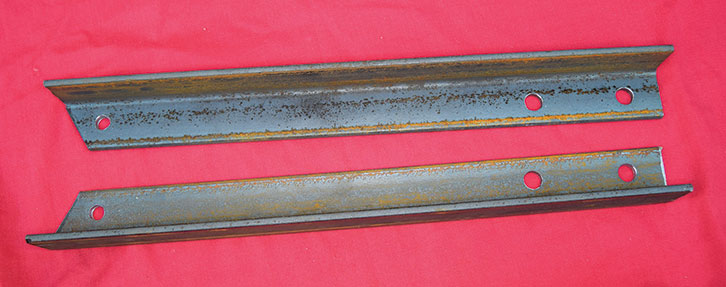
5. Support legs after drilling.
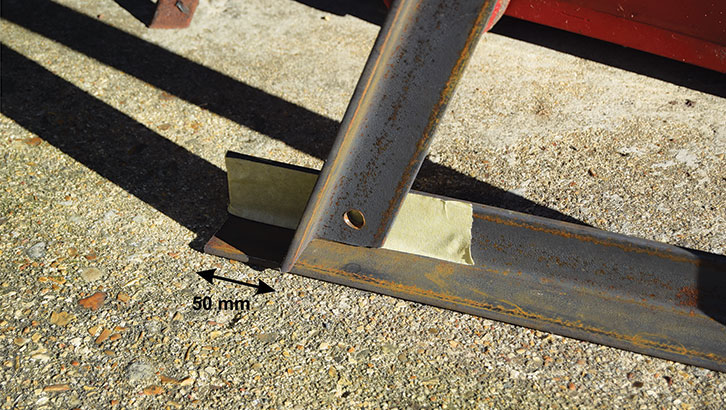
6. Base of support. Cut length to suit with 50mm overlap at each end
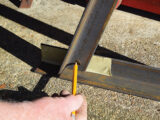
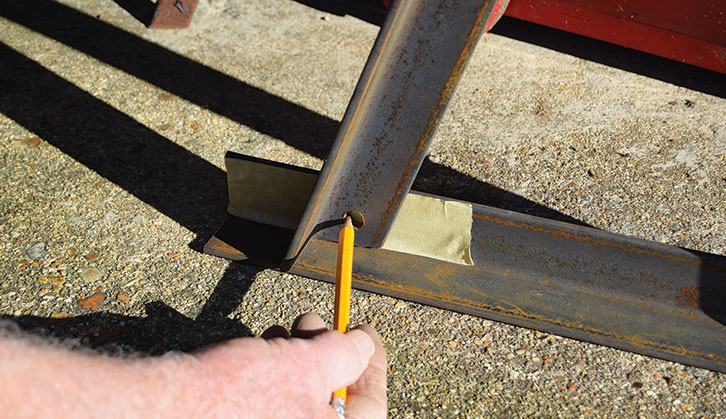
7. Using a pencil, mark the hole position on the base.
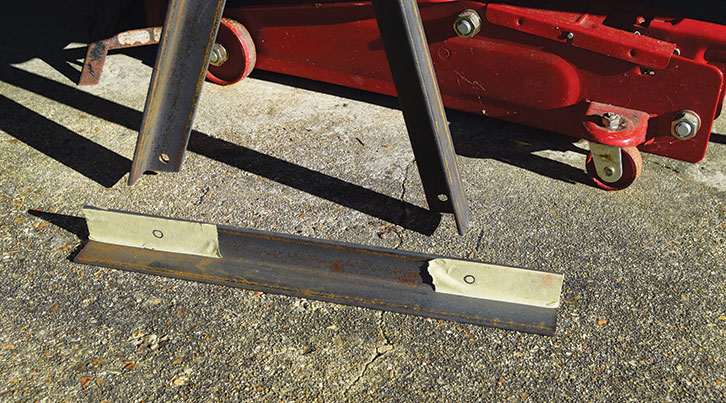
8. Base showing M10 drilling hole positions.
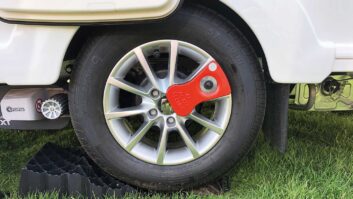
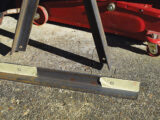
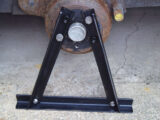
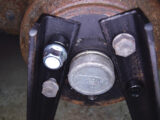
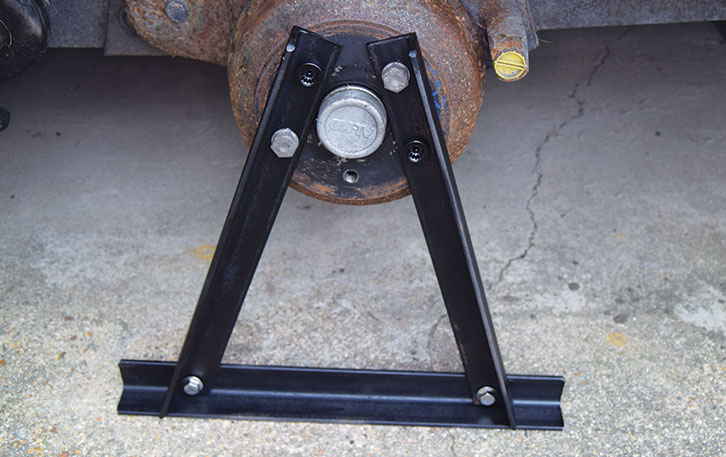
9. Wheel support deployed. I applied primer before painting the support black. Note two security bolts fitted.
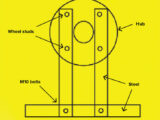
10. Suggested configuration, four-stud hub
11. Security bolt key inserted.

After more DIY projects? Then why not try these:
- We talk you through the process of replacing a jockey wheel
- We explain how you can repair a Whale Watermaster pump
Future Publishing Limited, the publisher of Practical Caravan, provides the information in this article in good faith and makes no representation as to its completeness or accuracy. Individuals carrying out the instructions do so at their own risk and must exercise their independent judgement in determining the appropriateness of the advice to their circumstances and skill level. Individuals should take appropriate safety precautions and be aware of the risk of electrocution when dealing with electrical products. To the fullest extent permitted by law, neither Future nor its employees or agents shall have any liability in connection with the use of this information. You should check that any van warranty will not be affected before proceeding with DIY projects.
If you’ve enjoyed reading this article, why not get the latest news, reviews and features delivered direct to your door or inbox every month. Take advantage of our brilliant Practical Caravan magazine SUBSCRIBERS’ OFFER and SIGN UP TO OUR NEWSLETTER for regular weekly updates on all things caravan related.