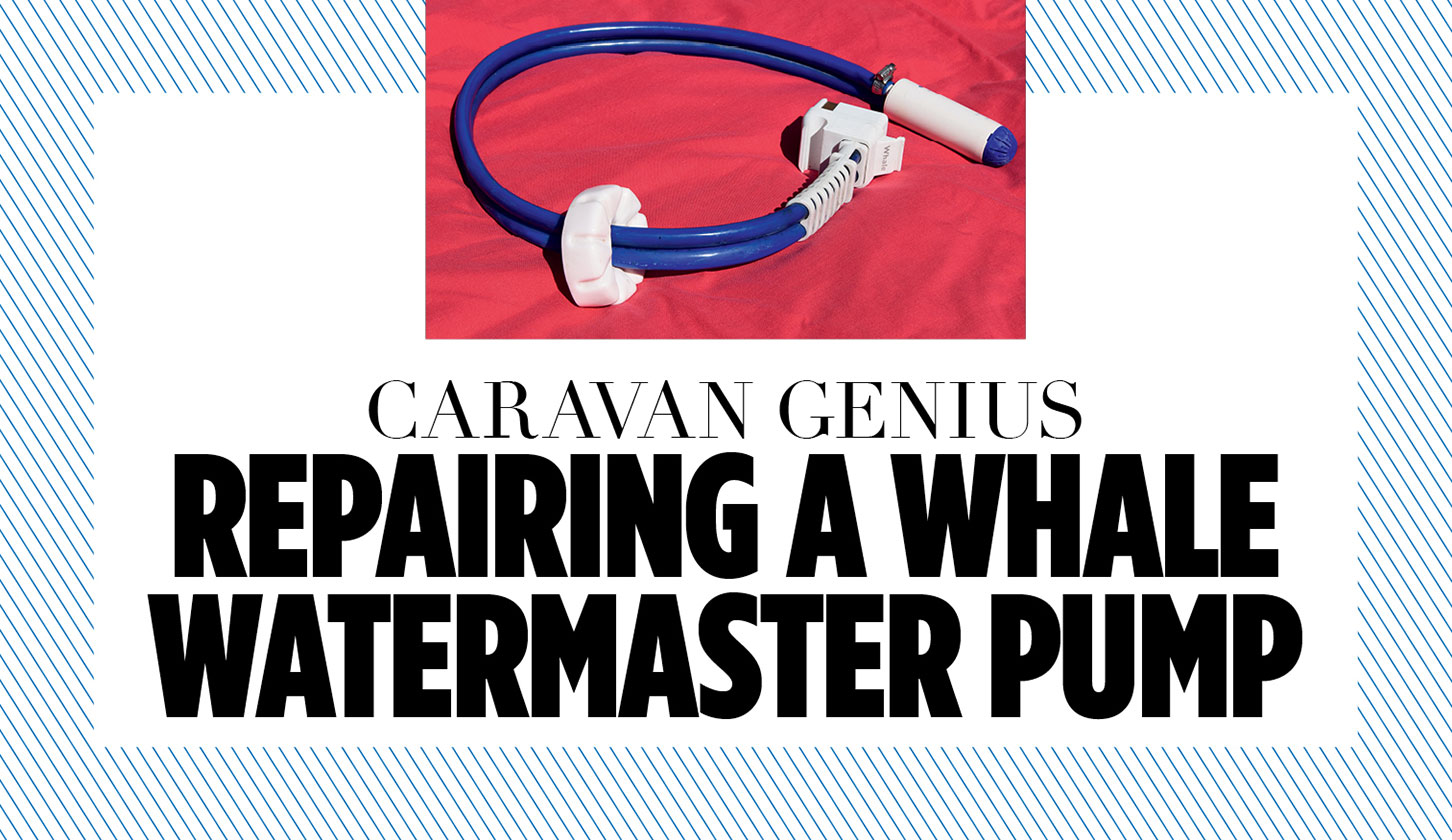

One of the most common fresh-water supply pumping systems utilised by caravans is the Whale Watermaster.
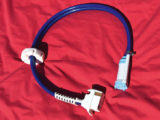
The Watermaster assembly itself consists of a water/12V interface connector that mates with its socket counterpart on the side of the van, and a submersible pump which is lowered to the bottom of an appropriate water container, which in my case is a 40-litre Aquaroll, containing the fresh water.
The pump is connected to the interface connector by a length of interconnecting tube for the water and a 12V supply wire for the pump. Upon turning a tap on in the van, the system is supplied with 12V via two flat copper strips either side of connector which activates the submerged pump. The pump remains active, pressurising the fresh water system until the tap is turned off, whereupon the 12V supply is removed.
- Take a look at our guide to caravan water systems to find out more about how they work too
Surrounded by water
Now the Achilles heel of the submersible pump is – they are submerged. They are designed so that the surrounding water is kept from the internal electrical components of the motor with watertight seals. However, the impeller shaft emerging via a seal, usually an ‘O’ ring, from the motor housing, can be prone to failure over time, resulting in the motor flooding and no longer functioning.
The seal where the supply wire enters the motor housing can also leak, causing failure.
Another cause of failure is one of the pumps continuing to run after the external water container has been emptied.
In normal use, the water surrounding the pump in the container serves to keep it cool while operating. However, once the water container runs dry, if the situation hasn’t been noted and rectified, the pump can continue running, becoming progressively hotter until terminal failure occurs.
This is probably the most common cause of water pump demise. You will find that some submersible pumps have ‘Do not run dry’ printed on them by way of a warning.
Any of these failures can occur in normal circumstances and usually, they will do so at the most inconvenient times.
If you are lucky, the failure can be progressive (the pump begins running more slowly), giving advance warning, and a pump replacement can be implemented in good time, with minimal inconvenience.
However, failure can also be abrupt, which can be far more disconcerting.
- We talk you through two common water supply problems and how to fix them
Spare assembly
One solution could be to keep a complete spare pump assembly to hand. But Watermaster pump assemblies are not cheap. Browsing the internet recently, I came across prices ranging from £60 to £80.
This article outlines replacing the faulty pump alone – on site should the need arise (and if you’re looking for your next touring destination, our best caravan park guide can help) – with a new pump, in a procedure that will take you no longer than 20 minutes and just uses a pair of pliers, a Pozidriv screwdriver, a flat-bladed screwdriver and wirecutters – all for under £25!
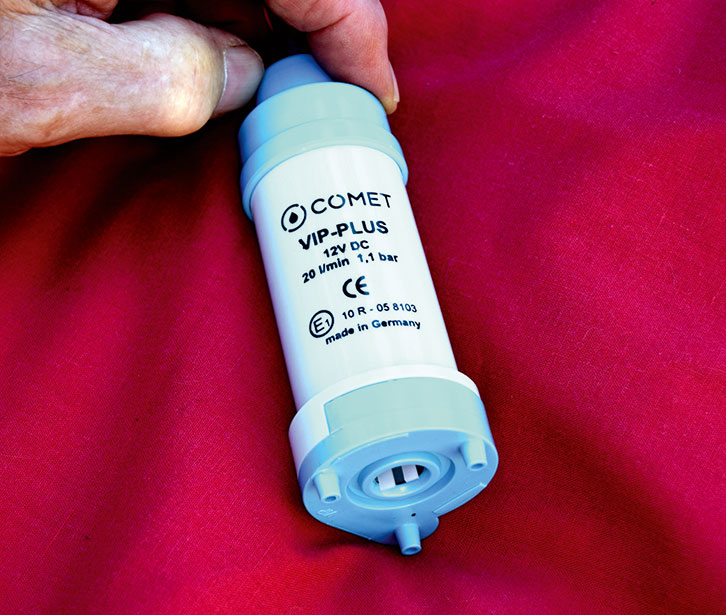
Note that in this case, I have used a Comet pump, rather than a Whale, because the Whale direct replacement costs in the region of £40, whereas the Comet is only £23.75.
The Comet pump, made in Germany, is a quality product with a superior specification to the Whale pump being replaced (20 litres/min as opposed to the Whale’s 16 litres/min flow capacity). It also has a 1.1 bar pressure rating.
Of course, you can always use a Whale pump if you prefer, and the procedure for replacement will remain exactly the same.
Tools you will need for repairing a Whale Watermaster pump:
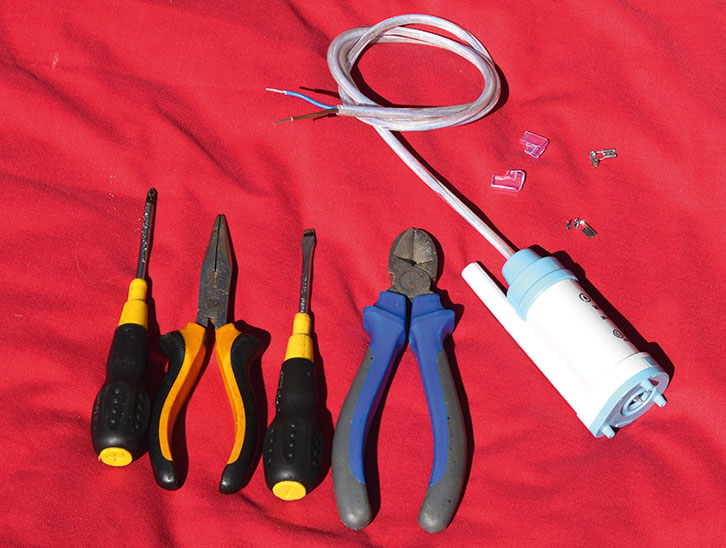
Tools Required
- Pliers
- Wirecutters
- Pozidriv and flat-blade screwdrivers
Parts List
- 1 x Comet 12V Submersible Fresh Water Pump VIP Plus 20 LPM Caravan Motorhome & Boat OR
- 1 x Whale GP1352 Premium Submersible Pump 12V Water Pump Caravan/Motorhome/Boat
- 2 x 4.8mm right angle – L shape flag spade crimp terminals, PVC cover
Note All parts are readily available on eBay
Skills Required
Basic wiring
A step-by-step guide to repairing a Whale Watermaster pump
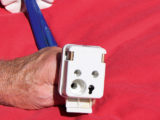
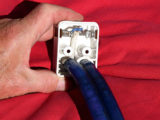
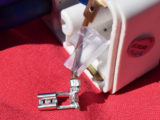
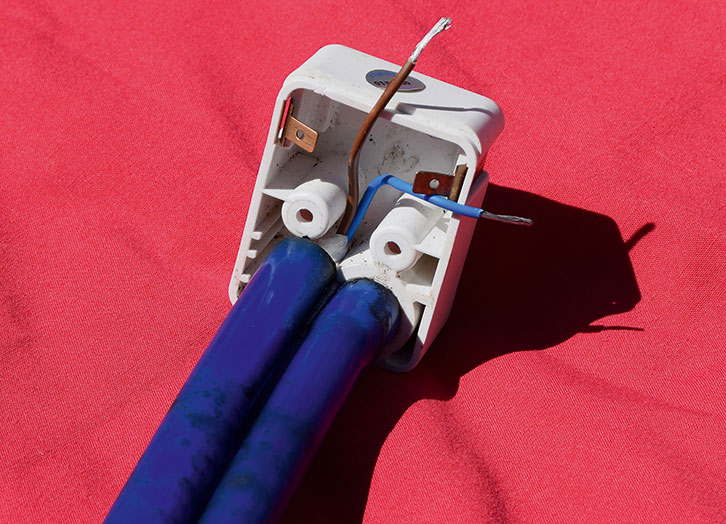
1. Rear view of the connector.
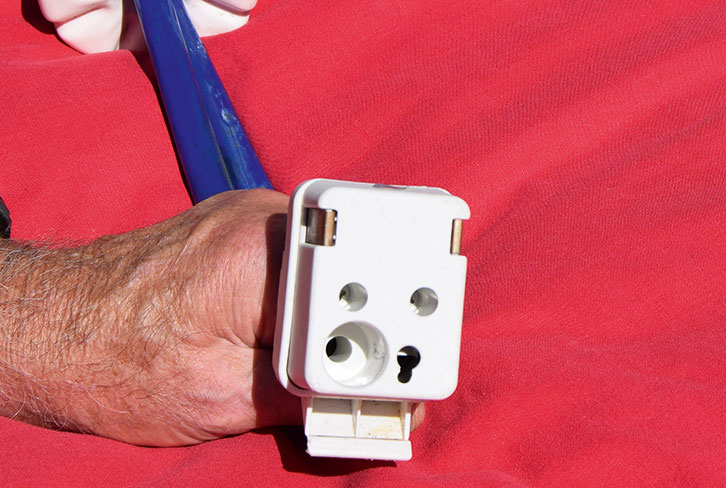
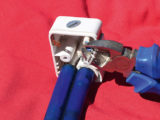
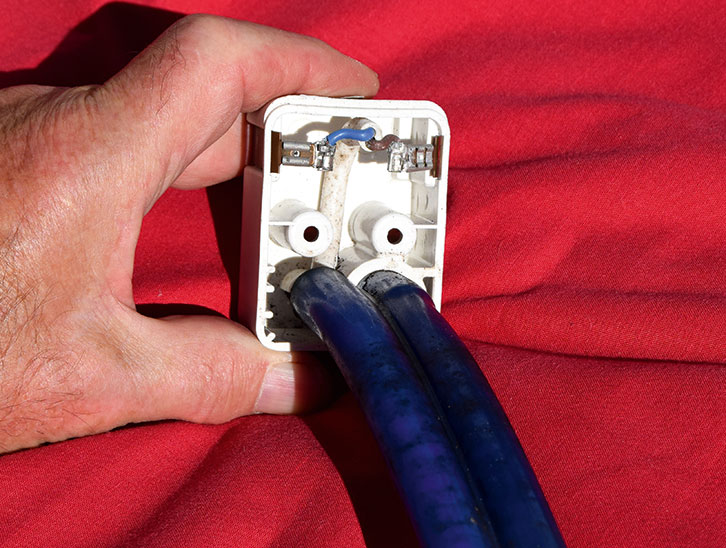
2. Inside connector showing spade connectors. Note the polarity.
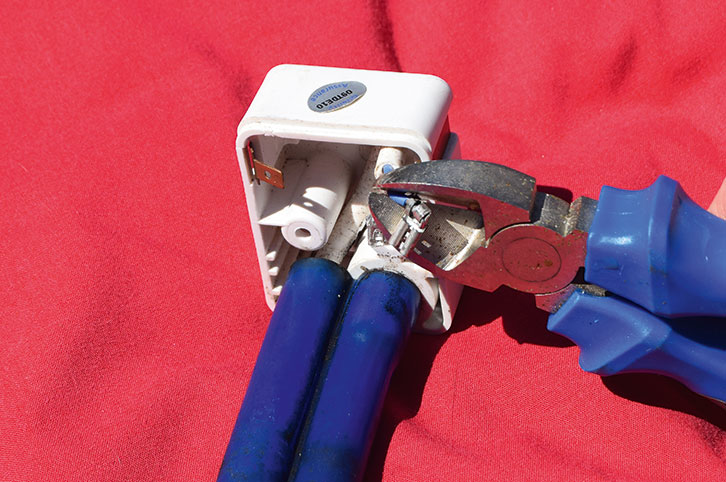
3. Using wirecutters, remove the two spade connectors.
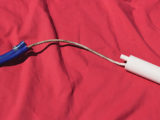
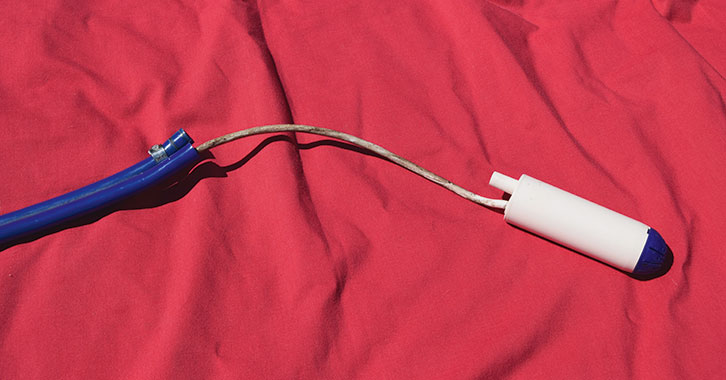
4. Pull out the old pump after disconnecting the hose clip.
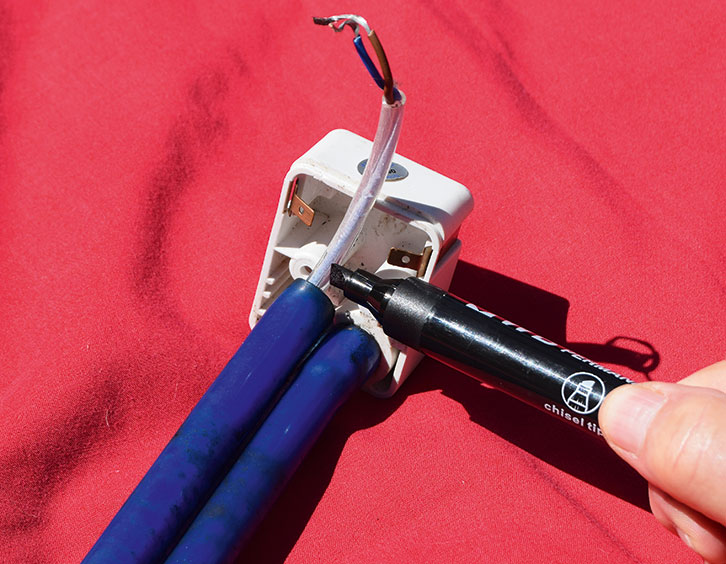
5. Push new cable through guide tube; mark where it emerges. Make sure the pump outlet is fully engaged with the hose.
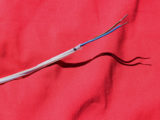
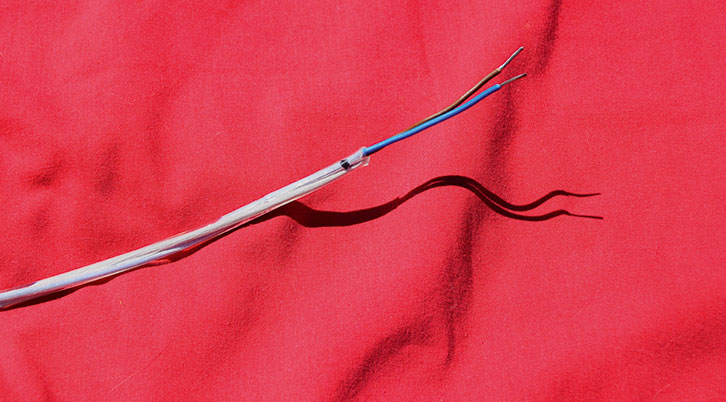
6. With wire withdrawn, prepare the cable end as shown.
7. Cable reinserted and ready for spade connectors.
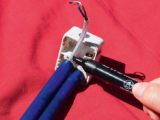
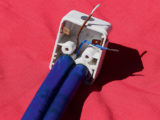
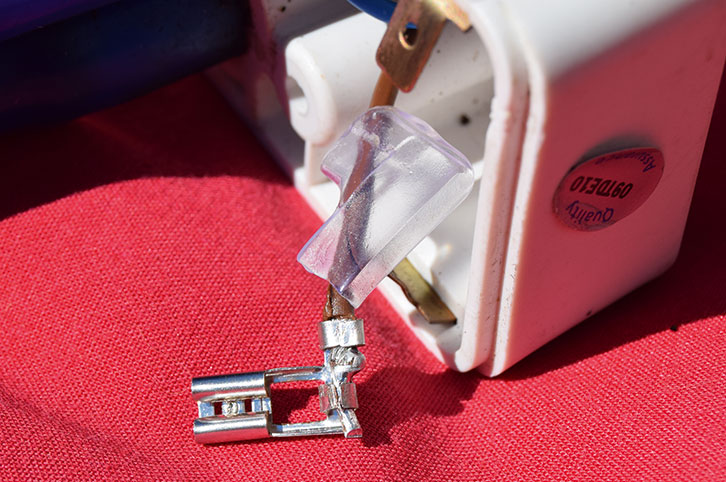
8. Spade connector after crimping tight with pliers. PCV insulator must first be fitted as shown.
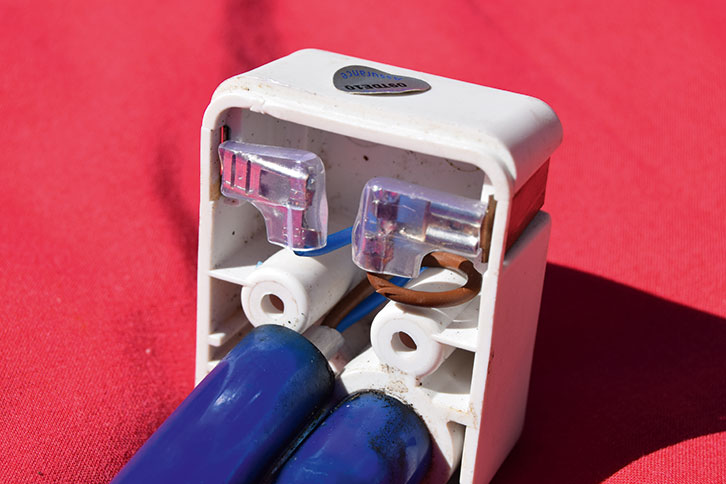
9. Spade connectors in position after crimping. Make sure that the polarity is correct.
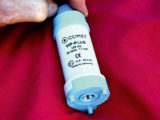
10. Replacement Comet pump.
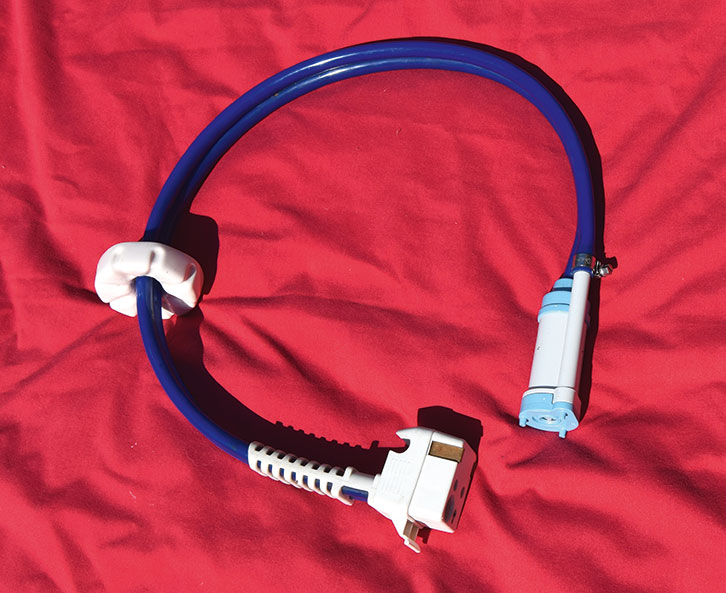
11. The repaired assembly with the new Comet pump fitted.
Looking for more useful DIY projects? Then be sure to check out our guide to how to fit a seven-pin 12S socket to your towbar and our guide to DIY caravan health checks.
Future Publishing Limited, the publisher of Practical Caravan, provides the information in this article in good faith and makes no representation as to its completeness or accuracy. Individuals carrying out the instructions do so at their own risk and must exercise their independent judgement in determining the appropriateness of the advice to their circumstances. Individuals should take appropriate safety precautions and be aware of the risk of electrocution when dealing with electrical products. To the fullest extent permitted by law, neither Future nor its employees or agents shall have any liability in connection with the use of this information. You should check that any van warranty will not be affected before proceeding with DIY projects.
If you’ve enjoyed reading this article, why not get the latest news, reviews and features delivered direct to your door or inbox every month. Take advantage of our brilliant Practical Caravan magazine SUBSCRIBERS’ OFFER and SIGN UP TO OUR NEWSLETTER for regular weekly updates on all things caravan related.