Owning a caravan can be expensive, but getting into the habit of carrying out some quick DIY checks every few months or so – or at least before you set out on significant trips – can help you spot problems early, before they develop into a failure or an expensive repair job.
Now, with lead times on many parts extended, it’s not just cost you need to worry about, either – you might miss your holiday entirely if those parts are on back order.
And many, many things are (ask anyone who has recently ordered an electric vehicle!). So it’s more important than ever to look after your stuff and maximise its longevity.
Battery checks
We’ve said it before, but we’ll say it again – 12V power is crucial for running all of the elements in your caravan and with a flat battery, all you have is a 230V extension cable on wheels. Unless you are plugged into the mains, nothing works.
That 12V leisure battery powers the lighting circuit, the water pump, the toilet flush, the fridge, the heating system and the cooker/hob ignition. Some systems are designed to work without power (such as piezo ignition on gas hobs), but not all can function that way.
Accurately checking your leisure battery for voltage and condition should become second nature.
Ideally, you need to invest a tenner in a multimeter – especially if you have a basic control panel that only has LEDs or LCD segments indicating voltage.
These are simply not precise enough: 0.9V can be the difference between a fully charged battery and a flat one. A fully charged leisure battery should be around 12.9V when full. Anything under 12V is a concern and needs urgent recharge.
If you don’t fancy messing about with a multimeter, there are lots of options available on the market that allow you to remotely monitor battery voltage with an app.
These can be short-range devices that transmit a few metres, for £20 or so, or posher versions that will set you back several hundred quid.
An alternative is a DIY tracker. These cost from £35 (plus about £70 a year subscription) and allow you to monitor battery voltage remotely and pinpoint your van’s location – a must if you store it away from home.
Old batteries can fail over time – they don’t last forever – but there are a couple of things to look for. First, if you have lead-acid batteries, you need to check the acid level. Wear gloves (vinyl ones are best for acid) and remove the caps covering the cells (a coin is usually fine for this).
Make sure that liquid is covering all of the lead plates inside – this can be difficult to see, so use the torch on your phone.
If they need topping up, use distilled water, which is available from motor factors. Don’t use tap water, because the minerals can degrade the electrolyte.
When you are inspecting the battery, the other thing to look for is any damage to the casing, because a battery that is failing often starts to bulge at the sides.
If you can see any evidence of bulging, the battery must be isolated and removed urgently – they can fail quite spectacularly if they are left in place.
While lead-acid, AGM, gel and lithium batteries do not require such regular maintenance, they still need checking every so often for casing bulges or splits.
Gas systems
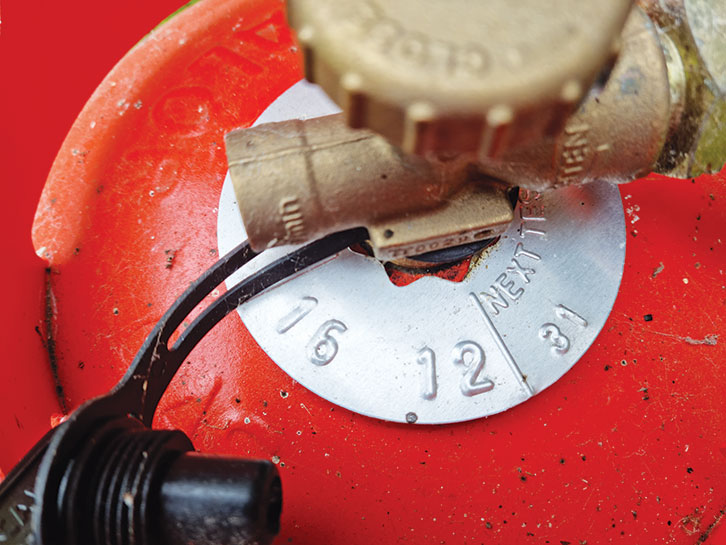
You’ll soon know if you run out of gas, because the hob will stop working. But before you reach this point, it’s worthwhile checking the weight of your gas bottle. This is the most reliable way of working out how much gas you have left.
The tare weight is the empty weight and is often stamped on an aluminium collar around the tap on the bottle.
A 6kg Calor propane cylinder weighs 7.3-10.9kg when empty and 15-17kg when full. A 13kg cylinder weighs around 13kg empty and 25-30kg full.
One method for weighing the cylinder is to remove it from the caravan. Next, you stand on the bathroom scales and note your weight in kilos. Then holding the gas cylinder, stand on the scales again and note the extra weight. The difference is the weight of the bottle plus any remaining gas.
Gas level is difficult to measure – you have both liquid and gas in a pressurised system. There are lots of gadgets for checking pressure, but some are more accurate than others, so seasoned caravanners don’t rely much on gauges.
Gas systems are best checked annually as part of a habitation check – it’s well worth getting this done each year, by a fully qualified caravan engineer or workshop, because it ensures the integrity of the system and ultimately, your family’s safety.
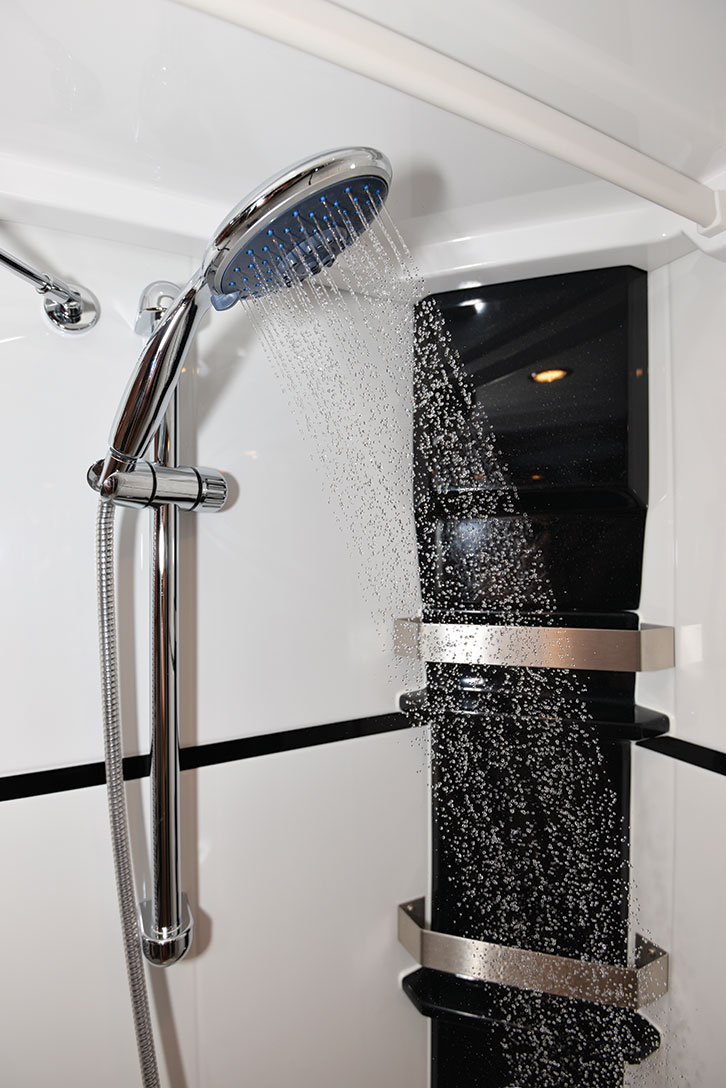
Water systems
Water is the sworn enemy of the caravan. From external bodywork leaks, which can wreak havoc on internal wooden battens or fibreboard, to internal leaks from the plumbing system, keeping water confined to where it’s supposed to be is critical to preserve the healthy longevity of your caravan.
External leaks are not always obvious, so it pays to have a damp check carried out annually as part of the regular habitation check. This can nip simple leaks – such as a failed rooflight seal or a rubber seal perishing around a window – in the bud and help to save you a fortune in the long run.
Once a leak has developed into a stained patch on the ceiling, or the floor or cabinets have gone spongy, the damage is done.
Equally, your nose is a great tool for sniffing out leaks. A ‘wet dog’ smell or signs of excessive internal condensation or mould are red flags – always buy used caravans with your nose!
Plumbing leaks because of frost damage or piping problems tend to be more obvious – either you’ll see a puddle or hear the water pump running flat out. Switch it off and investigate immediately.
If you can’t see any obvious clues, book the van in with your dealer. It’s usually hose clamp connections around taps, joints, connector blocks or water pumps that fail, and tightening with a screwdriver will often fix them.
The other point about water is that at 20-60°C, it can be a breeding ground for legionella bacteria, which can lead to Legionnaires’ disease, a form
of pneumonia that can be fatal.
Regularly clean and sterilise your fresh-water container or tank, and try to avoid inhaling misted droplets of water (that’s how the bacteria can enter your lungs and cause trouble). If you’re a smoker or elderly, you’re far more susceptible.
Legionella doesn’t survive above 60°C, so set your hot water boiler to this temperature and don’t drink water from the tank unless it is boiled (tea and coffee are fine).
Motor movers
Motor movers are all different, so it is difficult to give general advice about their maintenance.
Suffice to say, the vast majority of problems are battery issues, and the mover malfunctioning will be merely a symptom.
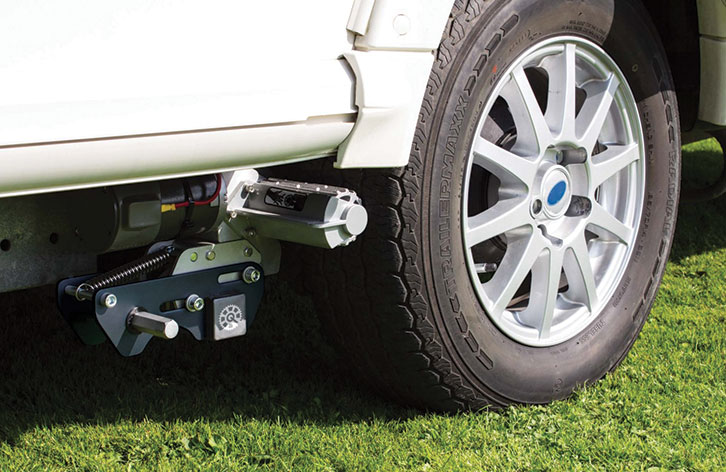
Make sure the actuators work and shunt the caravan backwards and forwards to ensure everything functions. Visual inspection of the mover units is worthwhile. Look for
evidence of anything appearing rusty or in danger of seizing up.
Scabby-looking surfaces should be cleaned and protected with a coating of light oil. Motorcycle chain oil is good – it is designed to be used in harsh environments.
Towball checks
Most caravans have a friction stabiliser, but these are only effective on a clean, dry towball. Even with a cover, grime finds a way in, leaving you with a less effective, noisy stabiliser.
Give the towball a wipe with some paper towel to remove the worst of the grime. If the ball is rusty, flash it over with some emery cloth to restore the shine, then hit it with some brake cleaner spray. It’s designed to clean brake components to ensure their effective operation, and it’ll do the same for your stabiliser.
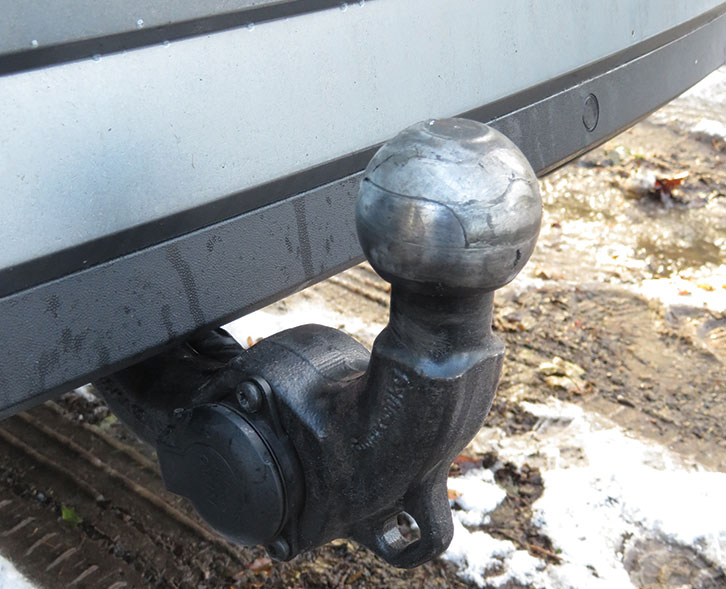
We’d advise doing this every time you tow. A squirt into the hitch head and a wipe around in there helps to clean the stabiliser friction pads, too.
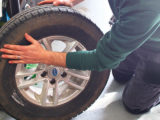
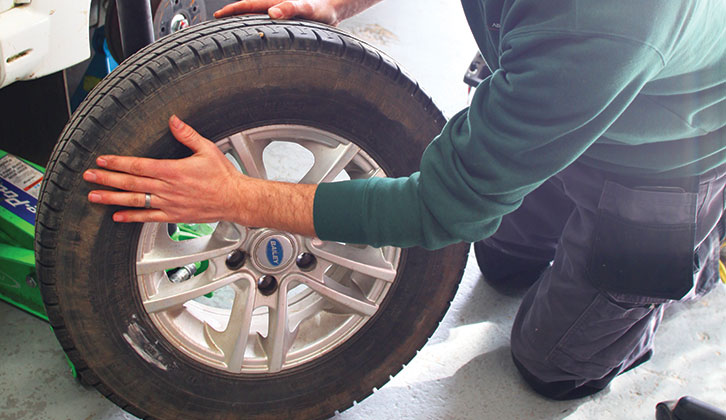
Tyre checks
Nothing is as safety-critical or more likely to be ignored than caravan tyres. Unless a tyre is actually flat, many van owners wouldn’t know they might have a problem. Ten minutes spent regularly checking them over is time well spent.
The easiest check is the tyre pressure. A small digital pressure gauge is a toolbox must-have and can give you change from a tenner. An analogue one is fine, too, and of course, will never need a battery change. Check your handbook and ensure your pressures are where they ought to be. If any are low, top them off, then check again a few days later to see whether they are staying in the correct place.
Soft tyres not only cause your tyres to become warmer in use; in severe cases, they can also result in stability problems and limit the usefulness of your motor mover if you have one fitted.
Grab an old sponge, a nailbrush and some car shampoo in a bucket, and give the tyres a wash. Given the muck and grit that can be present, we’d advise keeping this mixture just for the tyres. This is less about actual cleanliness and more about giving your tyres a good inspection.
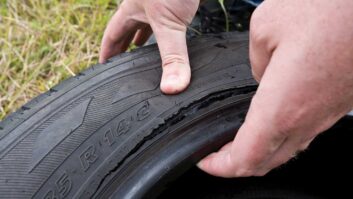
Examine the tyre walls for bulges caused by the tyre structure failing. Then look closely for any signs of cracking. Tyre walls can crack and this is easiest to observe at the bottom, where the tyre wall will be flexed the most.
Look for cuts in the tyre sidewall, caused by impact, or anything stuck in the tyre tread. Radial cracking is more difficult to spot, but for this, you need to look between the treads and search for cracks running around the radius (hence ‘radial’ cracking).
The other thing to spot is cuts in the sidewall, which are caused by impacts, or anything stuck in the tread. All of these problems require immediate investigation by a tyre workshop.
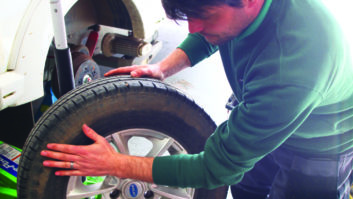
You can’t do this inspection properly with the caravan in one place, either. Roll it forward a few feet and clean the tread that was in contact with the ground.
There is also no alternative to sliding underneath (with all wheels safely chocked, the handbrake on and the steadies down) and having a look at the inward-facing tyre walls.
Don’t forget to check the spare tyre, too. Yes, it’s a very unpleasant task to have to (safely) clamber underneath the caravan or wind down a carrier, only to discover that all is well, but if you need that spare at some point, you’ll be glad you checked.
While you’re there, ensure the carrier isn’t red-rusty and apply a little grease to the clasp and the telescopic tubes if it is all starting to get a bit scratchy.
Future Publishing Limited, the publisher of Practical Caravan, provides the information in this article in good faith and makes no representation as to its completeness or accuracy. Individuals carrying out the instructions do so at their own risk and must exercise their independent judgement in determining the appropriateness of the advice to their circumstances. Individuals should take appropriate safety precautions and be aware of the risk of electrocution when dealing with electrical products. To the fullest extent permitted by law, neither Future nor its employees or agents shall have any liability in connection with the use of this information. Check that any van warranty will not be affected before proceeding with DIY projects.
Interested in more DIY projects? Then take a look at these:
- We talk you through the process of installing QC 3.0 USB fast chargers and 8-way fuse panel
- We explain how you can fit a seven-pin 12S socket to your towbar
If you’ve enjoyed reading this article, why not get the latest news, reviews and features delivered direct to your door or inbox every month. Take advantage of our brilliant Practical Caravan magazine SUBSCRIBERS’ OFFER and SIGN UP TO OUR NEWSLETTER for regular weekly updates on all things caravan related.