

We all know that most caravans rely on a three-wheel configuration for on-site manoeuvring. More modern tourers have the luxury of movers, which use the leisure battery to activate electric motors on each of the van’s road wheels and drive it into the planned position.
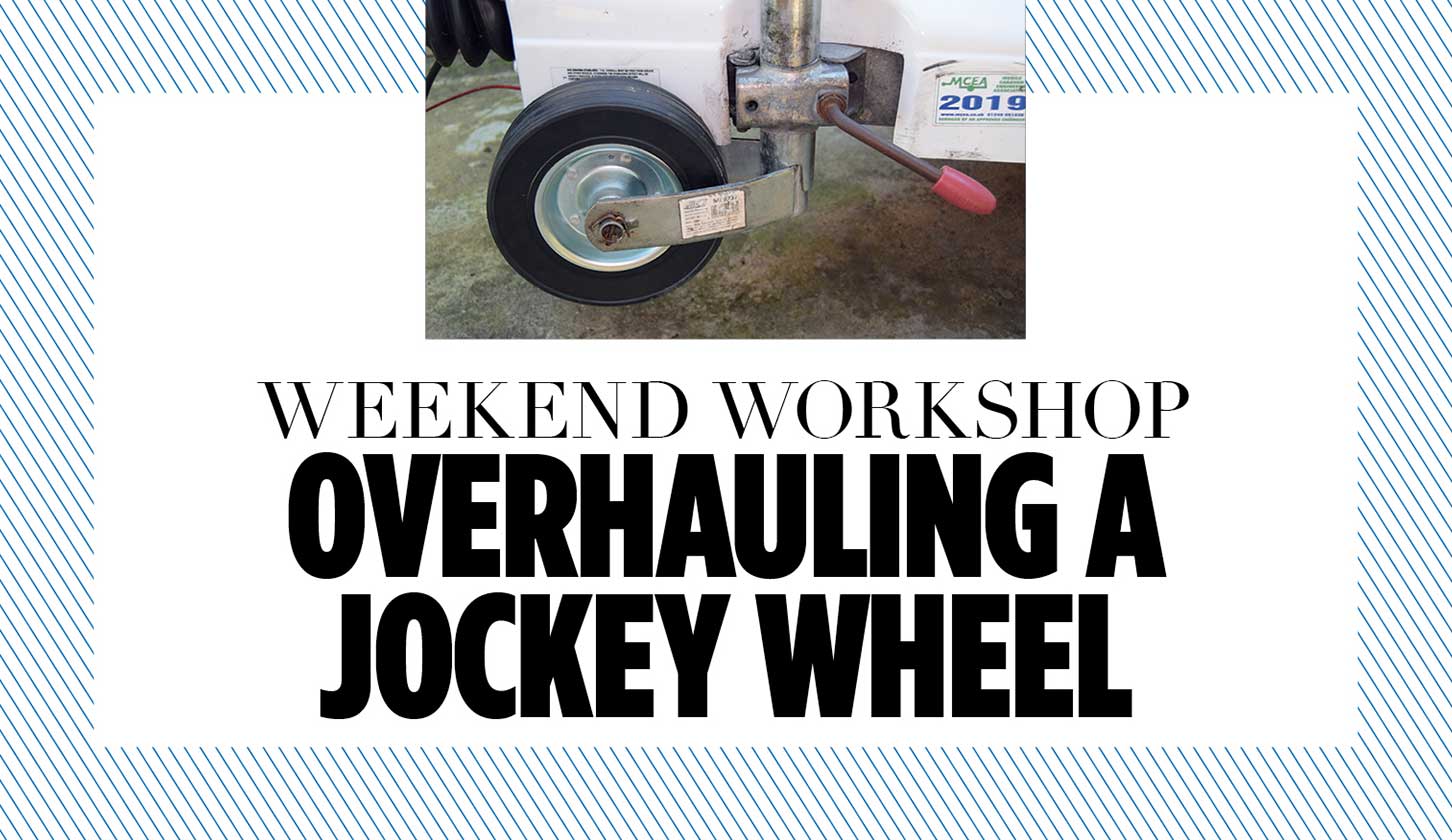
Whatever the circumstances, the caravan jockey wheel plays a really important part in enabling manoeuvres to be accomplished successfully.
Unfortunately, this essential manoeuvring adjunct is often neglected. Exposed as it is to the vagaries of the weather and assorted road pollutants (salt and so on), its operational effectiveness can eventually fall far below expectations.
Unless the wheel assembly can pivot freely about its vertical axis and the wheel itself can run freely on its axle, the caravan could be harder to control on site.
It is also important that the main column clamp operates freely, otherwise deploying the jockey wheel can be difficult.
Here, you can learn how to revamp a jockey wheel assembly and ensure it is up to the job.
In devising the approach for this project, I have also taken into consideration my own caravanning experiences. For example, when manoeuvring on gravel, my plastic-faced jockey wheel can prove unwilling to roll smoothly. To offset this, I have replaced it with a more compliant rubber-faced variant.
- Interested in finding out what you should be taking on tour? Then take a look at our guide to caravan essentials.
Points to consider
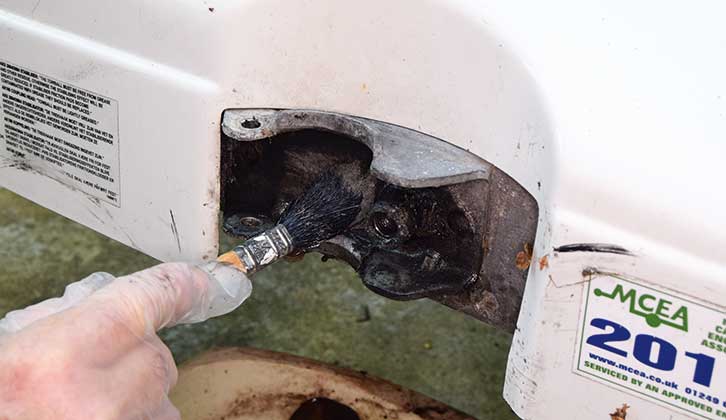
- All of the caravan steadying jacks should be lowered and the brake on, before removing the jockey wheel.
- For cleaning the assemblies, I used a paintbrush and some paraffin, although white spirit will work equally as well.
- Grease should be applied to all threaded parts before they are reassembed.
- Some grease should also be applied to the internal bore of the jockey wheel before it is reassembled – unless the replacement wheel has bearings already fitted, in which case this will be unnecessary.
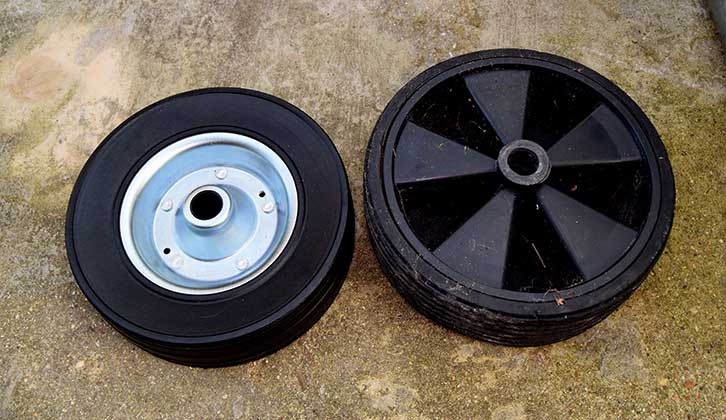
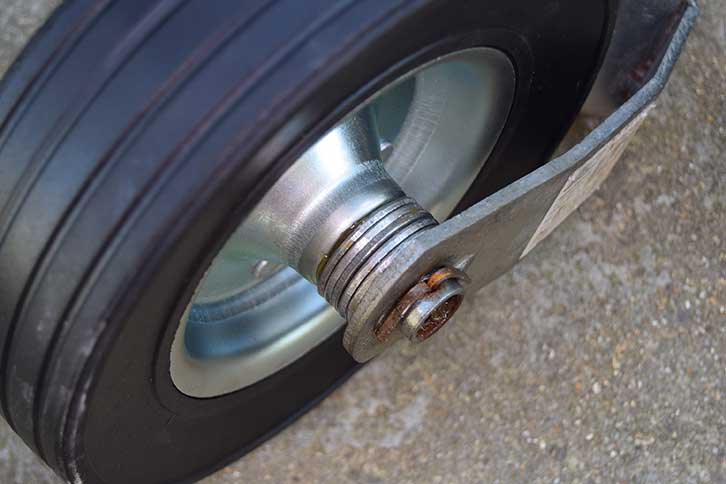
- My new jockey wheel did not have the same axle width as the one being replaced. To make up the gap, I used a pack of M20 washers on either side of the new wheel, to centralise it in the yoke.
- If a new wheel is fitted, make sure that it has a sufficient kg load rating for your caravan.
- DO NOT reuse the old split pin securing the axle. In most instances, it will be rusty and already fatigued by the process of removing it.
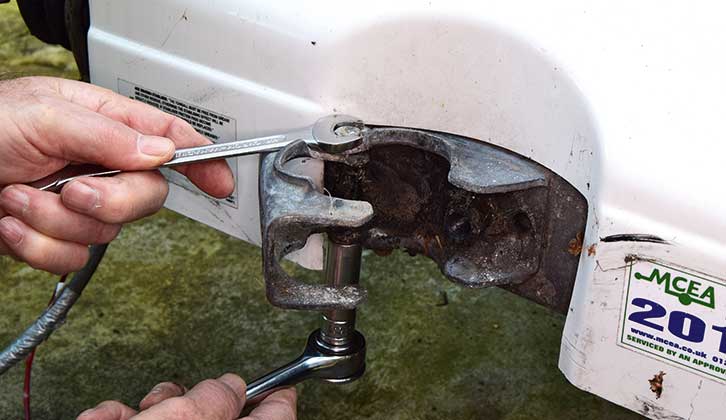
- When replacing the securing clamp swivel bolt, DO NOT overtighten it – this will distort the bracket and prevent the clamp from swinging freely. A smear of grease should also be applied to the abutting faces of the clamp.
- Refitting your old wheel is, of course, perfectly acceptable, but it should be inspected for signs of damage before doing so. Most are plastic and can suffer cracking or damage to the rolling surface.
Tools Required
- Conventional toolbox
- Spanners to fit the clamp swivel bolt
Parts List
- 1 x jockey wheel. This should be dimensionally as close as possible to the original, that is, the outer diameter and internal shaft size. DO NOT exceed the outer diameter, as this will probably cause the wheel to rub against the yoke. Ensure the wheel has a sufficient load-carrying capacity for the caravan
- 1 x split pin to suit the diameter of the hole on the wheel axle
- Packing washers to suit the axle diameter if the new wheel hub is narrower than the original wheel
- Lithium grease
- Paraffin or white spirit and a paintbrush
Step by step guide to replacing a jockey wheel
1. Ensure all caravan jacks are fully deployed and the brake is on.
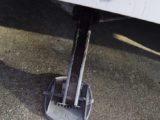
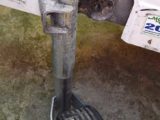
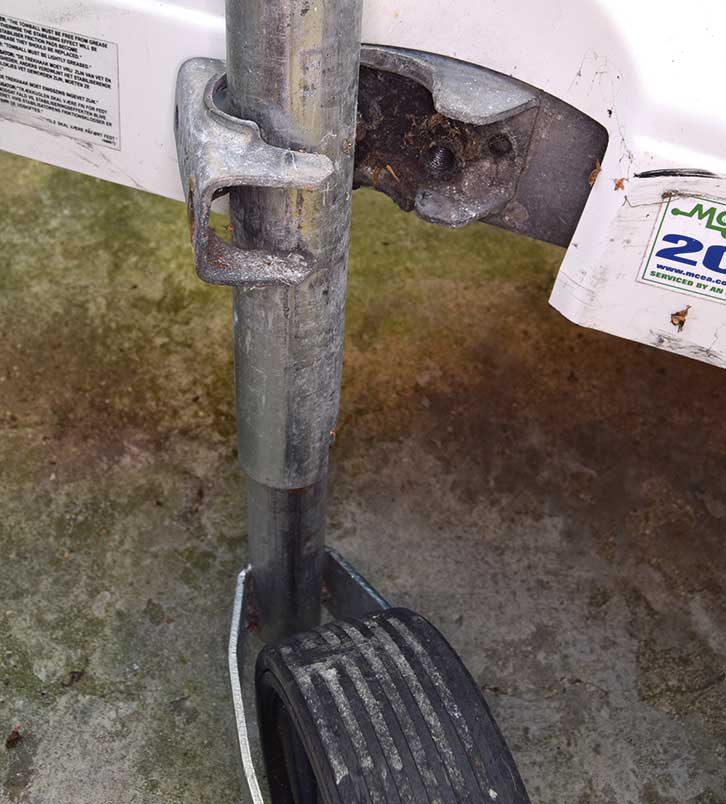
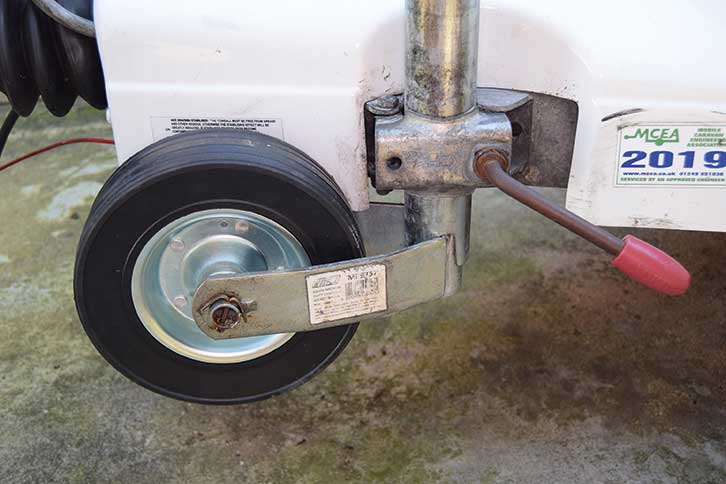
2. The jockey wheel assembly.
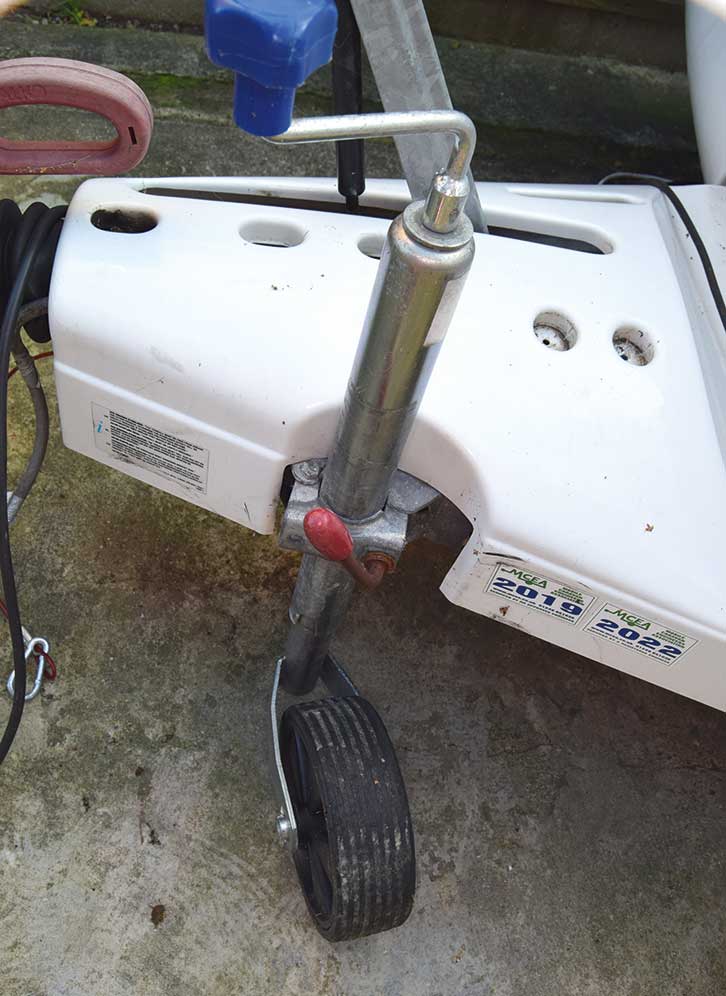
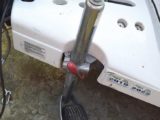
3. The clamping lever.
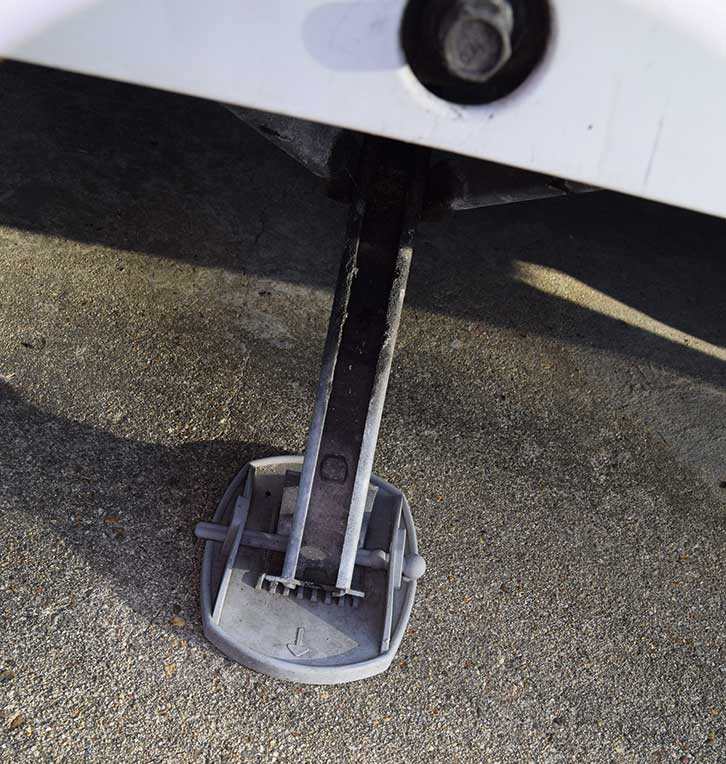
5. Jockey wheel assembly released.
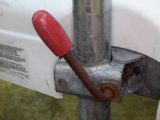
6. Removing the clamping lever.
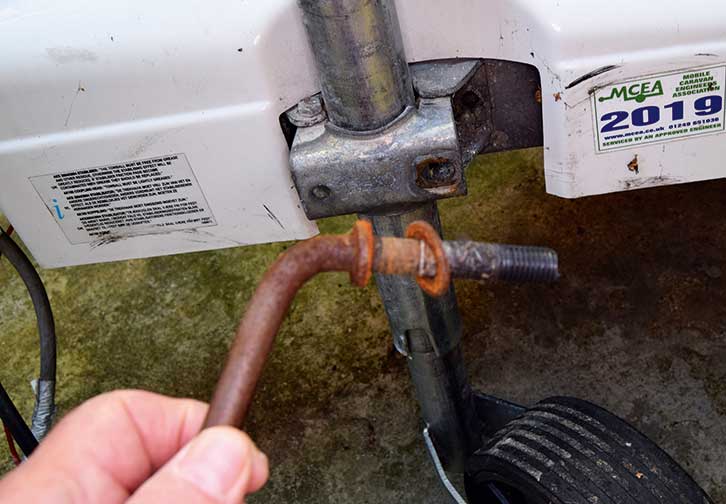
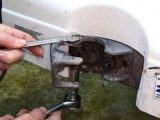
7. Turn the jack lever anticlockwise until the lower wheel assembly is released.
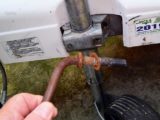
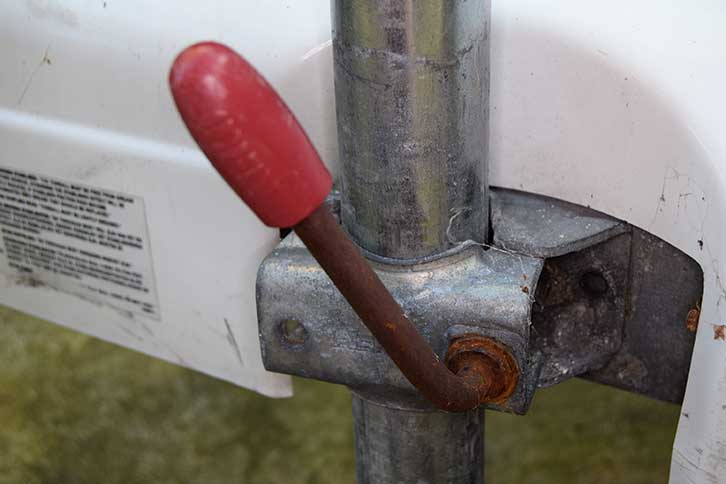
8. Release the clamp securing bolt.
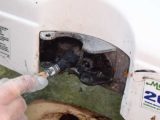
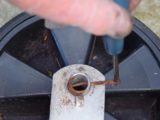
9. Using paraffin or white spirit on a paintbrush, remove contaminants from the bracket.
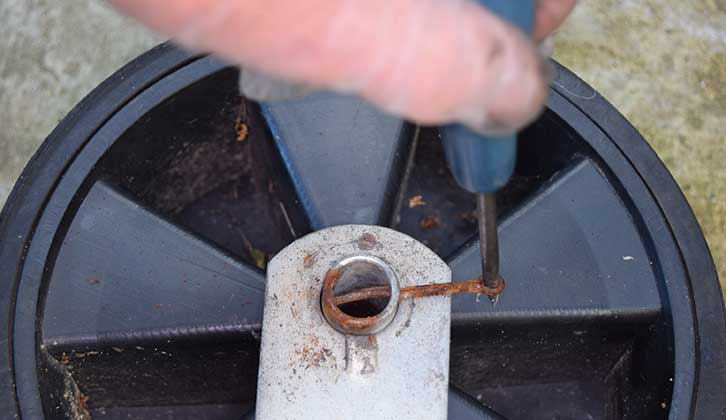
10. Remove the split pin from the axle shaft.
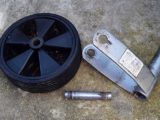
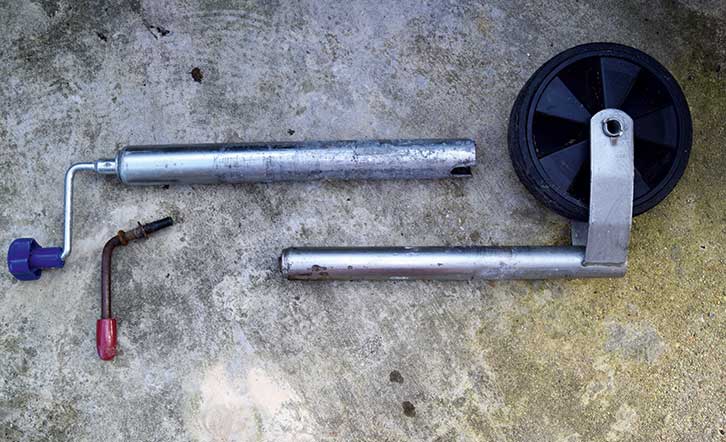
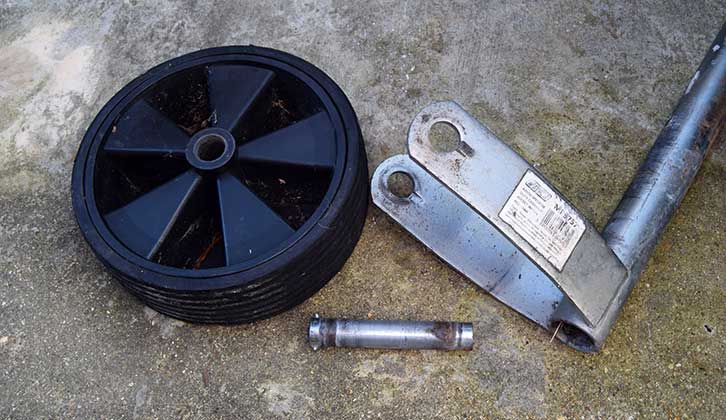
11. Lower jockey wheel assembly components.
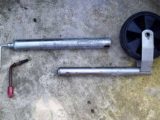
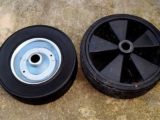
12. New and old jockey wheels.
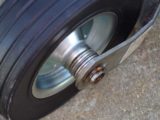
13. Packing washers centralise the new wheel. New split pin MUST be used to secure axle.
14. Jockey wheel after servicing.
- Looking for a way to keep your tourer safe and secure? Our best caravan wheel lock guide could help
Future Publishing Limited, the publisher of Practical Caravan, provides the information in this article in good faith and makes no representation as to its completeness or accuracy. Individuals carrying out the instructions do so at their own risk and must exercise their independent judgement in determining the appropriateness of the advice to their circumstances. Individuals should take appropriate safety precautions and be aware of the risk of electrocution when dealing with electrical products. To the fullest extent permitted by law, neither Future nor its employees or agents shall have any liability in connection with the use of this information. You should check that any van warranty will not be affected before proceeding with DIY projects.
Looking for some more DIY projects to try out? Then why not try these:
- We talk you through how to fit an Al-Ko side-lift jack
- We explain how you can repair a Whale Watermaster Pump
If you’ve enjoyed reading this article, why not get the latest news, reviews and features delivered direct to your door or inbox every month. Take advantage of our brilliant Practical Caravan magazine SUBSCRIBERS’ OFFER and SIGN UP TO OUR NEWSLETTER for regular weekly updates on all things caravan related