This was a bit of DIY that started with an entirely different job planned. The initial idea was to cure a weeping seal on the exterior locker and to reseal the whole door frame to the outside of the van.
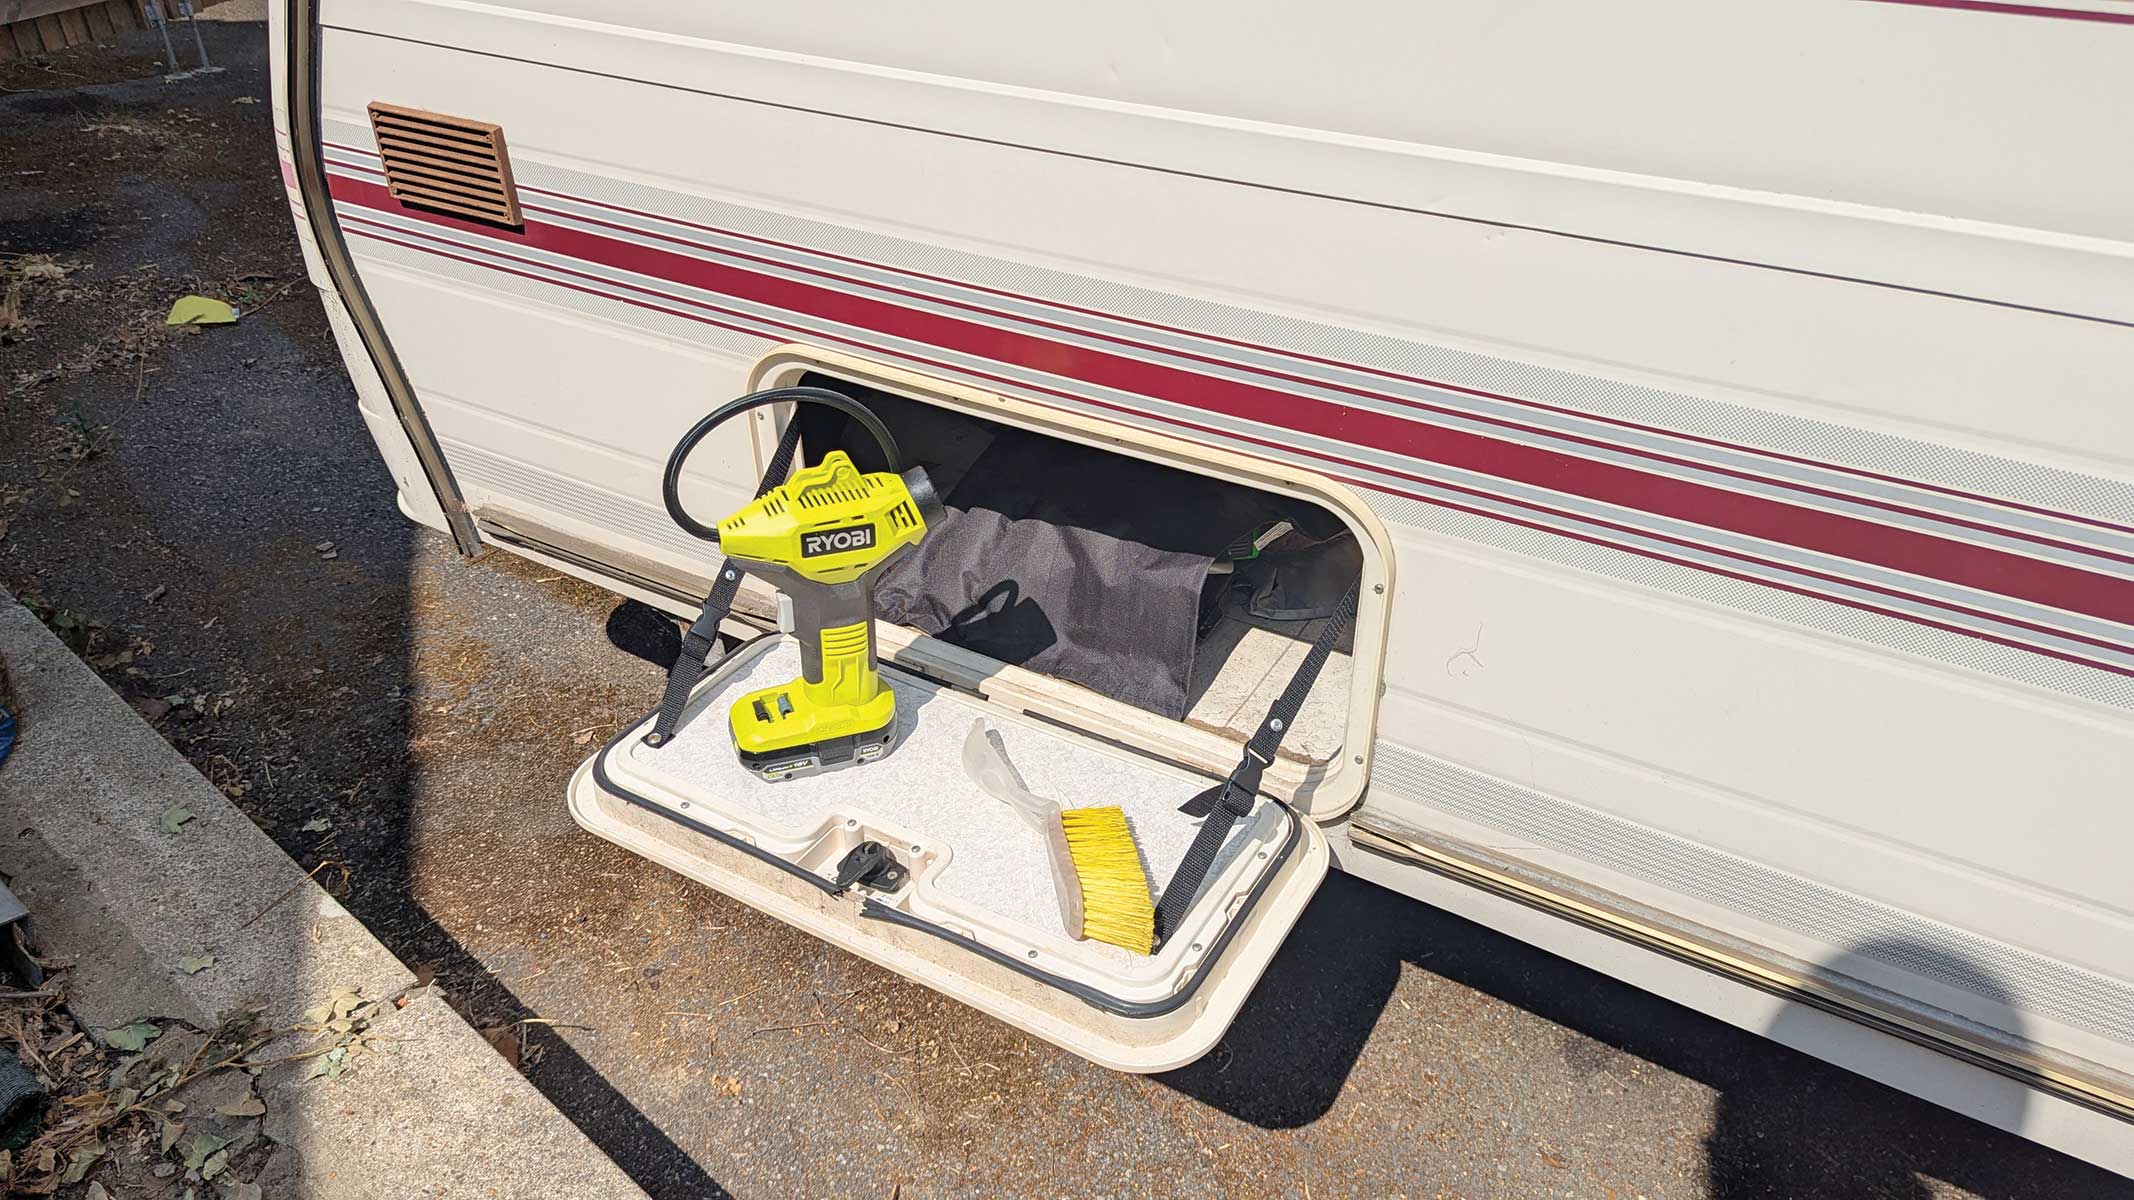
While getting a shopping list together for that job, though, I thought how much nicer it would be if the locker door could be used as a tray or shelf.
As standard, it opens and flops down. That is good for access to the locker but less so for loading a caravan with small bits that you want to take in and out. Using a selection of odds and ends from the workshop, I hit upon an idea to make the locker a little more user-friendly. We decided to add some retaining straps, so it was time to reach for the caravan tool kit.
The simplest way to add the straps was with some 20mm polypropylene flat webbing. I actually had some of this in the workshop already, but the kit from Amazon cost around £8 and included five metres of webbing and various clips and adjusters.
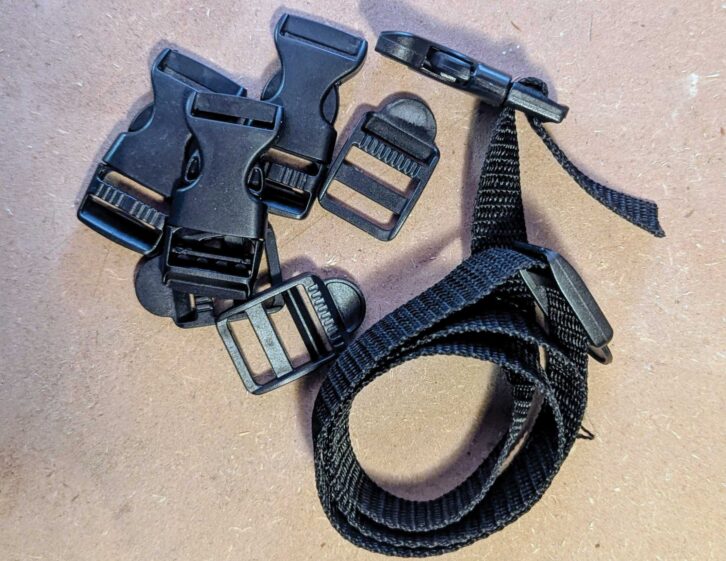
I bought it for restraining stuff in the boot of a car, but flat webbing is one of those things that has dozens of uses around the caravan, too. It’s not something you necessarily think about buying when you’re considering of your essential caravan accessories, but once you have some, you start thinking of other uses for it. The secret to getting good outcomes is working out how to use it properly.
Flat webbing has a few issues that can easily be overcome. The main one is fraying. It is a woven product – when you cut it, the webbing has nothing to stop it unravelling so it immediately starts doing so. It looks unsightly, reduces the webbing’s strength and makes it harder to work with. There are a few things you can do to make this less likely, however.
Don’t miss how I fitted a remote controlled unit to my caravan’s awning light, either.
Frayed edges
The first is to cut it with care. Use a pair of sharp scissors or, better still, a sharp knife and a straight edge to ensure you get a nice crisp edge. This will ensure the finished edge looks neat, but you will need to seal the end to stop it fraying.
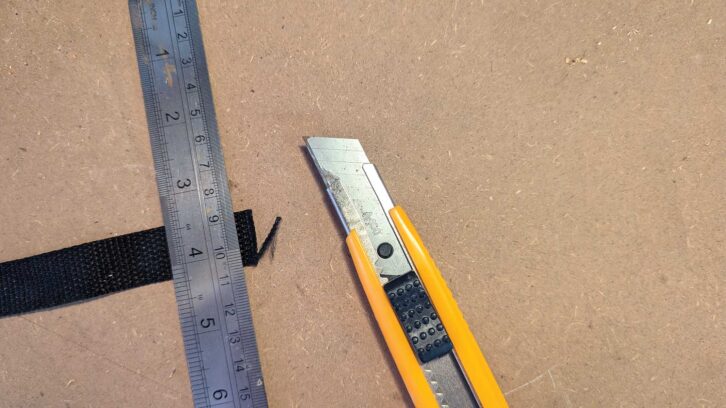
The way we got around that was to fire up the soldering iron. We used the square tip of our soldering iron to score across the webbing along a metal rule.
Doing this melts the cut edge of the webbing, meaning you get a lovely straight edge and no risk of fraying. The cut ends are melted to each other and, as a result, cannot unravel.
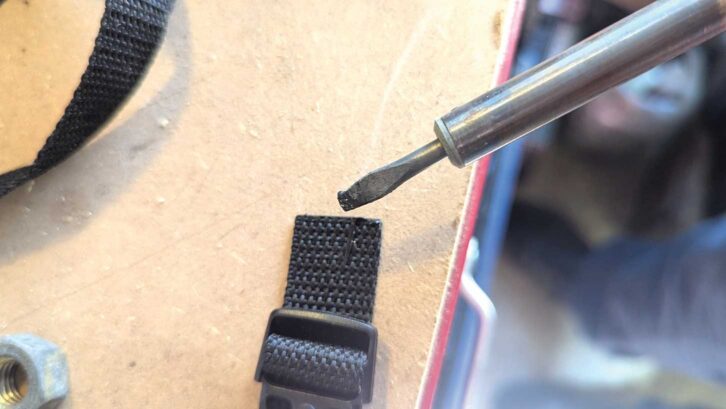
If you don’t have a soldering iron, you can (very carefully) use a lighter or other open flame and hold it a centimetre or so from the cut edge. Don’t get too close to the webbing with the flame: it will melt into a blob. If this happens, don’t panic. Just cut a new edge and try again.
The webbing itself is fairly useless unless you can get some clasps and buckles attached. We do have a sewing machine somewhere which does a lovely neat job of things, but it is a hateful thing and I wanted to avoid using it.
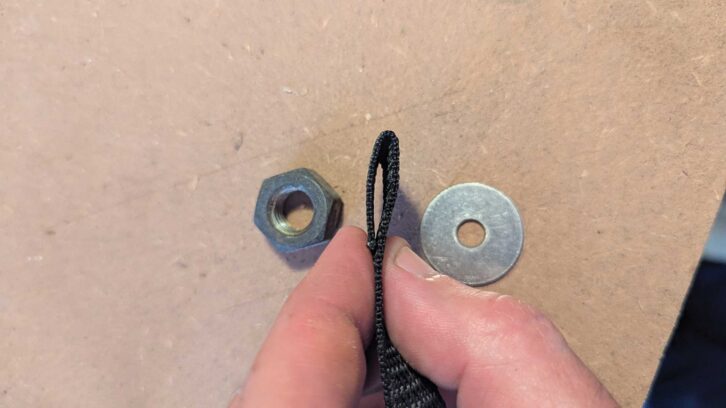
The simplest solution for our needs was to use blind or ‘pop’ rivets. These are more than strong enough for our requirements. Applied correctly, they look neat, too.
For this, we got out the soldering iron again. We put a large 8mm nut on the bench, laid the webbing across it, put a repair washer with a 3mm hole over the top and then used the soldering iron to make a perfect circular hole in the webbing, using the washer as a template. As with the cutting, this seals the cut ends to make fraying unlikely.
We then used 3mm pop rivets to thread through the webbing, put a cup washer on the back of the rivet and compressed it to lock the strap together. The cup washer is important because it stops the rivet pulling through the webbing.
Spread the load
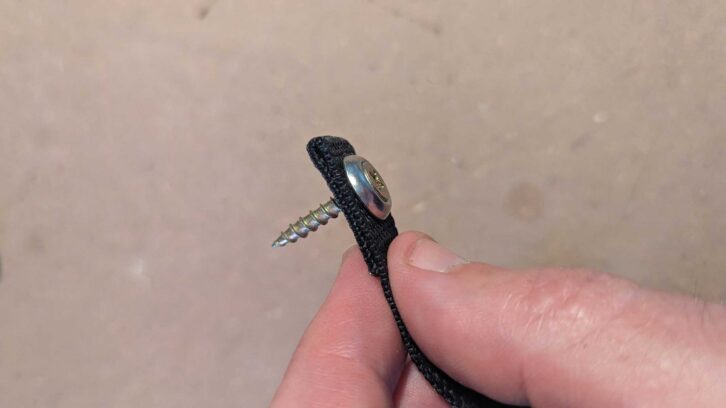
The final task we needed to be able to do was to attach the webbing to both the locker door and the caravan wall. We used the same technique again, using a washer to make a neat circular hole in the strap. We then used a 20mm woodscrew threaded through a cup washer to spread the load onto the strap.
The webbing kit comes with clasps for joining two lengths of webbing together, and a slide adjuster for altering the length.
We considered making the straps fixed length which would be marginally quicker, but relies on very precise measuring and placement of the screws to ensure the door sat at the right angle.
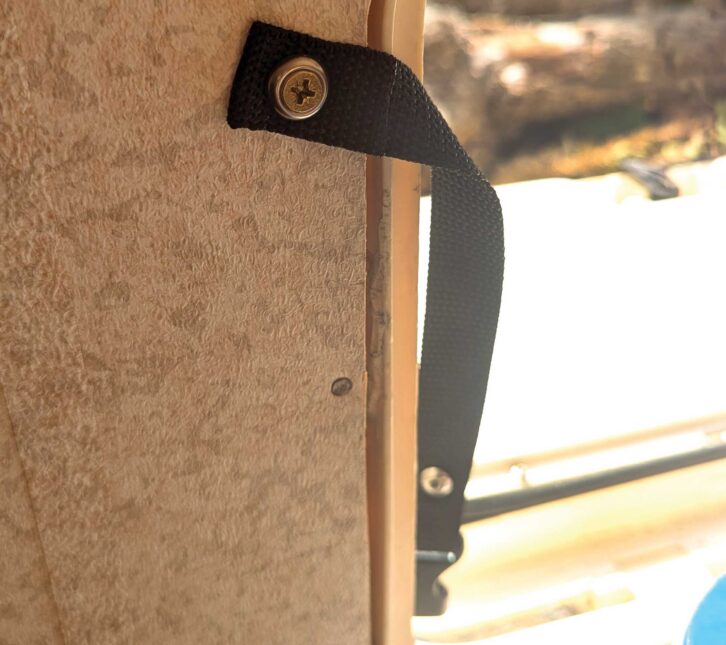
Instead, we opted to make our straps adjustable on our nearly 30 year old caravan, so we could fine-tune the angle that the open door sat at. It also allows us to unclip the door and let it flap completely open for bulkier items.
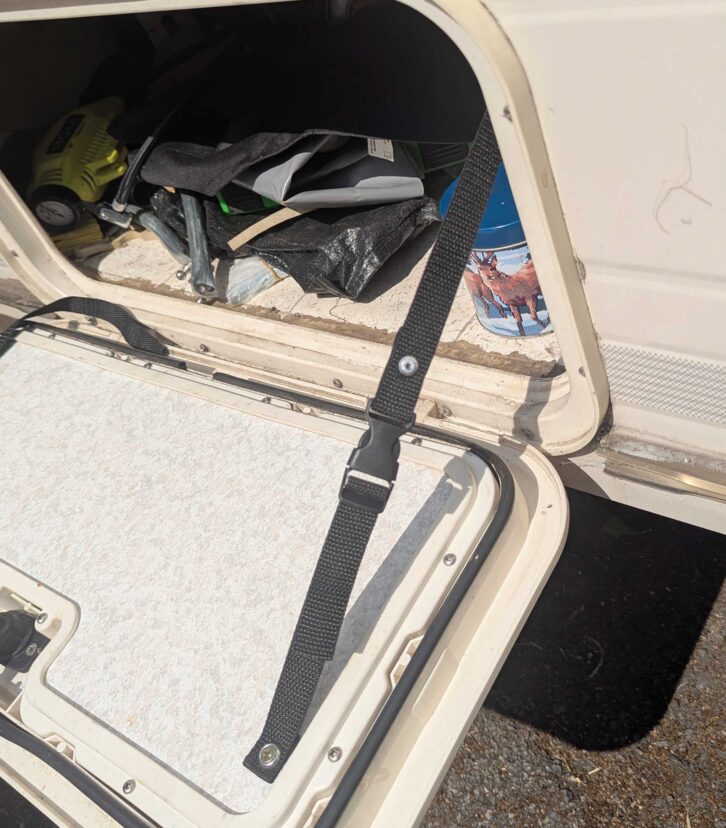
The total cost of the webbing kit and the stainless steel cup washers we used was £12, but we still have loads of webbing and washers left for other projects. The cost of the actual straps as fitted probably comes in at about two quid.
With it completed, I can now wait for the postman to bring me the new door seal so I can complete the job I originally planned to do!
Don’t miss what we have to say about caravan toilets, either, as we talk you through the main types and the recent innovations.
Future Publishing Limited, the publisher of Practical Caravan, provides the information in this article in good faith and makes no representation as to its completeness or accuracy. Individuals carrying out the instructions do so at their own risk and must exercise their independent judgement in determining the appropriateness of the advice to their circumstances. Individuals should take appropriate safety precautions. To the fullest extent permitted by law, neither Future nor its employees or agents shall have any liability in connection with the use of this information. Check that any van warranty will not be affected before proceeding with DIY projects.
If you’ve enjoyed reading this article, why not get the latest news, reviews and features delivered direct to your door or inbox every month. Take advantage of our brilliant Practical Caravan magazine SUBSCRIBERS’ OFFER and SIGN UP TO OUR NEWSLETTER for regular weekly updates on all things caravan related.