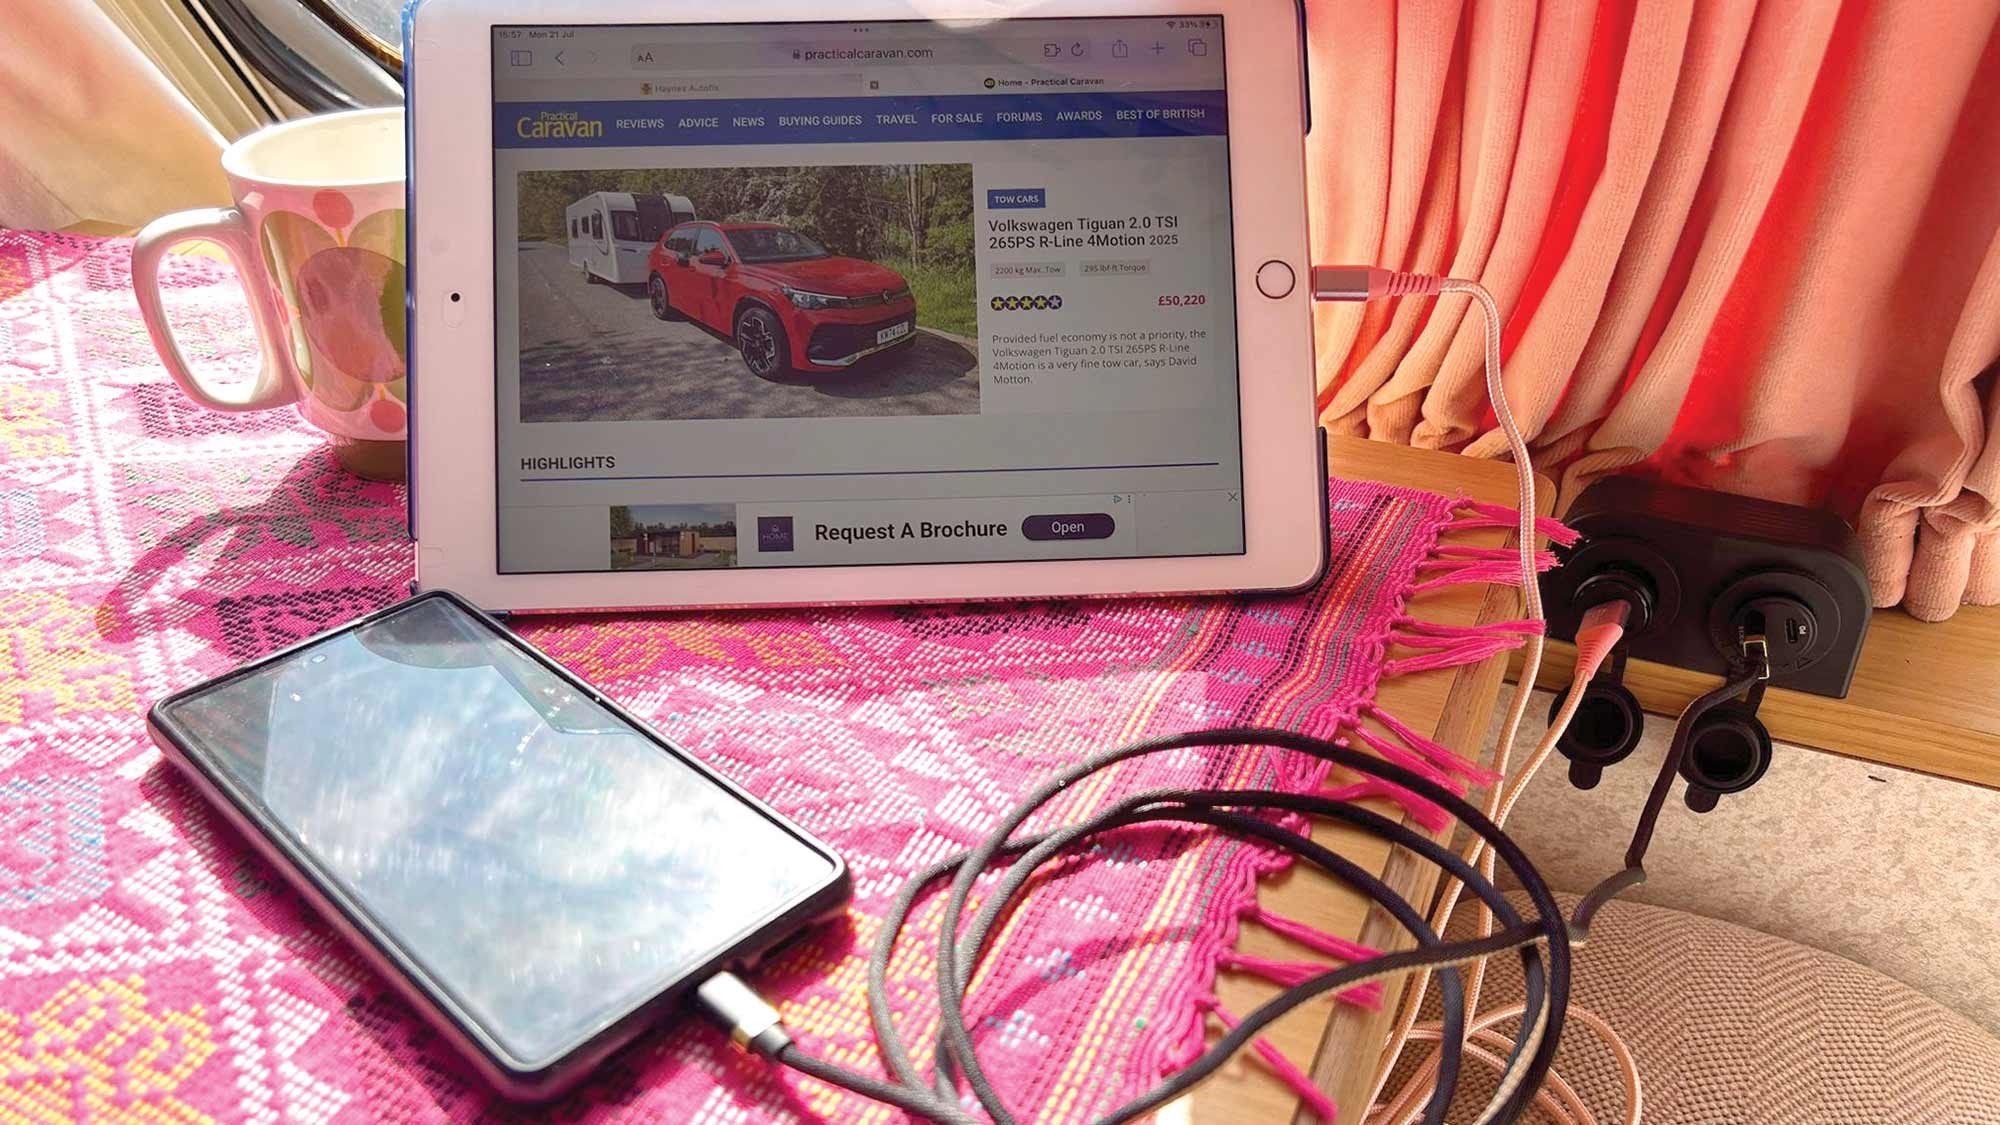


Spending time in your van is the best way to remind yourself that you haven’t done something you meant to do ages ago. We’ve always rather struggled to charge both of our phones in the van when we’re caravanning off-grid. There’s only one 12V socket, so someone always ends up short when we’re reaching for our phone chargers.
What we needed was more accessory sockets. The one we had was in a daft spot, too, with no shelf or anywhere nearby to rest a phone while charging.
Don’t miss some of the other DIY projects I’ve carried out either, including how to install solar panels on a caravan and how to get Wi-Fi in a caravan.
Choosing the location
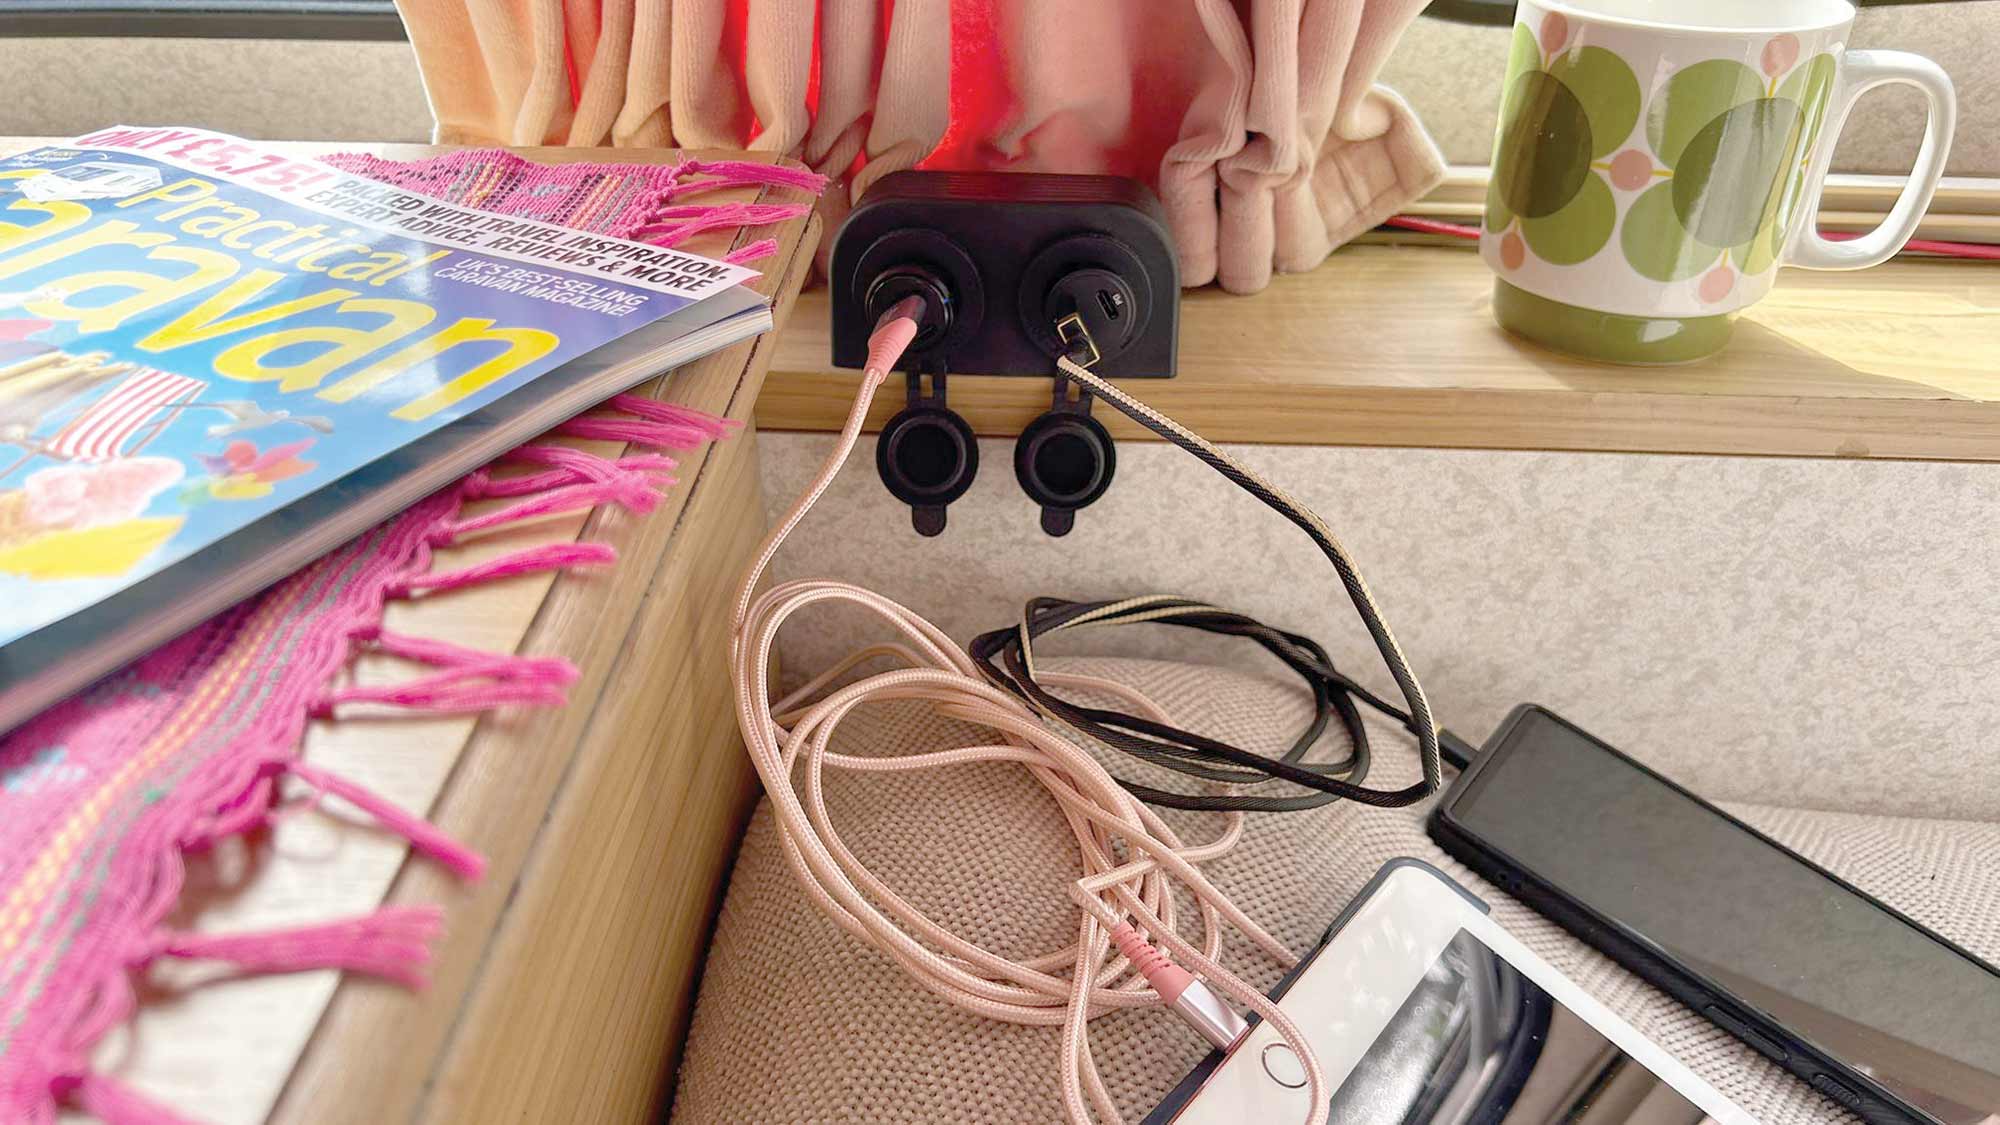
We wanted to have two sockets in our 1998 Bailey caravan, somewhere with a shelf, ideally within reach of the bed, so we could keep a phone handy.
A lot of cigar lighter-style sockets are panel-mounted. That means you have to reach for your caravan tool kit for your drill, so you can drill a hole and push the fitting through. In a caravan, you can fit those into a locker or a wardrobe, but you will often end up with the cables getting snagged or the fitting not being seated properly.
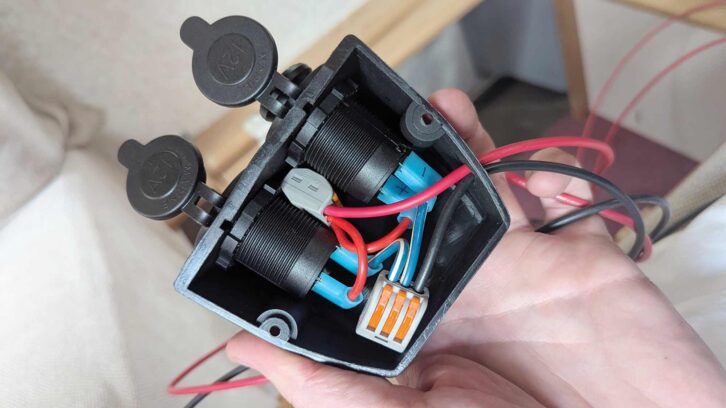
A quick internet search turned up some surface-mount accessory sockets. We wanted a double socket so we could charge two devices at once, and we soon found one.
We didn’t go for the very cheapest, just choosing one with waterproof rubber covers and locking sockets, so the plugs fit more snugly.

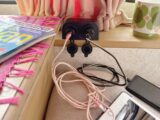
For our phones, we added two accessory socket-to-USB adaptors, opting for ones with the later USB-C plugs alongside the usual USB-A.
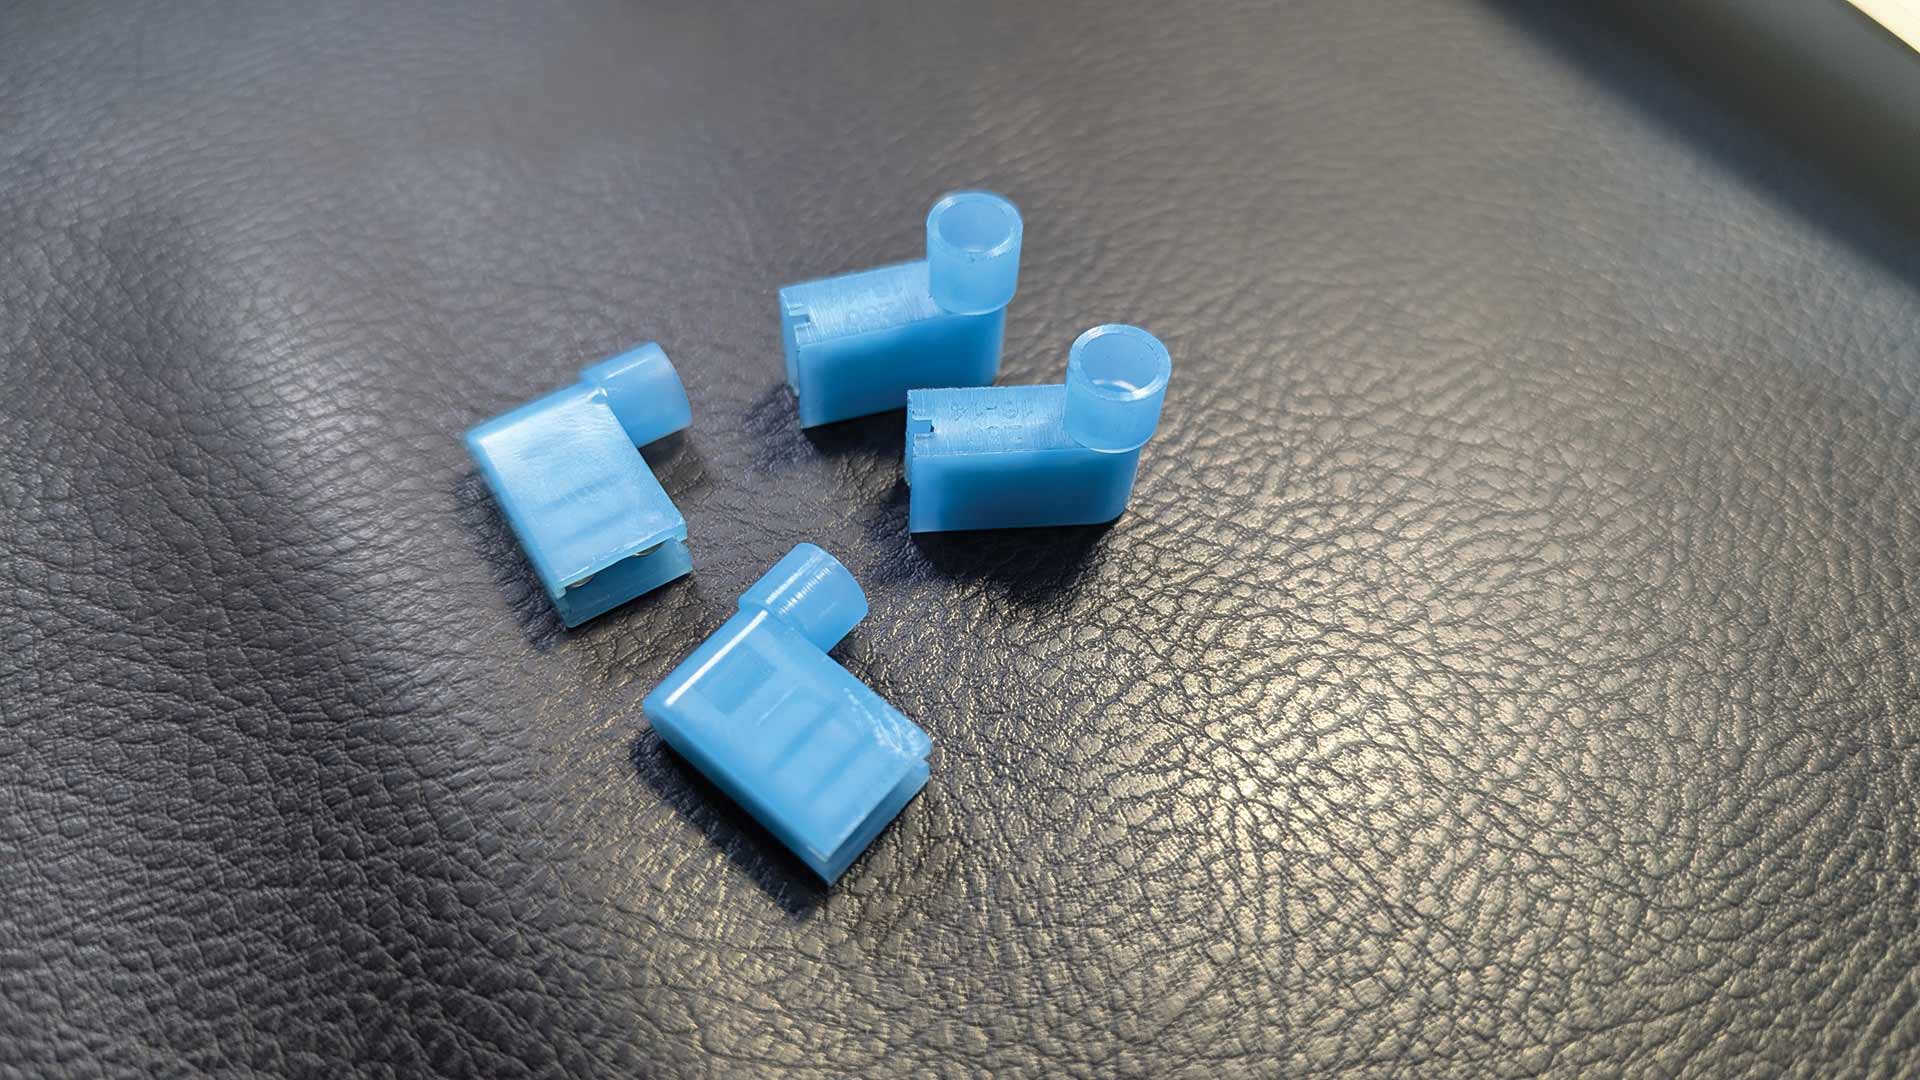
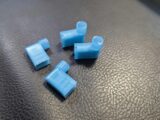
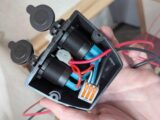
The package turned up the next day, but we immediately noticed a problem. The sockets fitted in the surface-mount pod, but to attach the cables to the terminals on the back, right-angled crimp terminals were supplied. Straight ones wouldn’t give enough clearance for the sockets to fit.

Back to the internet I went, and I learned those right-angled terminals are actually called ‘flag’ terminals. To install them, you need a dedicated pair of crimping pliers. Once again,
my credit card and Amazon had a chat, and the next day, a pair of new flag terminal crimping pliers were on the doormat.
I now had everything we needed to fit the sockets.
Power supply
As with any caravan wiring job, the first question is where the power will be coming from.
We wanted the sockets near the bed. We considered hiding them away, for example in a locker, but in all cases, they would be a pain to use.
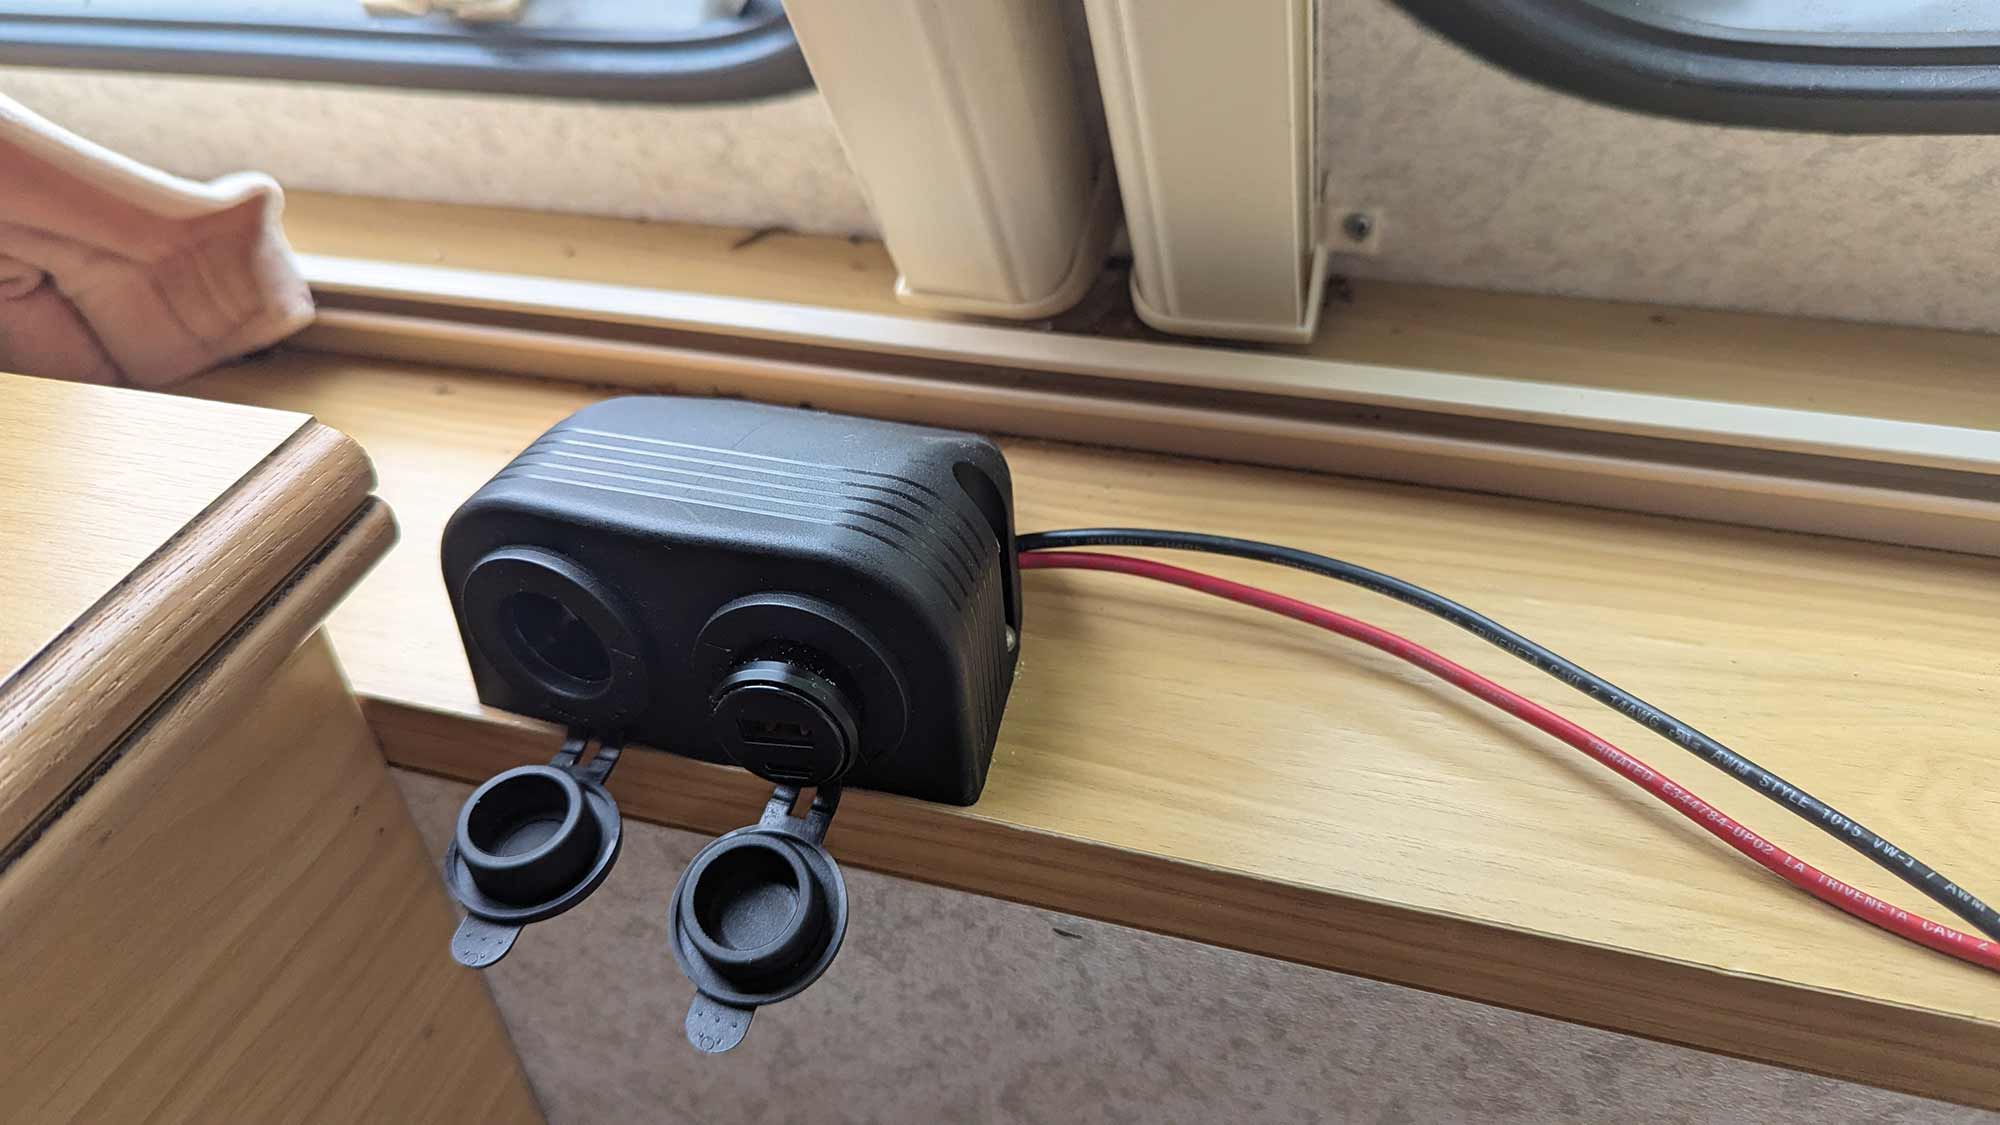
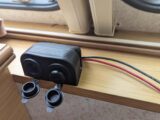
The sockets aren’t exactly handsome, but they’re fairly discreet, so we put them to the right of the centre chest, on the front shelf.
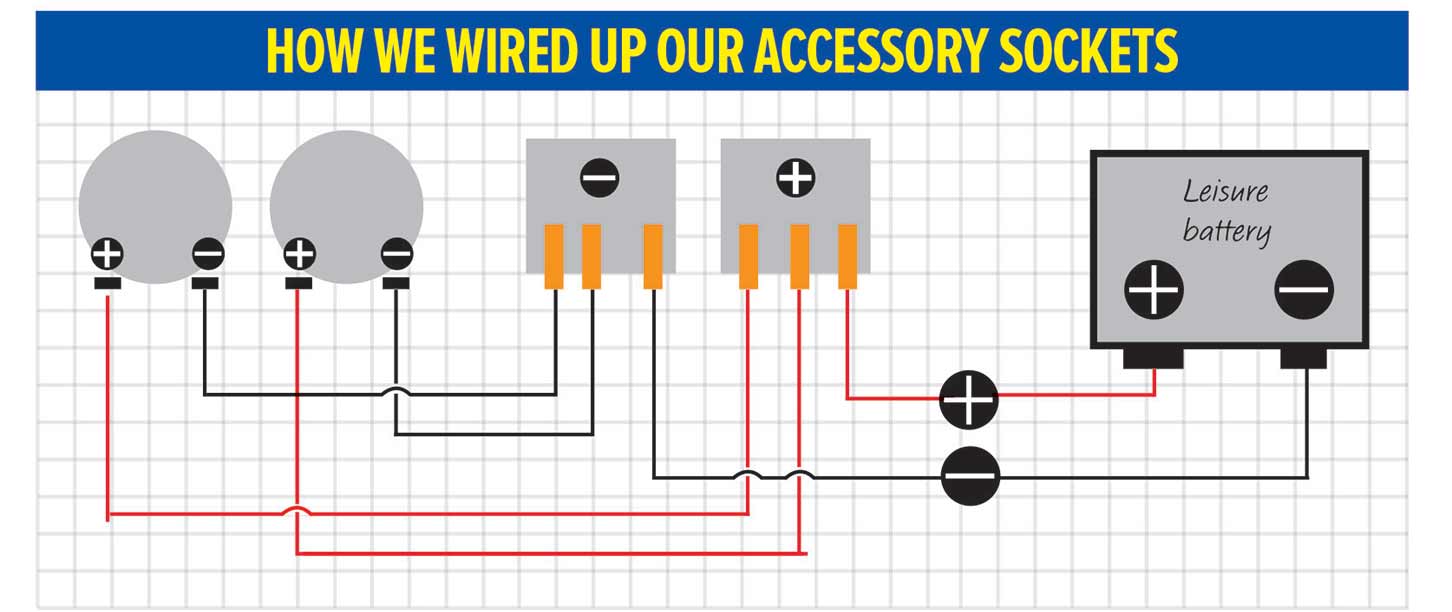
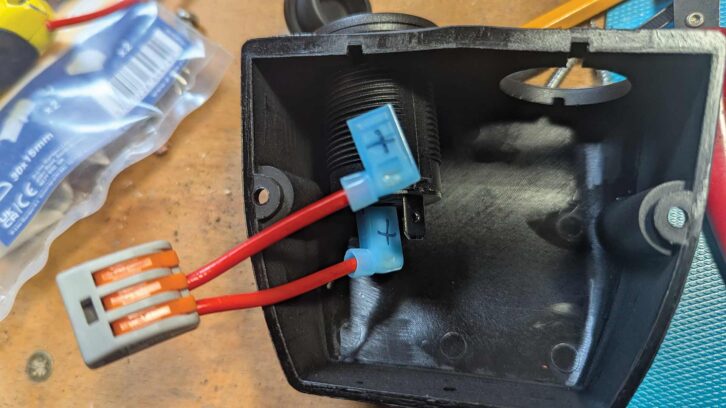
We chose the right-hand side as that’s where the battery is, which made the cable run a bit easier. Given that the sockets could potentially draw up to 3A, we went with heavier 2.5mm² cable, which can handle up to 16A. That gives us plenty of overhead and avoids voltage drops. Usefully, I happened to have a few metres of this in the workshop already.
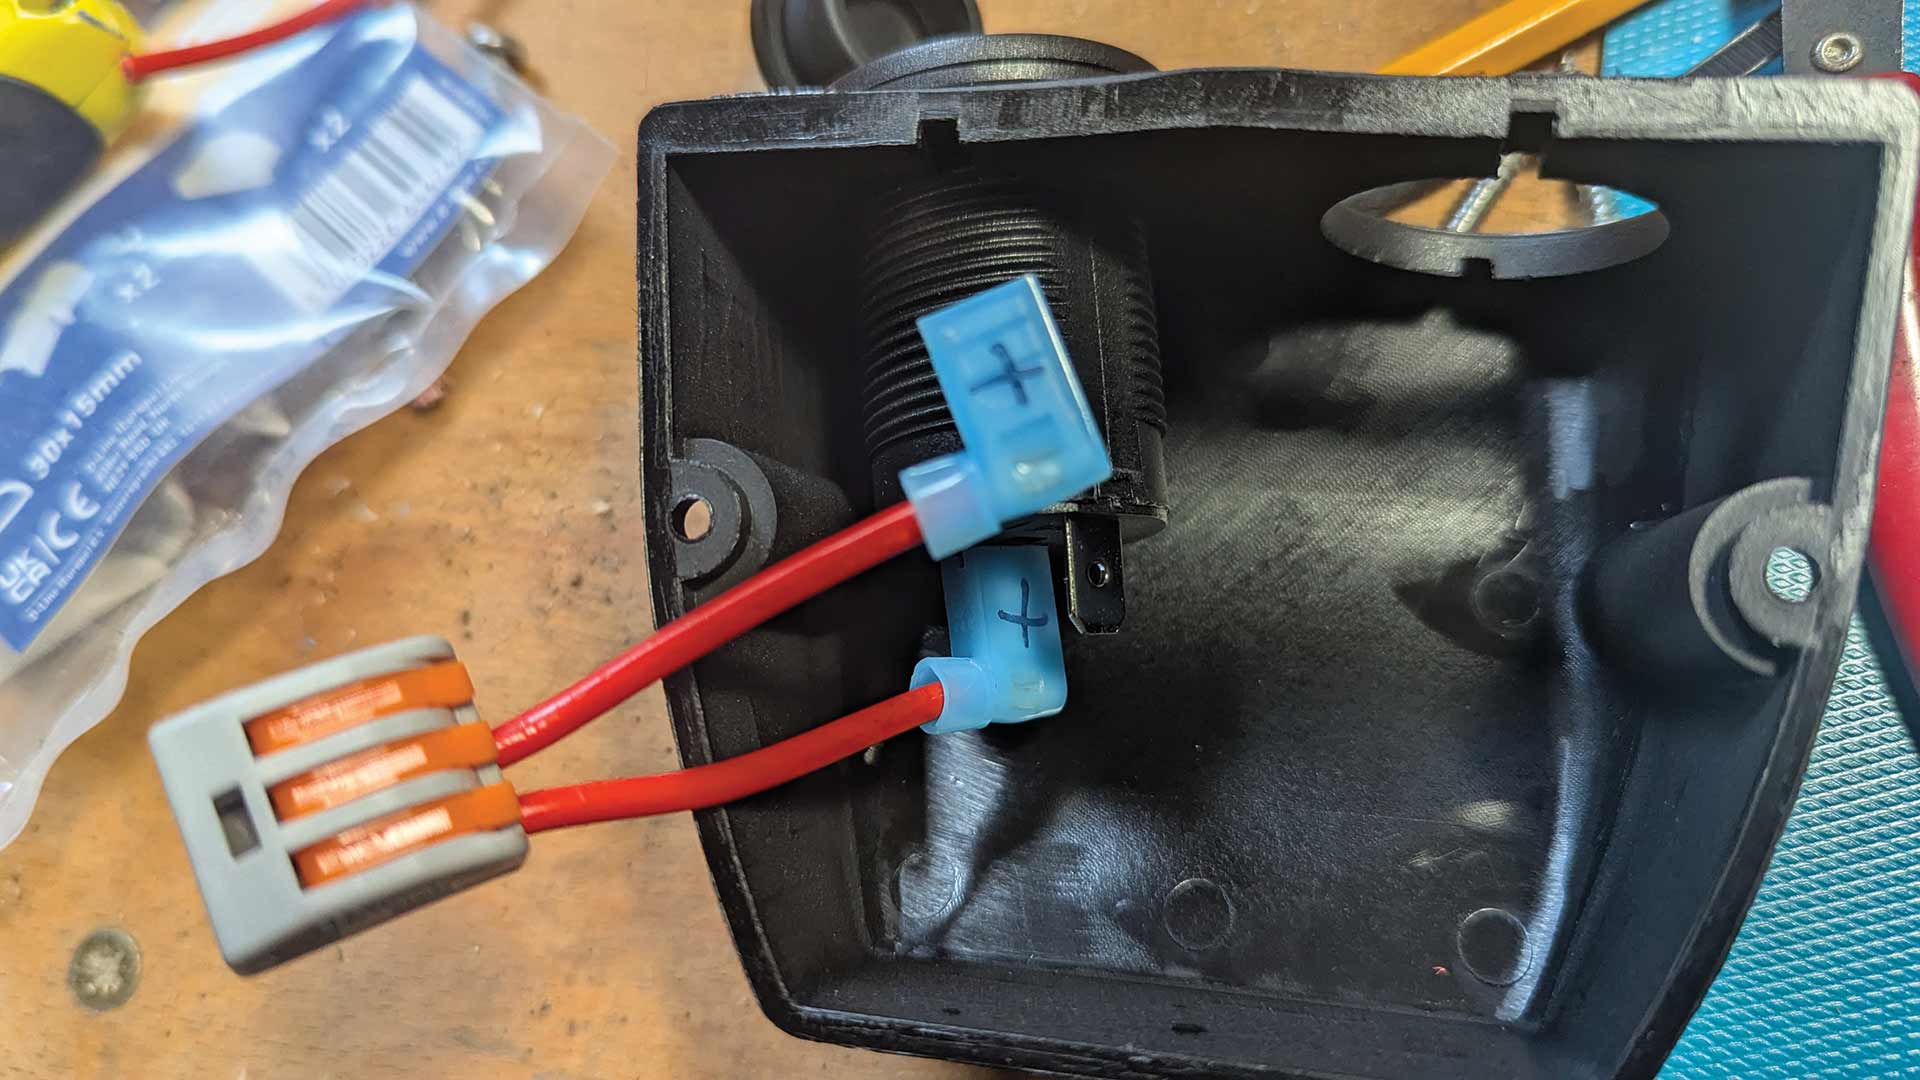
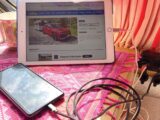
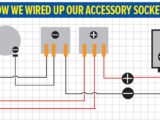
To run the twin-cable into two sockets without lots of extra wiring, I used lever-lock connectors. We picked up a pair of three-way ones.
If you’re not familiar with them, they’re a nice way to join cables, with a locking lever that ensures a good connection.
Two-way ones let you join two cables, but for this job, three-way ones let us join the two 12V feeds for the sockets to the 12V supply from the battery. We did the same for the earths.
With a bit of fiddling about, we connected up the wiring inside the surface-mount box.
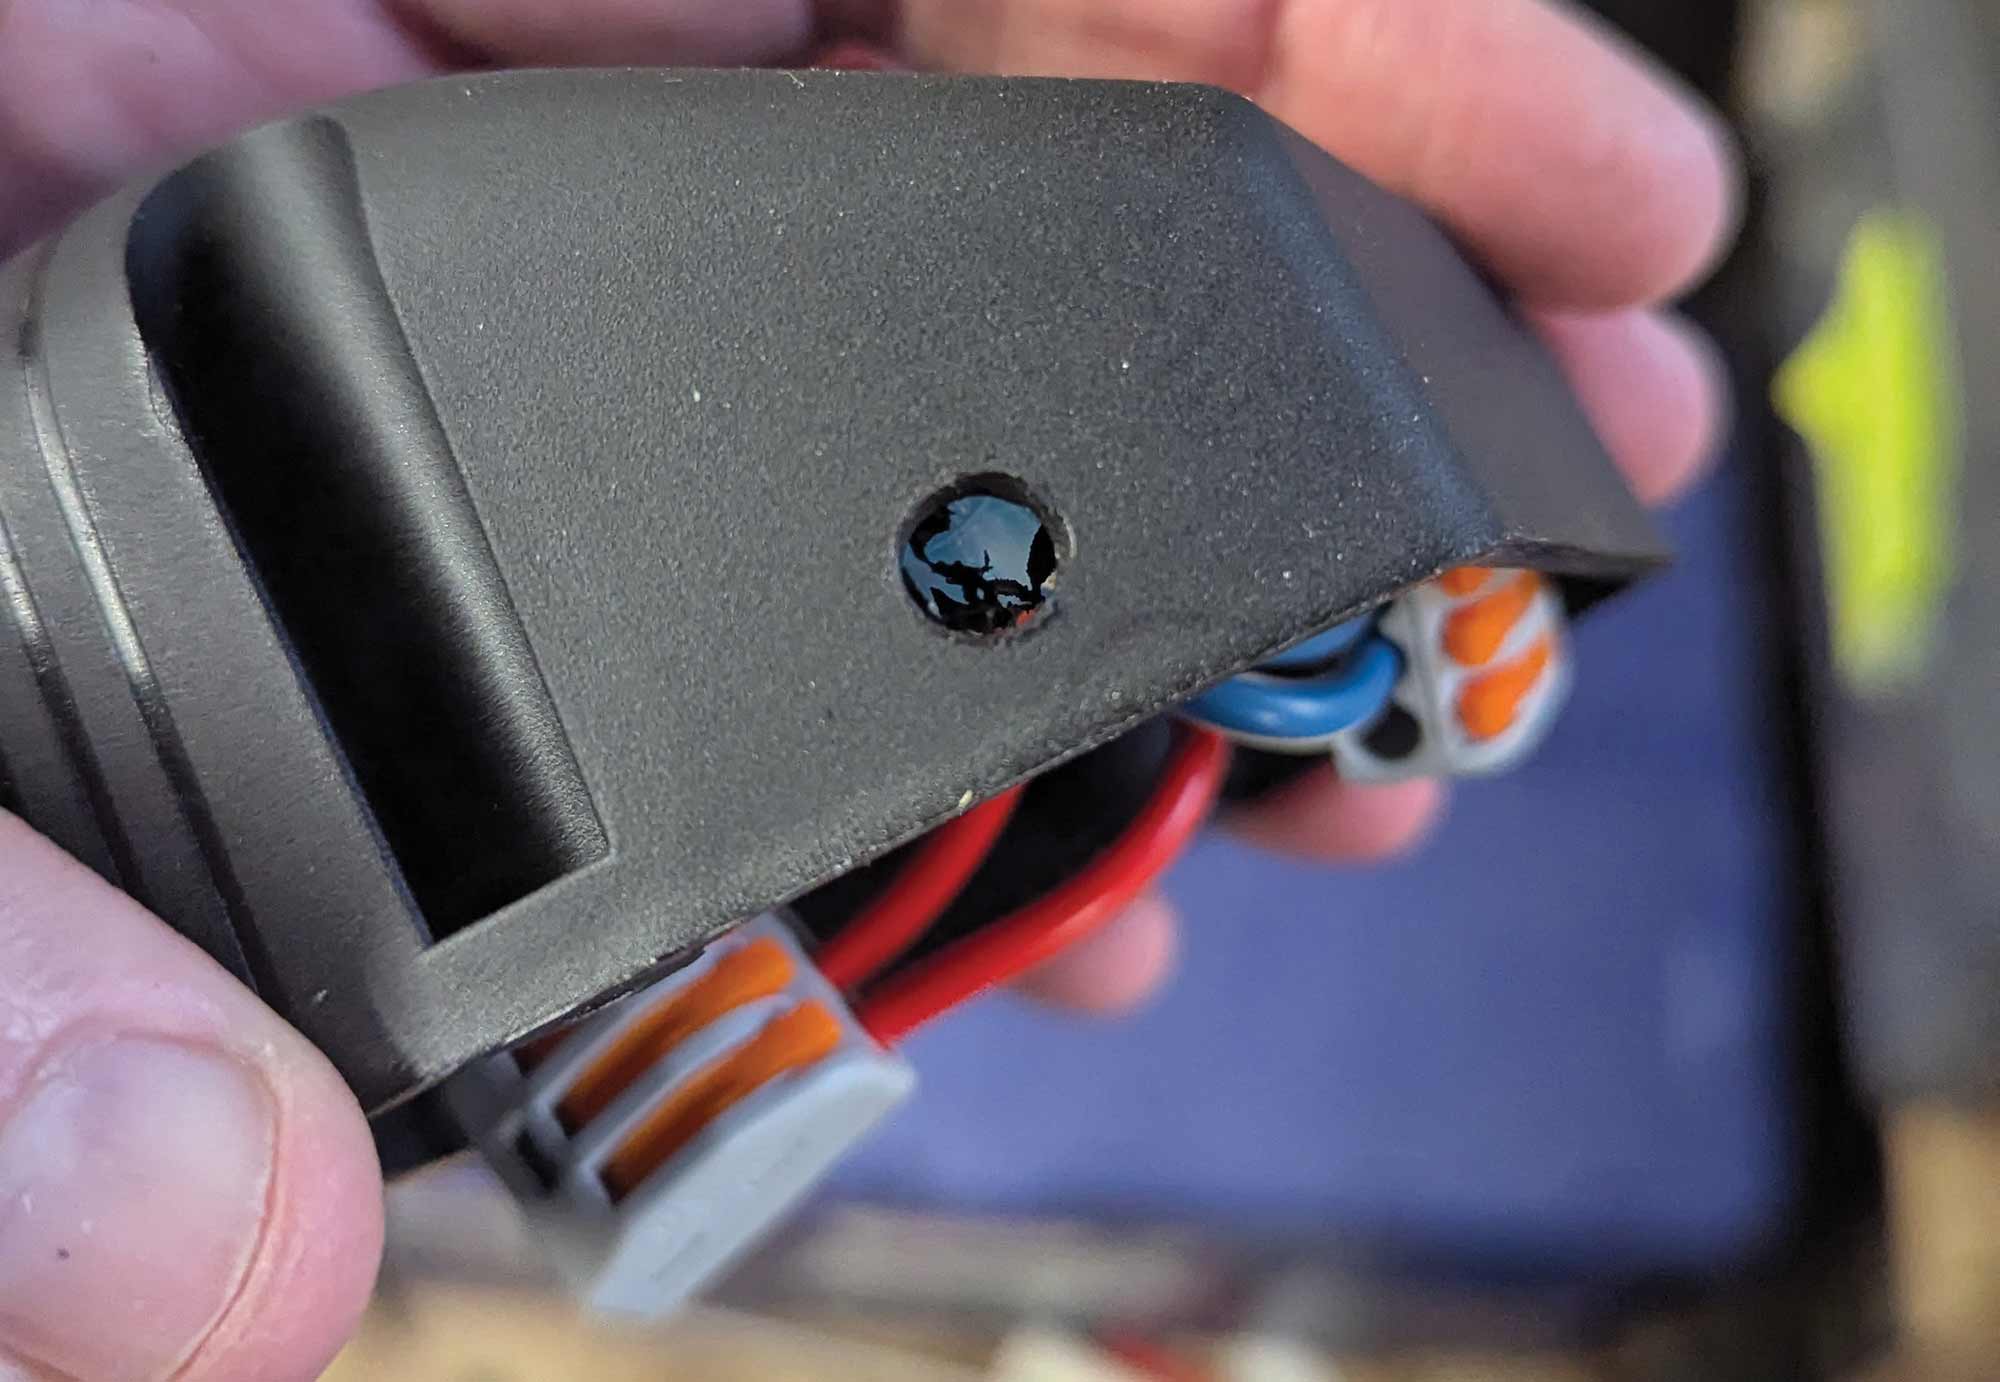
The cables are designed to go out underneath the unit, but we wanted to run the cable under the curtains, so some careful drilling provided us with a suitable exit point.
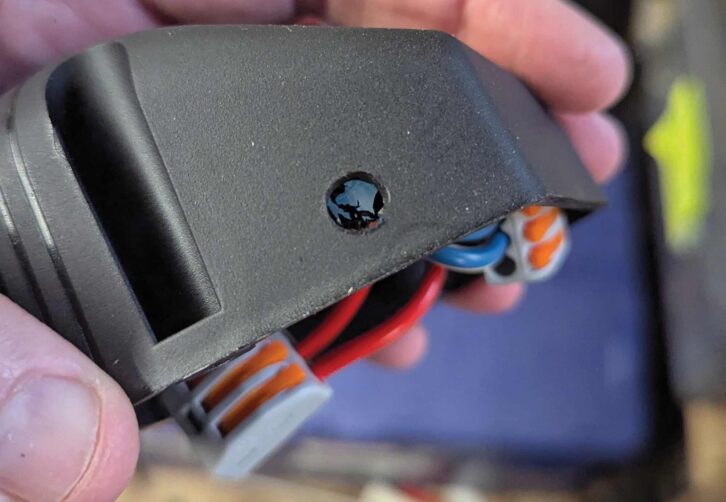
One downside of the heavier cable is that it’s harder to conceal than thinner stuff, but I would rather err on the side of caution where 12V power is concerned. I did think about using some heatshrink to neaten it up, but I’d already crimped the terminals on when I had the idea. Too late!
Cabling up
With the cabling at the socket end complete, it was a simple matter of running the cables down the wall and through a hole we drilled in the seat box framing, then clipping it to the existing wiring and back to the van’s electrics.
If you’ve been following our adventures, you’ll know we have a neat accessory fusebox installed behind the battery. We trimmed the cable to length, crimped on a ring terminal and connected it up.
With the cables clipped back and the surface mount screwed down, we were ready to pop in a fuse and test the sockets. Everything lit up, so all that remained was to clear away bits of cable, tape and sawdust, and put the seat back together.
If you are thinking of heading off-grid, don’t miss our guide to caravan solar panels – they’re a gadget which can be particularly useful for ensuring you have power.
Future Publishing Limited, the publisher of Practical Caravan, provides the information in this article in good faith and makes no representation as to its completeness or accuracy. Individuals carrying out the instructions do so at their own risk and must exercise their independent judgement in determining the appropriateness of the advice to their circumstances and skill level. Individuals should take appropriate safety precautions and be aware of the risk of electrocution when dealing with electrical products. To the fullest extent permitted by law, neither Future nor its employees or agents shall have any liability in connection with the use of this information. You should check that any van warranty will not be affected before proceeding with DIY projects.
If you’ve enjoyed reading this article, why not get the latest news, reviews and features delivered direct to your door or inbox every month. Take advantage of our brilliant Practical Motorhome magazine SUBSCRIBERS’ OFFER and SIGN UP TO OUR NEWSLETTER for regular weekly updates on all things motorhome related.