


I’ve been considering having Wi-Fi in our caravan for some time, but I think that drilling holes in the roof of a van that’s still under warranty would be a step too far.
Until now, there have been times on tour where the signal has been weak and the caravan has acted like a Faraday cage, in that we can receive a data signal outside, but not inside – which can be frustrating if you’re trying to watch a programme on the best caravan TV.
Practical Caravan is supported by its audience. When you purchase through links on our site, we may earn an affiliate commission. Learn more.
New antenna
Last year, I was informed by the team at Vision Plus that they were working on a new project, something I might be interested in.
Roll on to the present, and that project is something that I think is likely to be a huge hit with caravanners who are after Wi-Fi in a caravan. After all, Wi-Fi will be a crucial part of getting a smart TV to work in a caravan.
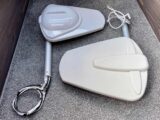
Vision Plus has launched 4G and 5G versions of a replacement antenna for the hugely popular Status 570 (see: the best caravan TV aerials), which is fitted to a large percentage of caravans in the original manufacturer specification. And it really is a very straightforward swap, as you’ll see from this guide.
Another bonus is that, so long as you keep your original TV antenna, it can be put back and the Wi-Fi version removed and swapped onto any other van you might have in future, (provided it has the Status antenna, or you buy the parts to fit one).
So the next question was, which version should I buy to access the internet in my caravan, 4G or 5G?
There’s a premium for 5G, as you would expect, but that’s the one I went for, my rationale being that 5G will probably see my days out!
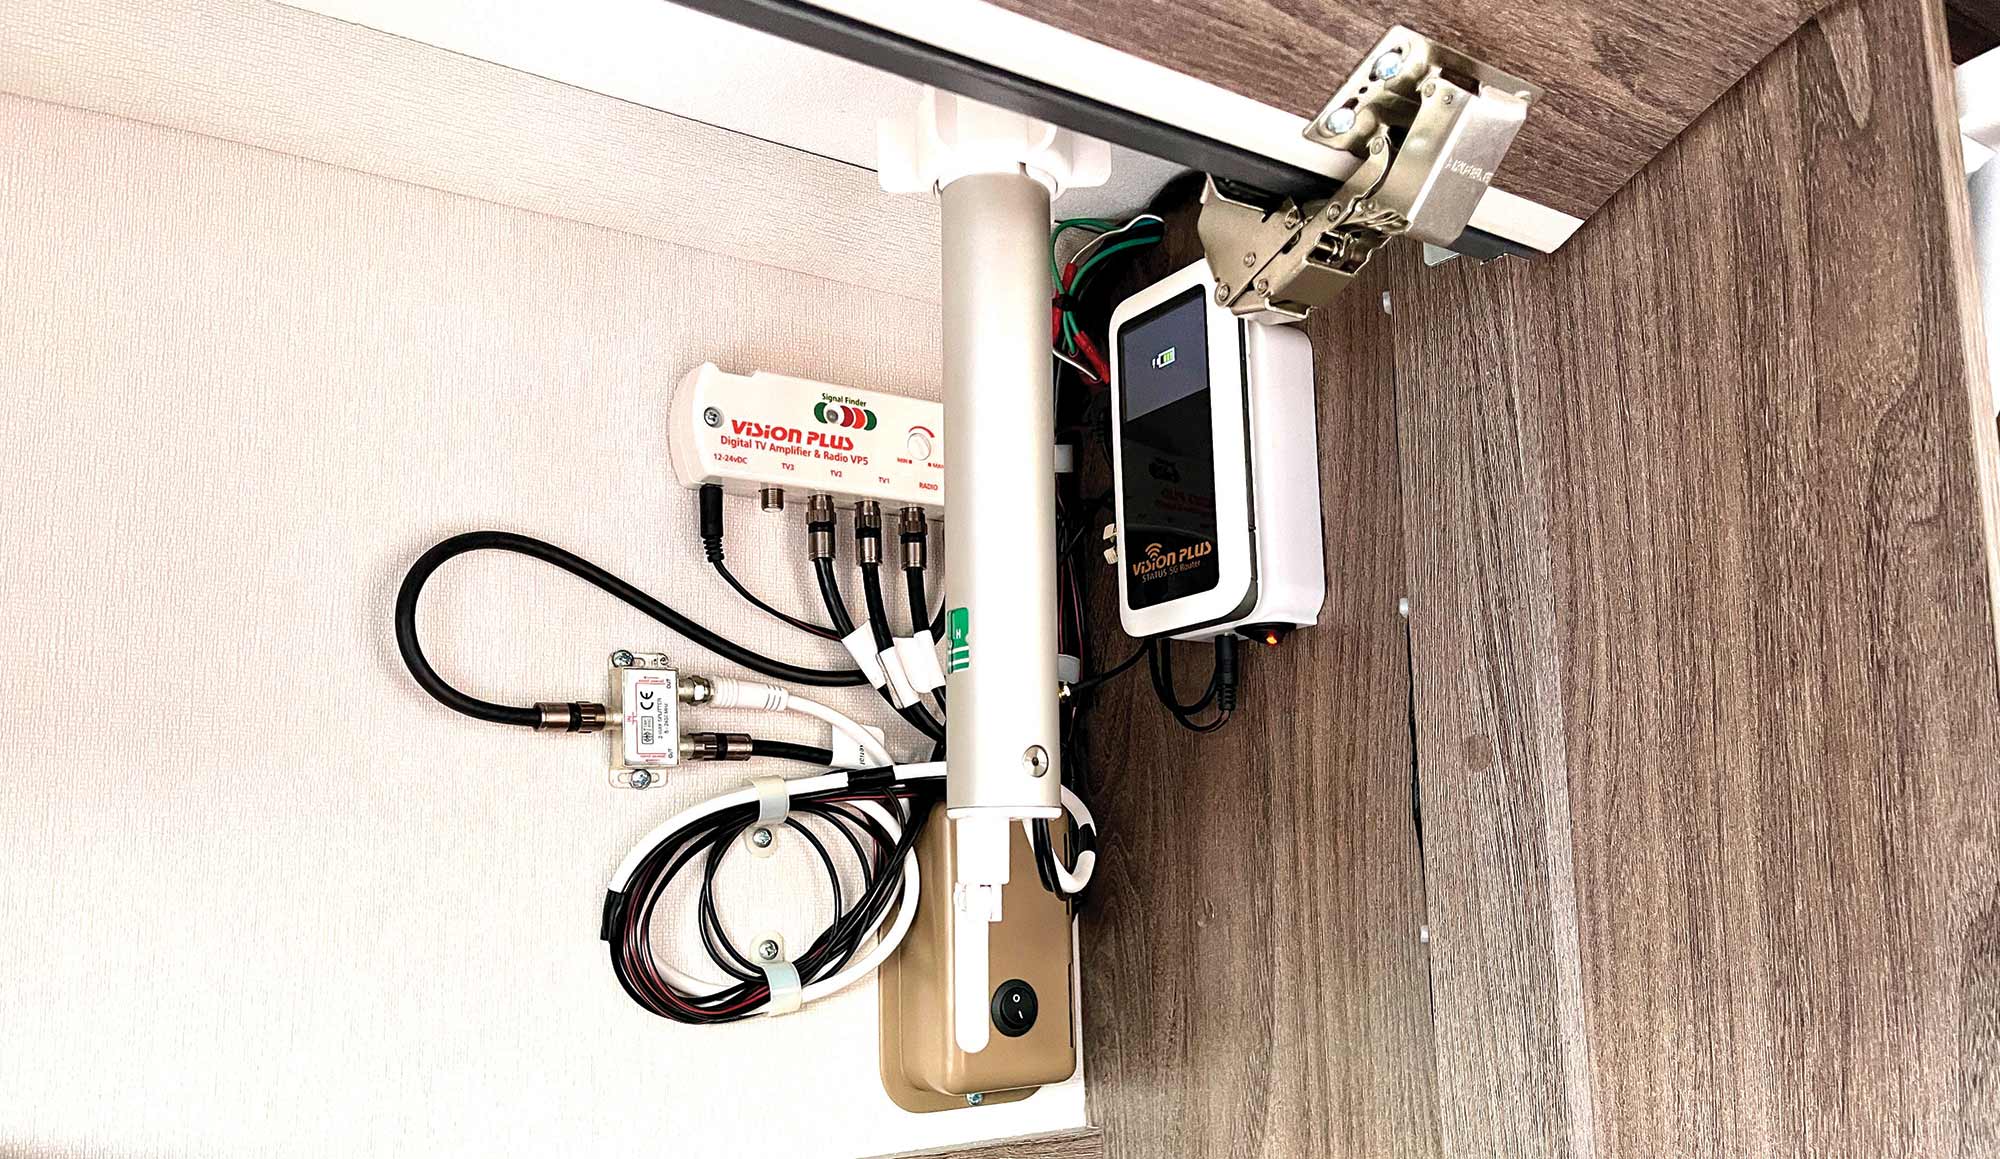
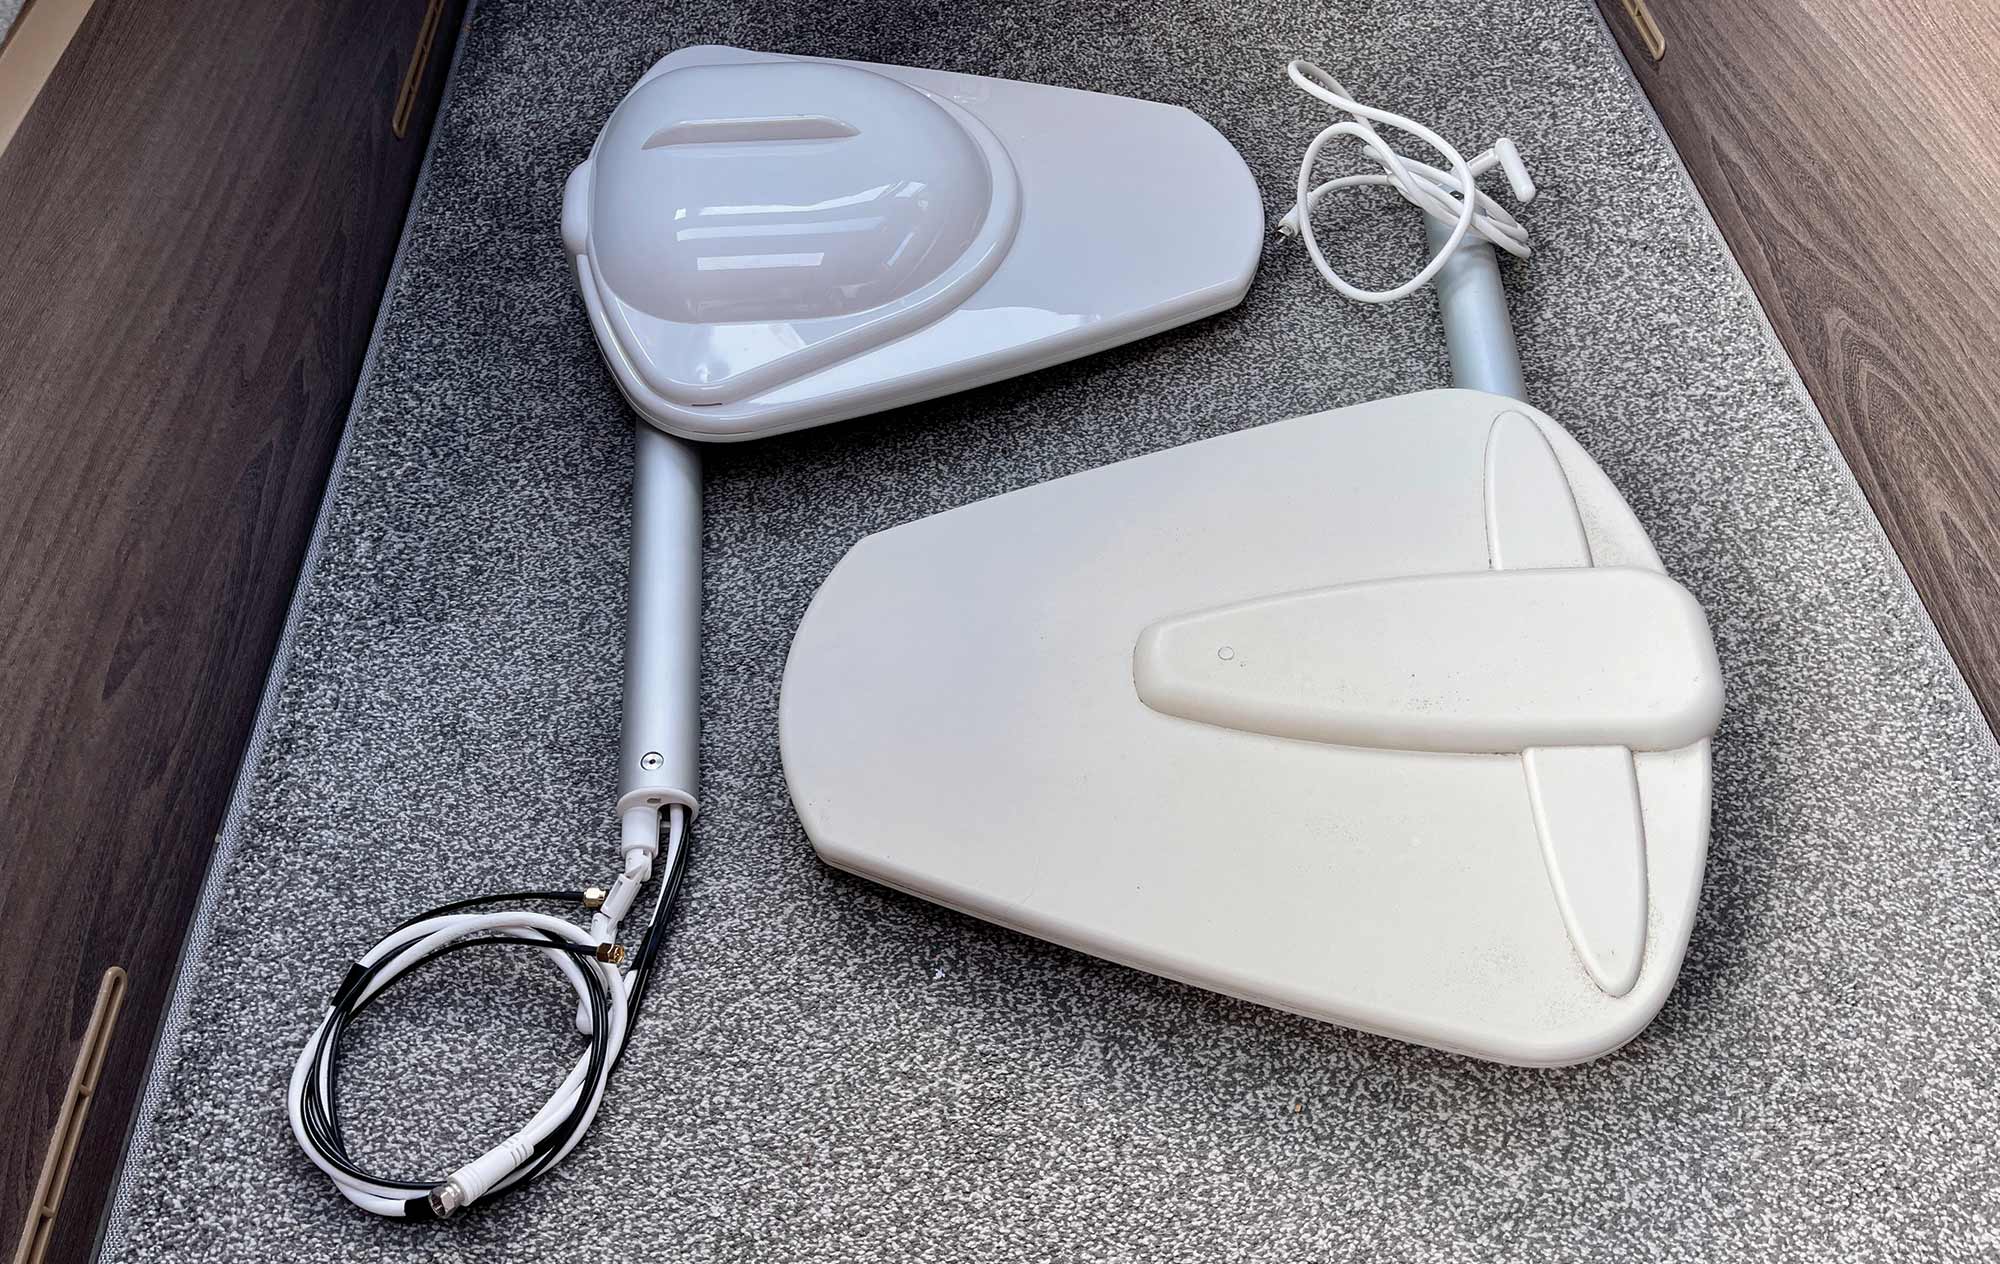
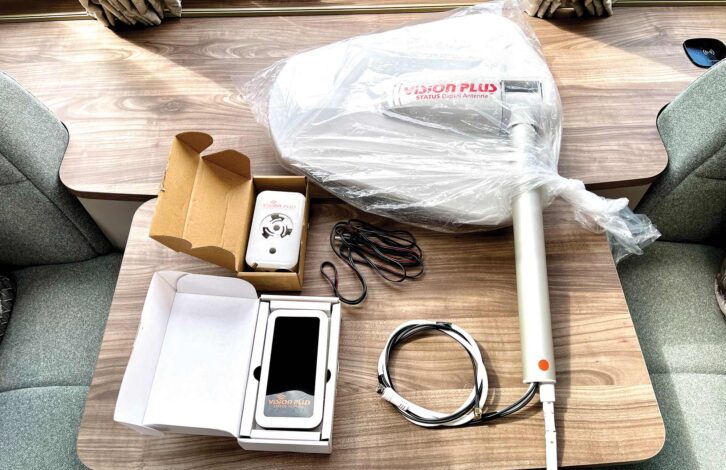
Having ordered the kit, I didn’t have to wait long before the box from Vision Plus duly arrived, containing the new antenna (with an extra dome for the Wi-Fi antenna), the power unit, a portable modem, the wiring and instructions.
You might find that like me, you’re lucky and the caravan is pre-wired for Wi-Fi in terms of having 12V where you need it. If not, you’ll have to run a 12V supply for the power unit.
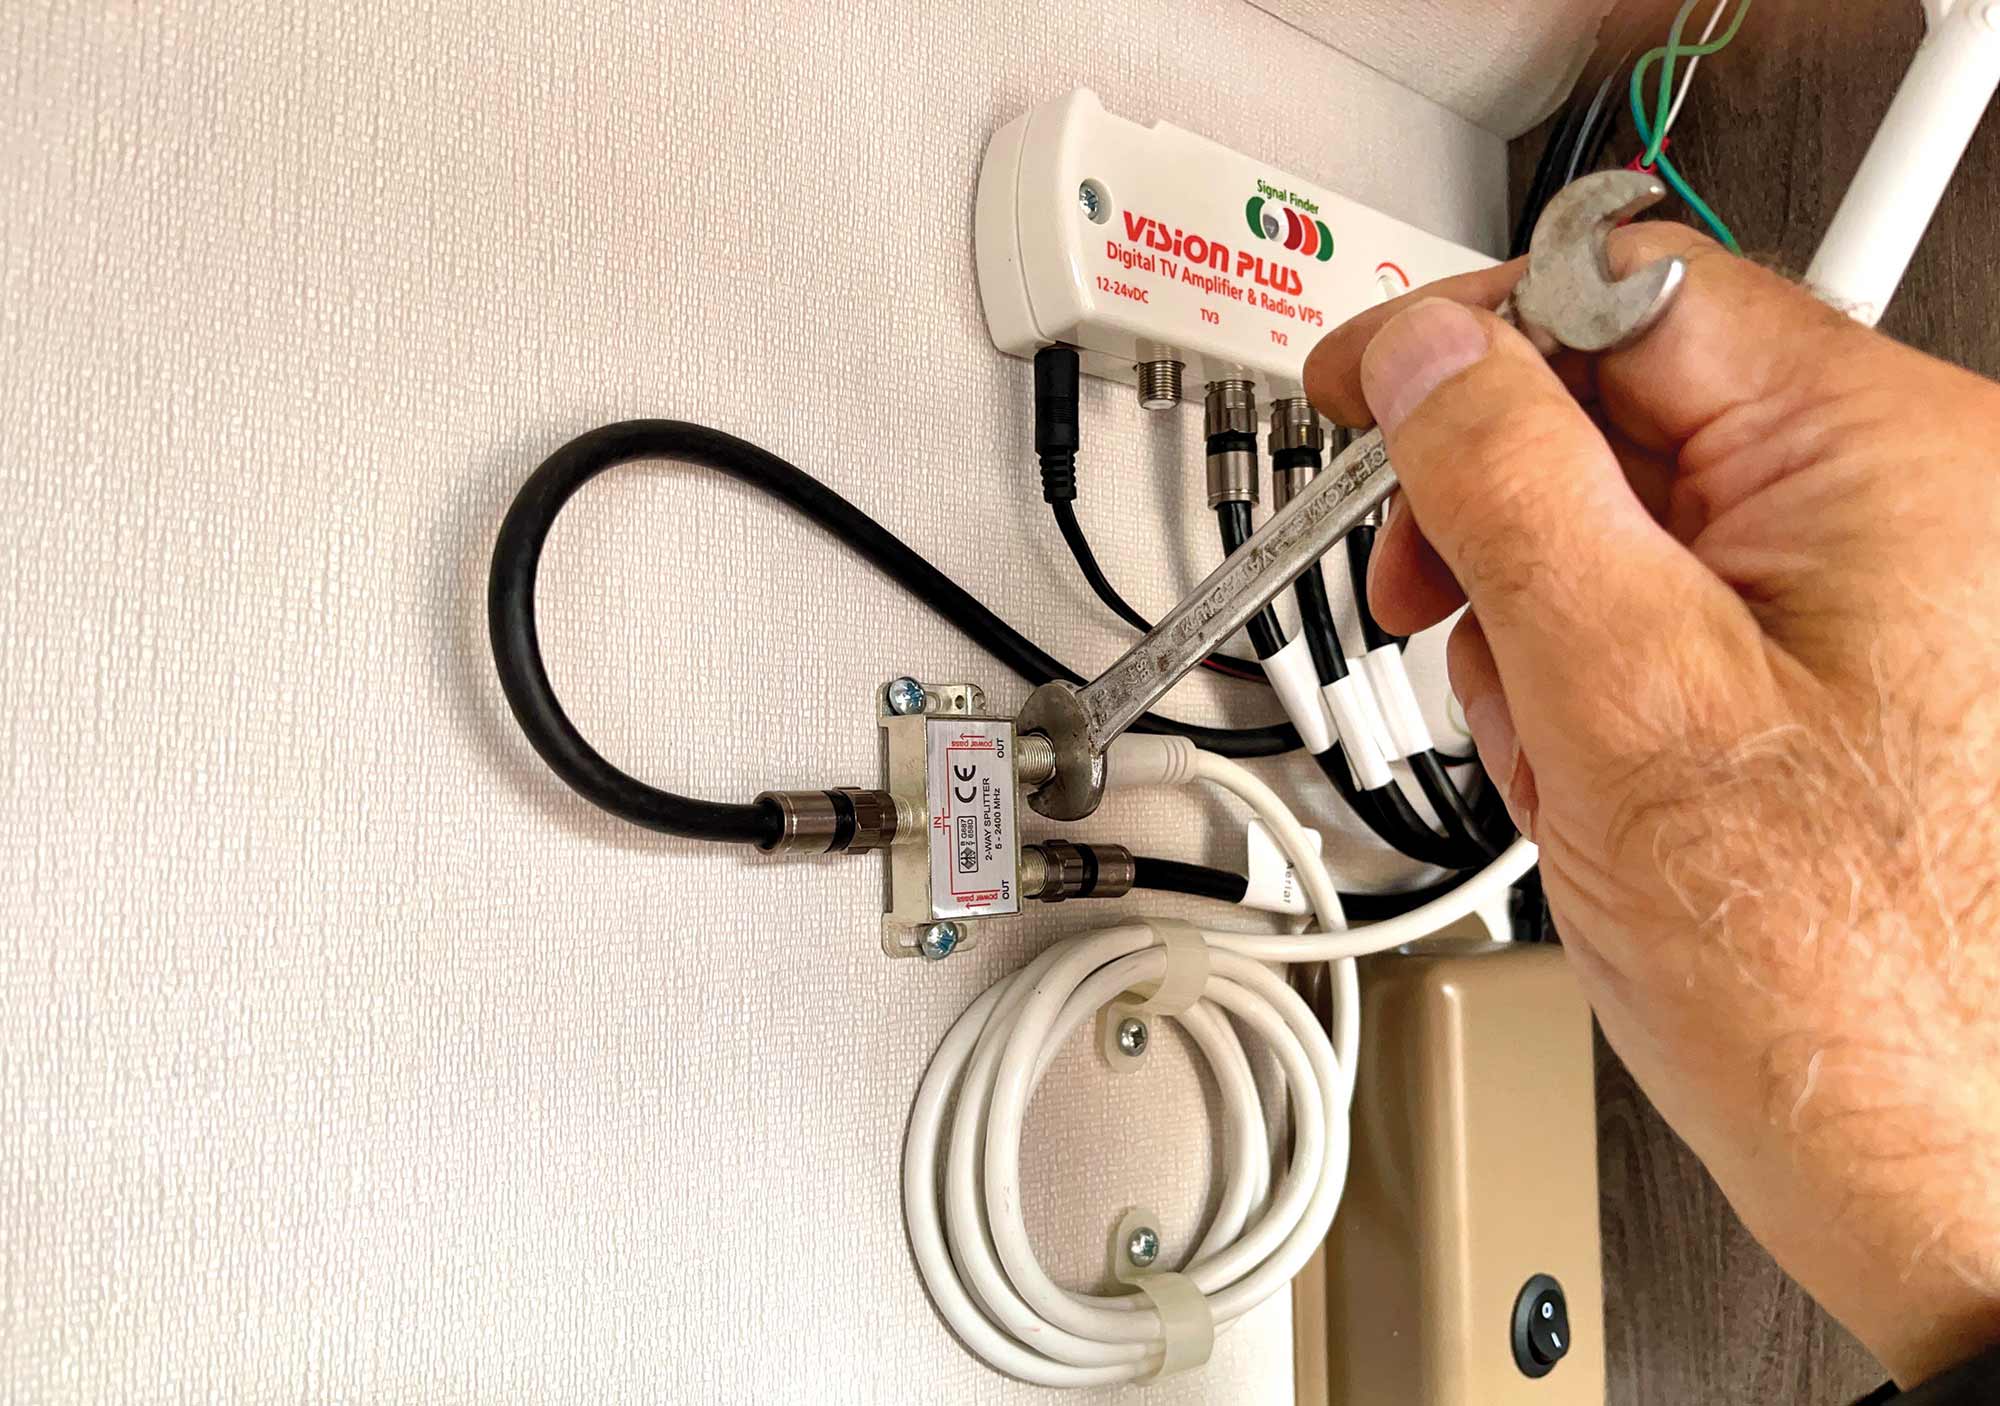
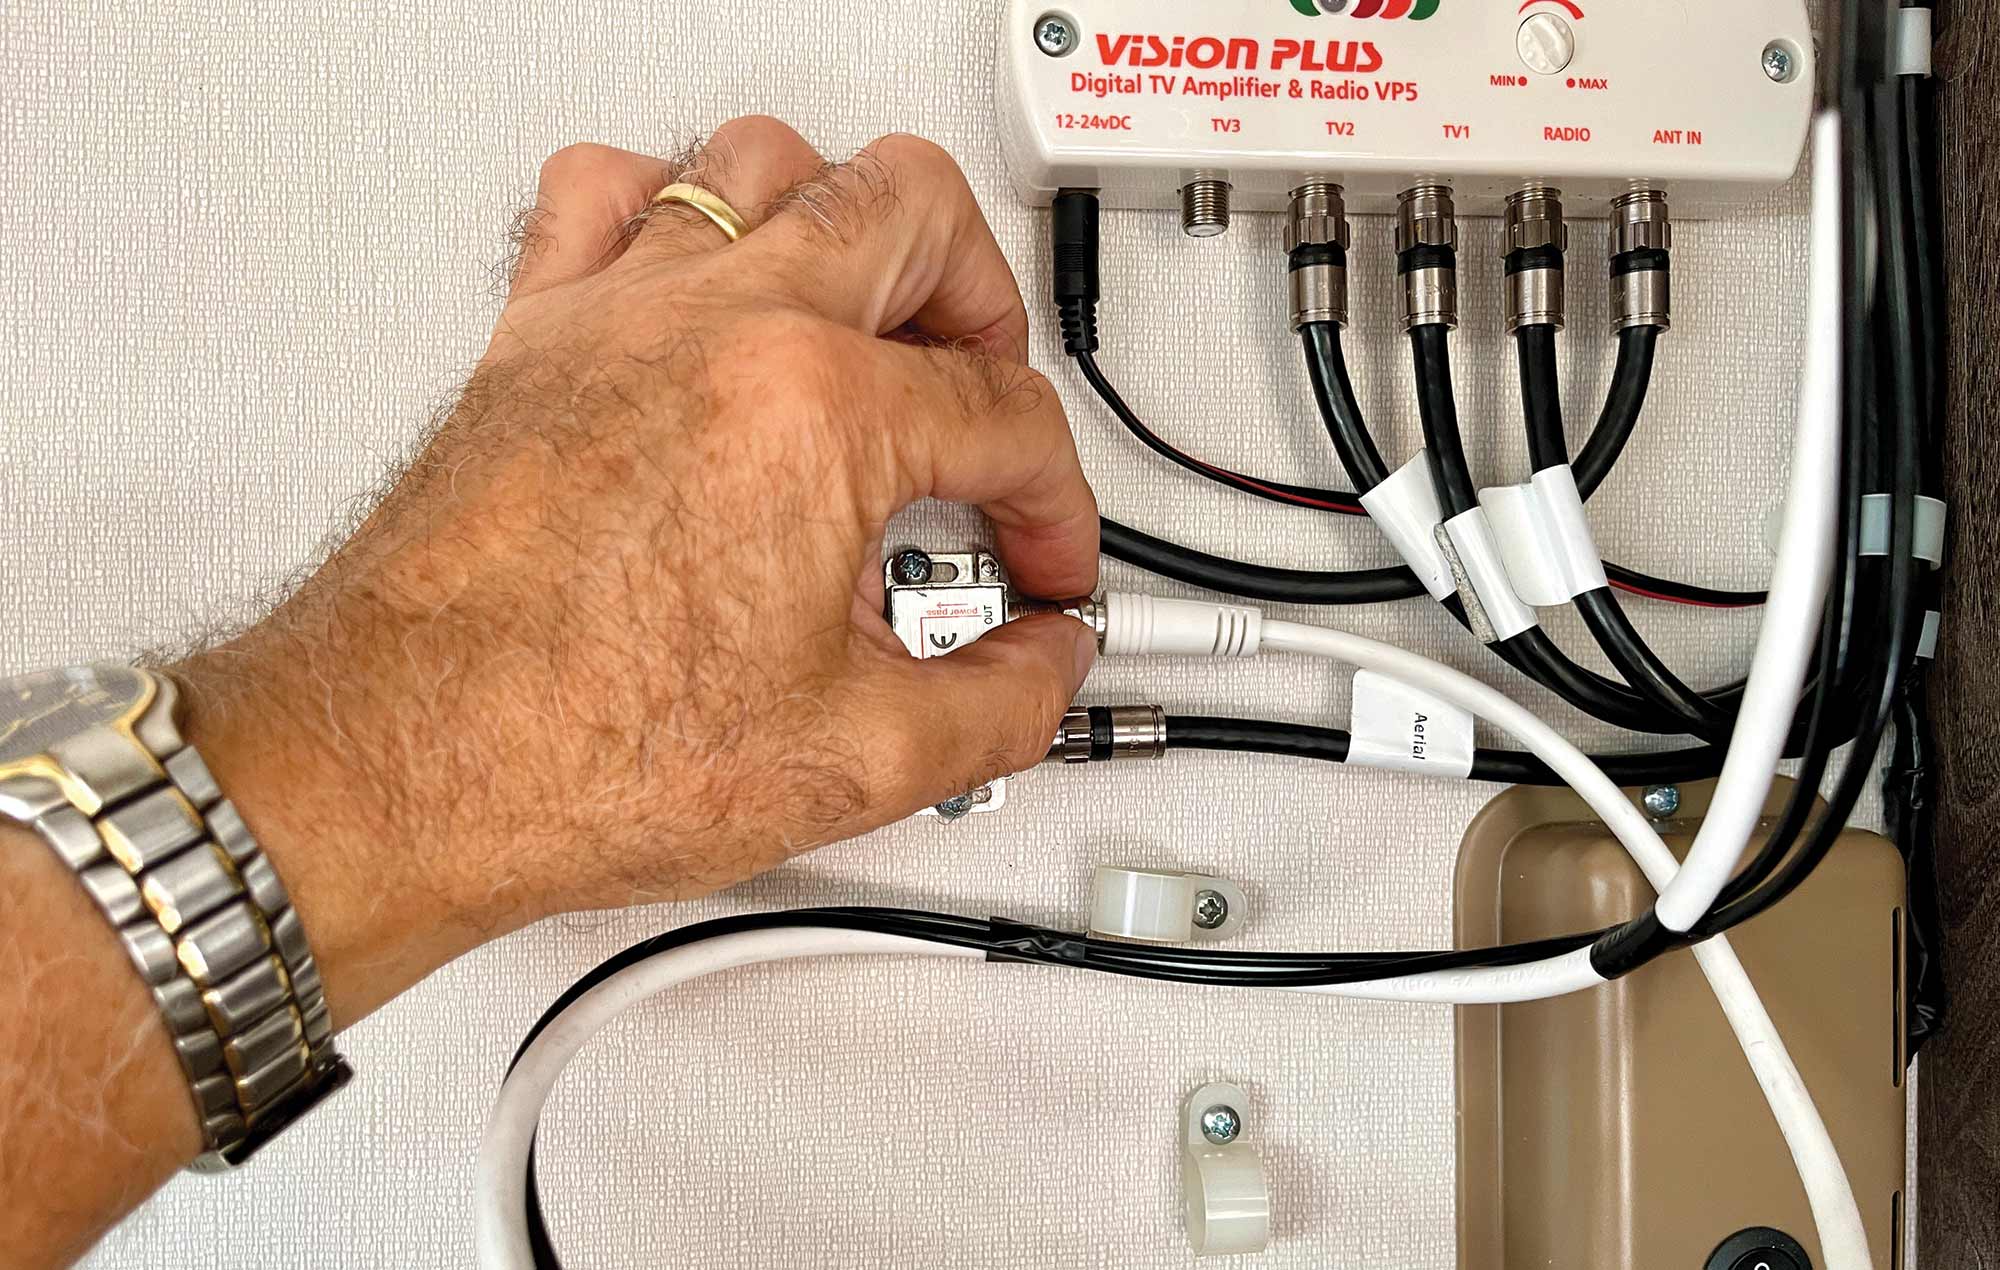
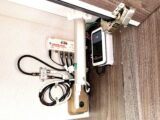
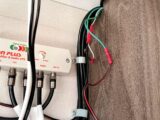
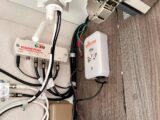
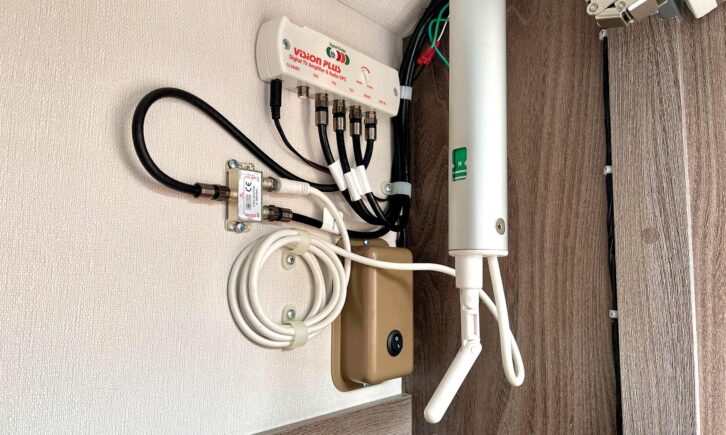
The first (very important) step is to disconnect the 12V power supply to the caravan. Next, you’ll need to remove the TV antenna. In our caravan, the coaxial cable from the antenna connects to a splitter (with an external feed), which is in turn connected to the VP5 amplifier. Detach the lead from the antenna, loosening the connection using a spanner or small pliers if needed.
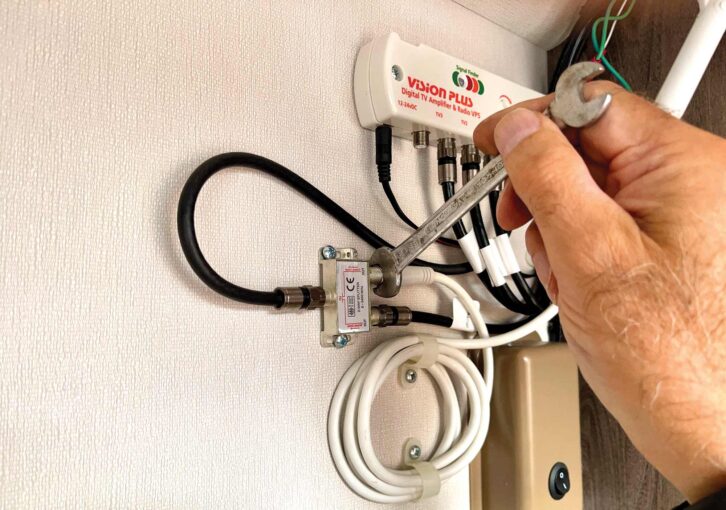
If your original antenna has three leads (white: TV, black: DAB, red: FM) and is connected to a VP2 unit, you’ll need a VP3 or VP5 replacement.
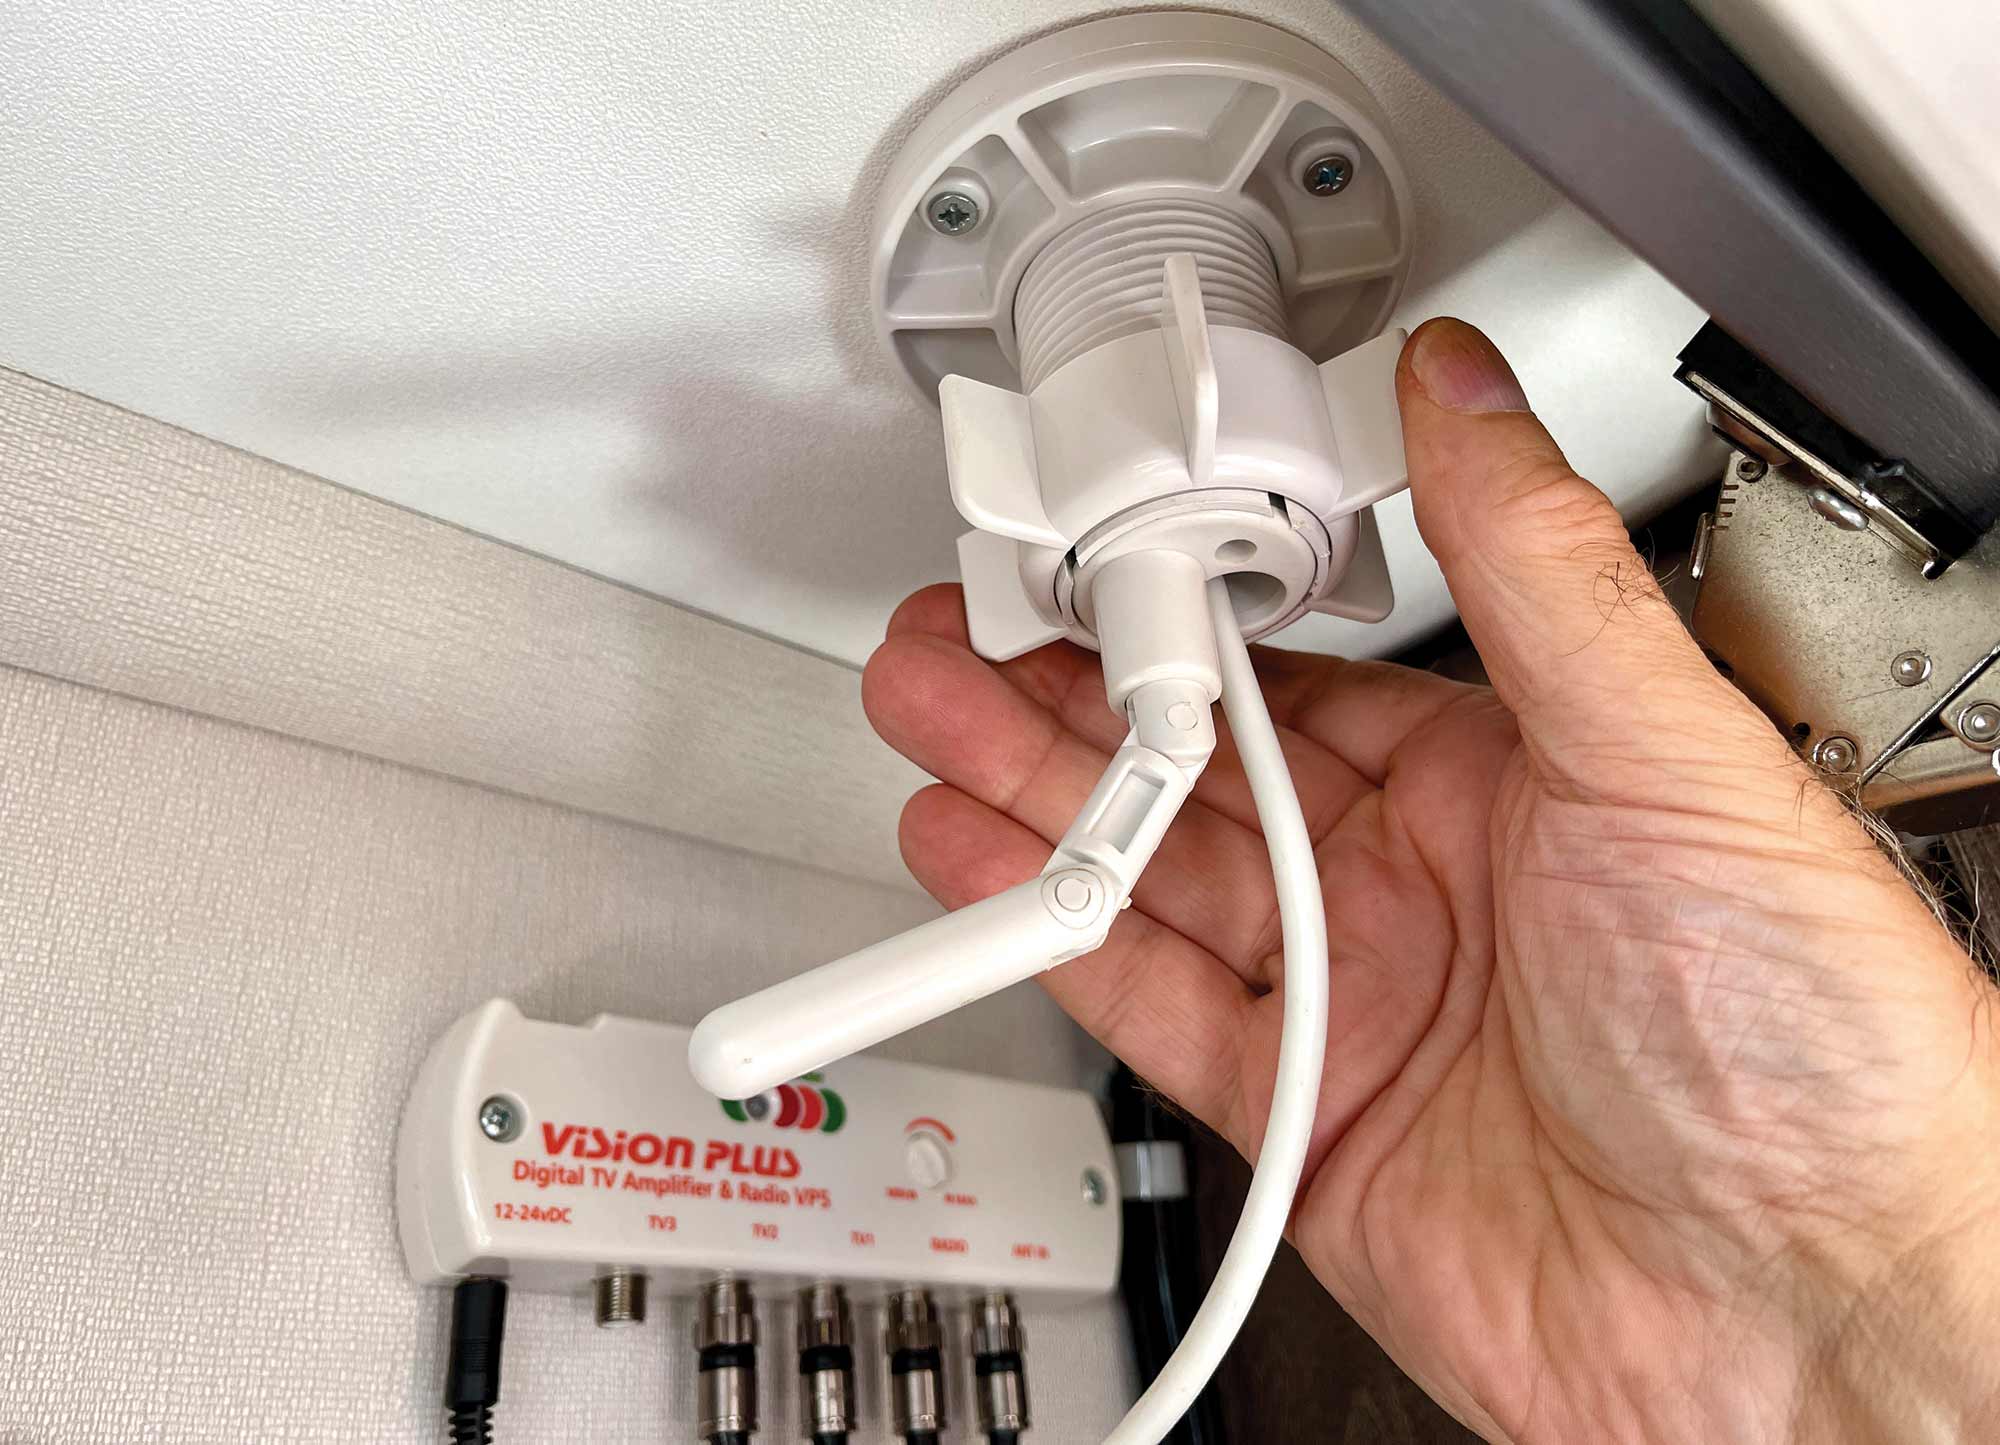
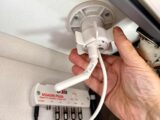
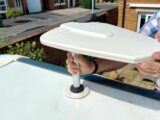
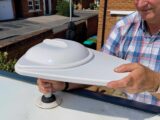
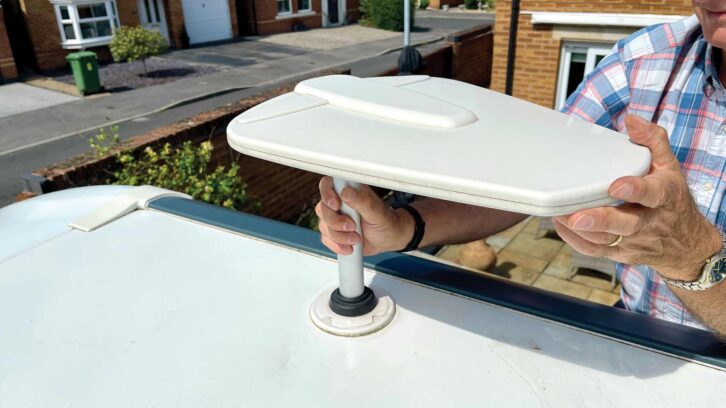
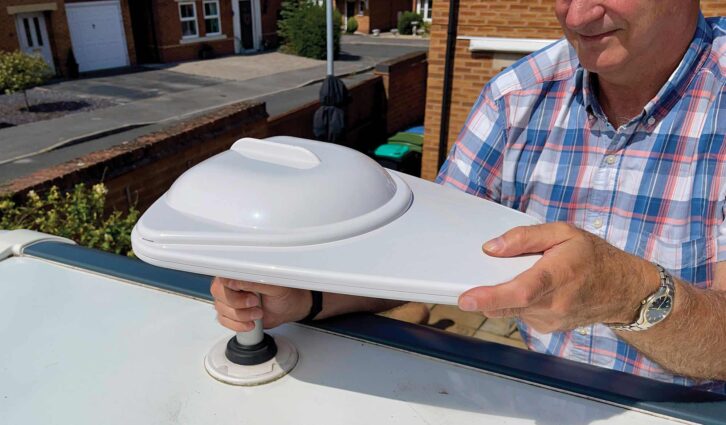
Now, it’s time to release the collar around the stem of the antenna fully, so the antenna is loose. Working outside, lift the antenna out of its mount.
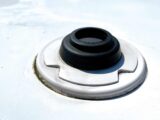
Then check the roof mount to see there are no cuts or splits in the rubber seal.
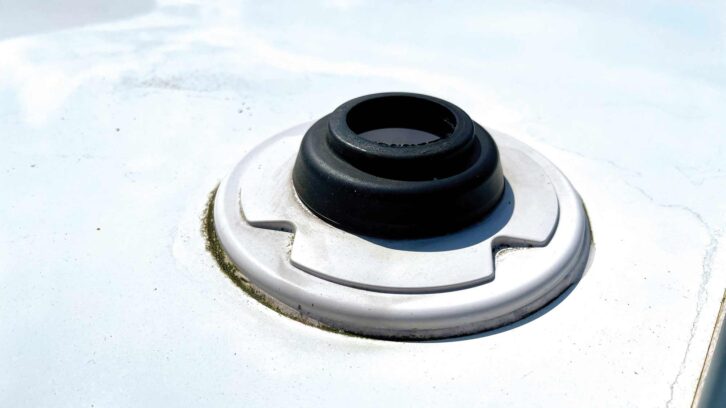
If all’s good, feed the leads on the new antenna stem through the roof mount.
While you’re up there, you may decide the roof could do with a bit of a clean, in which case be sure to take a look at our guide to cleaning a caravan roof.
Wiring up
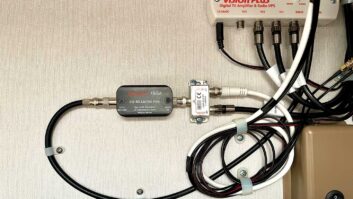
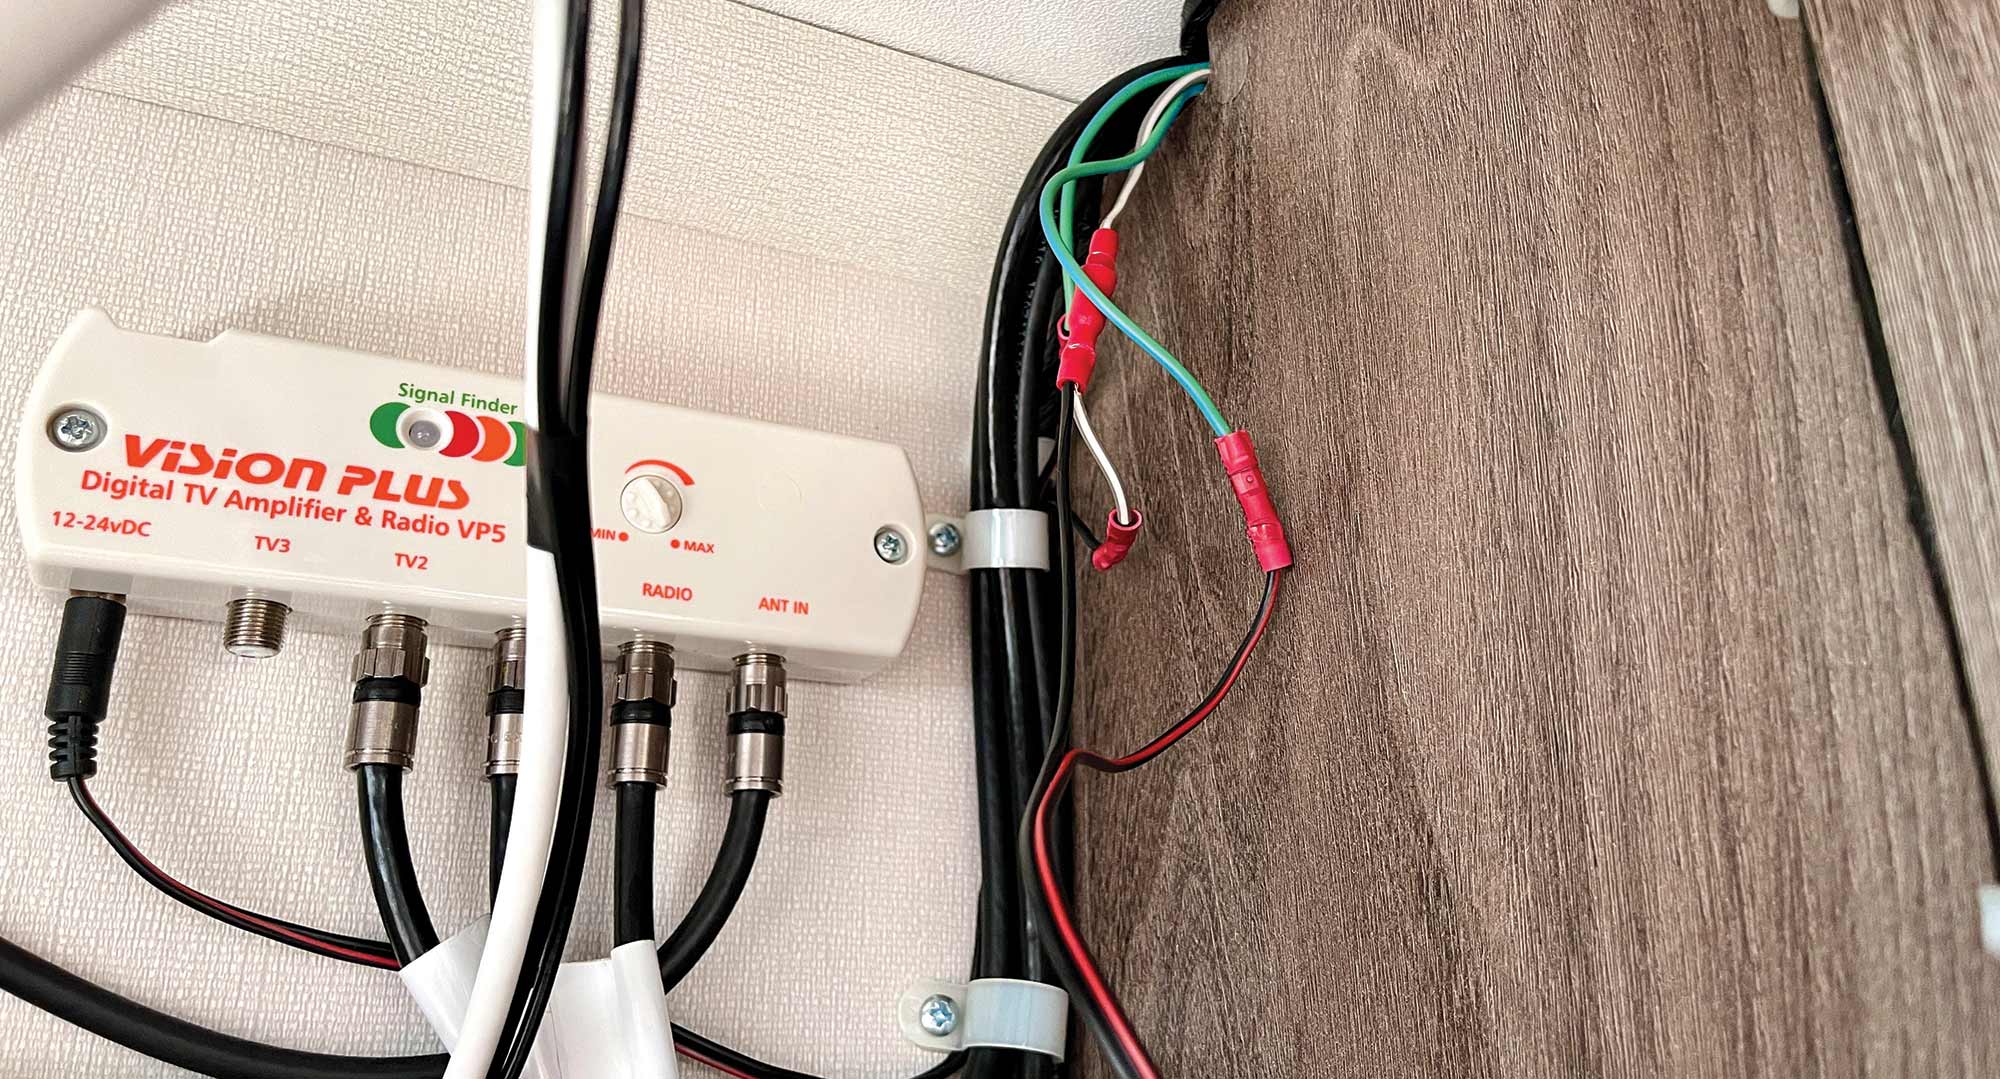
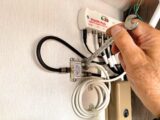
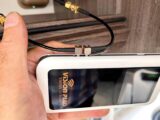
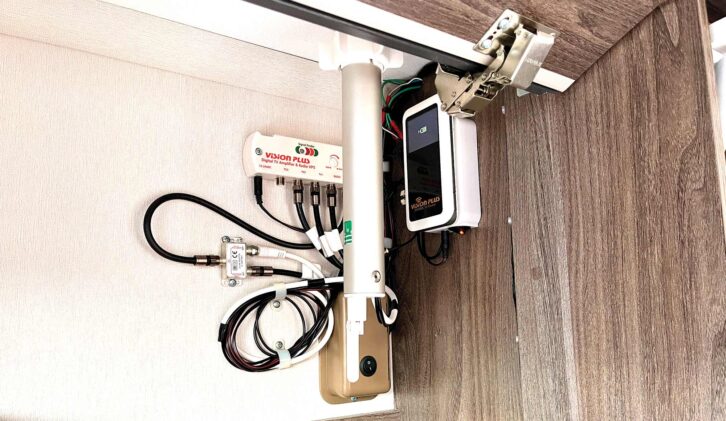
Back inside the caravan, raise the antenna stem and tighten the collar in as high a position as possible to give you space to work. You’ll see the new antenna has the white coaxial cable (TV) and two thinner black cables with SMA connectors (Wi-Fi).
Be mindful that the coaxial cable might be shorter than the one it’s replacing.
Connect the coaxial cable to either the splitter or the VP3/VP5 ‘ANT IN’ point. And that’s it for the TV part.

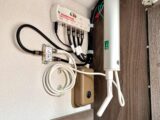
Next, connect the power lead for the power unit (this is identical to the lead powering the VP unit, and if you don’t have a separate power feed, you could splice into that) to your power source.
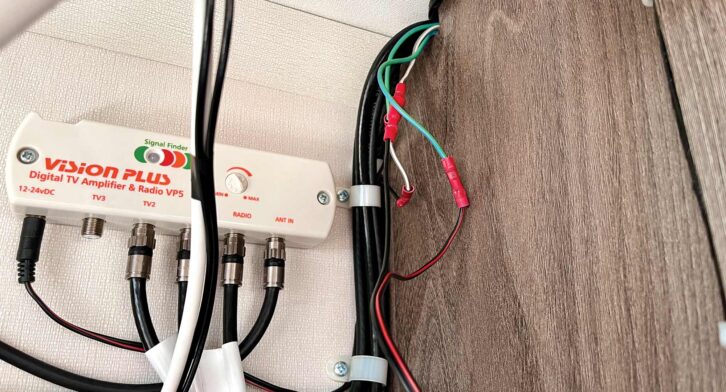
Our van came fitted with wires terminated in crimp connectors, so it was simply a case of crimping the new wires into these.
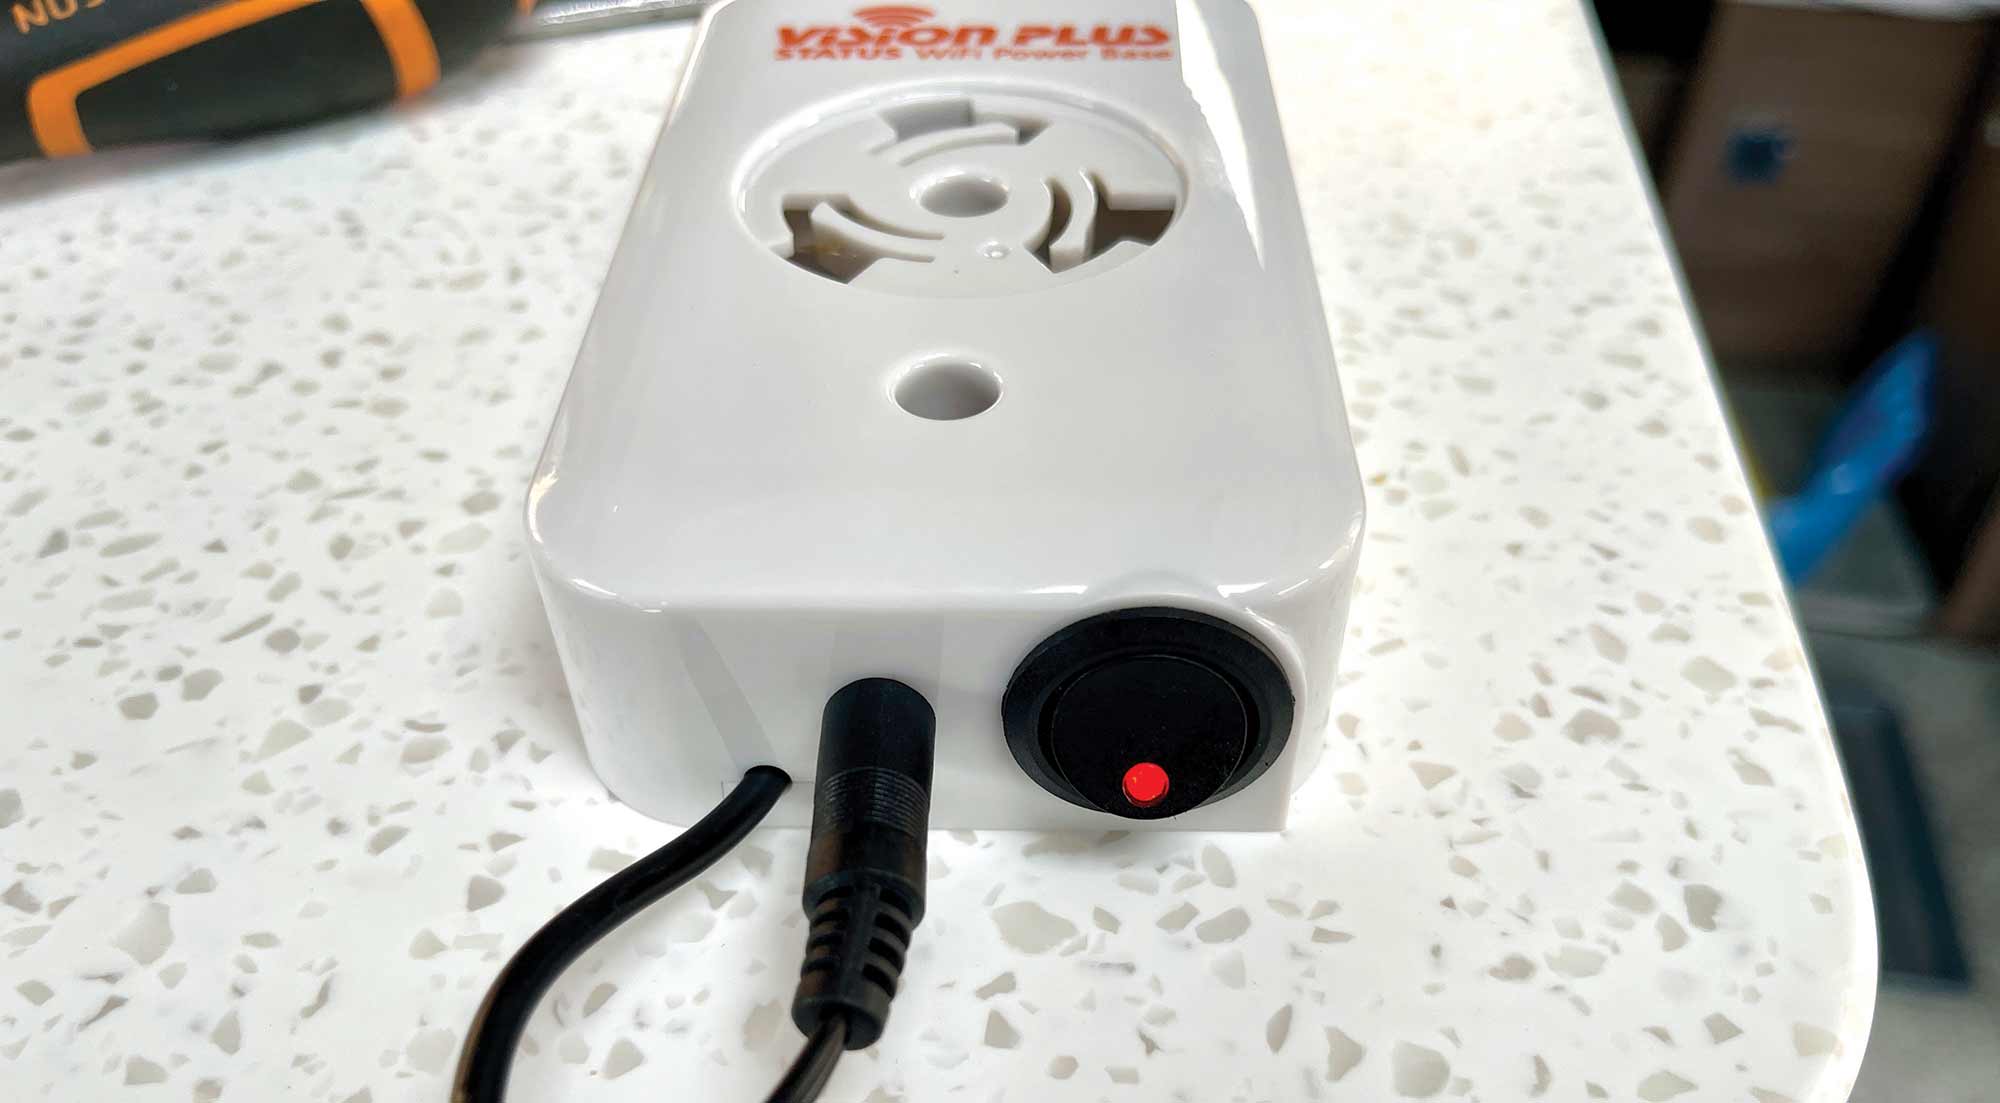
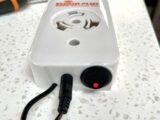
Find a suitable place to mount the power unit. Ideally, this needs to be out of harm’s way, but you also need to be able to mount/dismount the modem. I’d suggest mounting the modem to the power unit and trying out various places to find the best spot.

Two screws are supplied for mounting the power unit, but they were a bit too long for the place I chose to mount it and would have penetrated a locker nearby. Instead, I attached it with strong double-sided tape.
With 12V power reconnected, check the power unit works. If all’s good, tidy and secure the wiring so far.
Activate the system
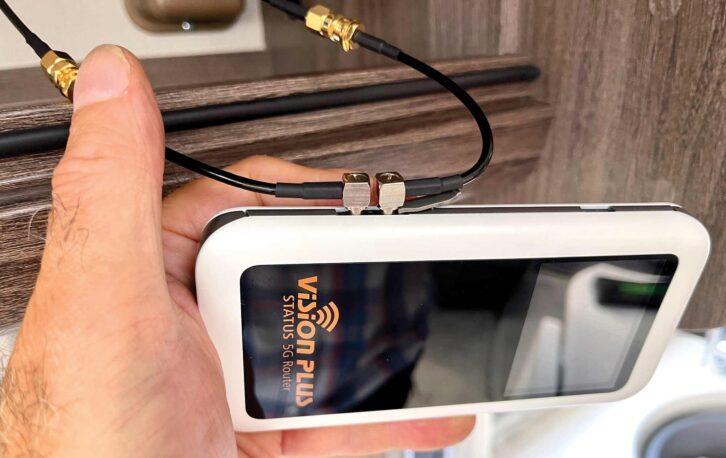
Now attach the two short black jumper leads to the black leads from the antenna via the SMA connectors.
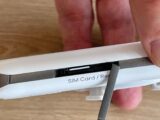
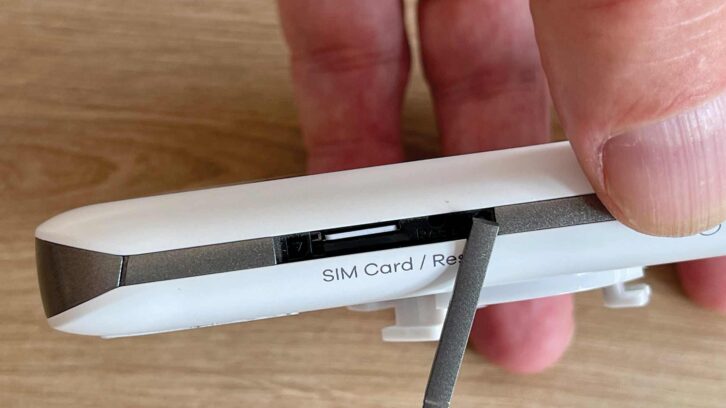
Insert an activated SIM card into the modem and switch it on.
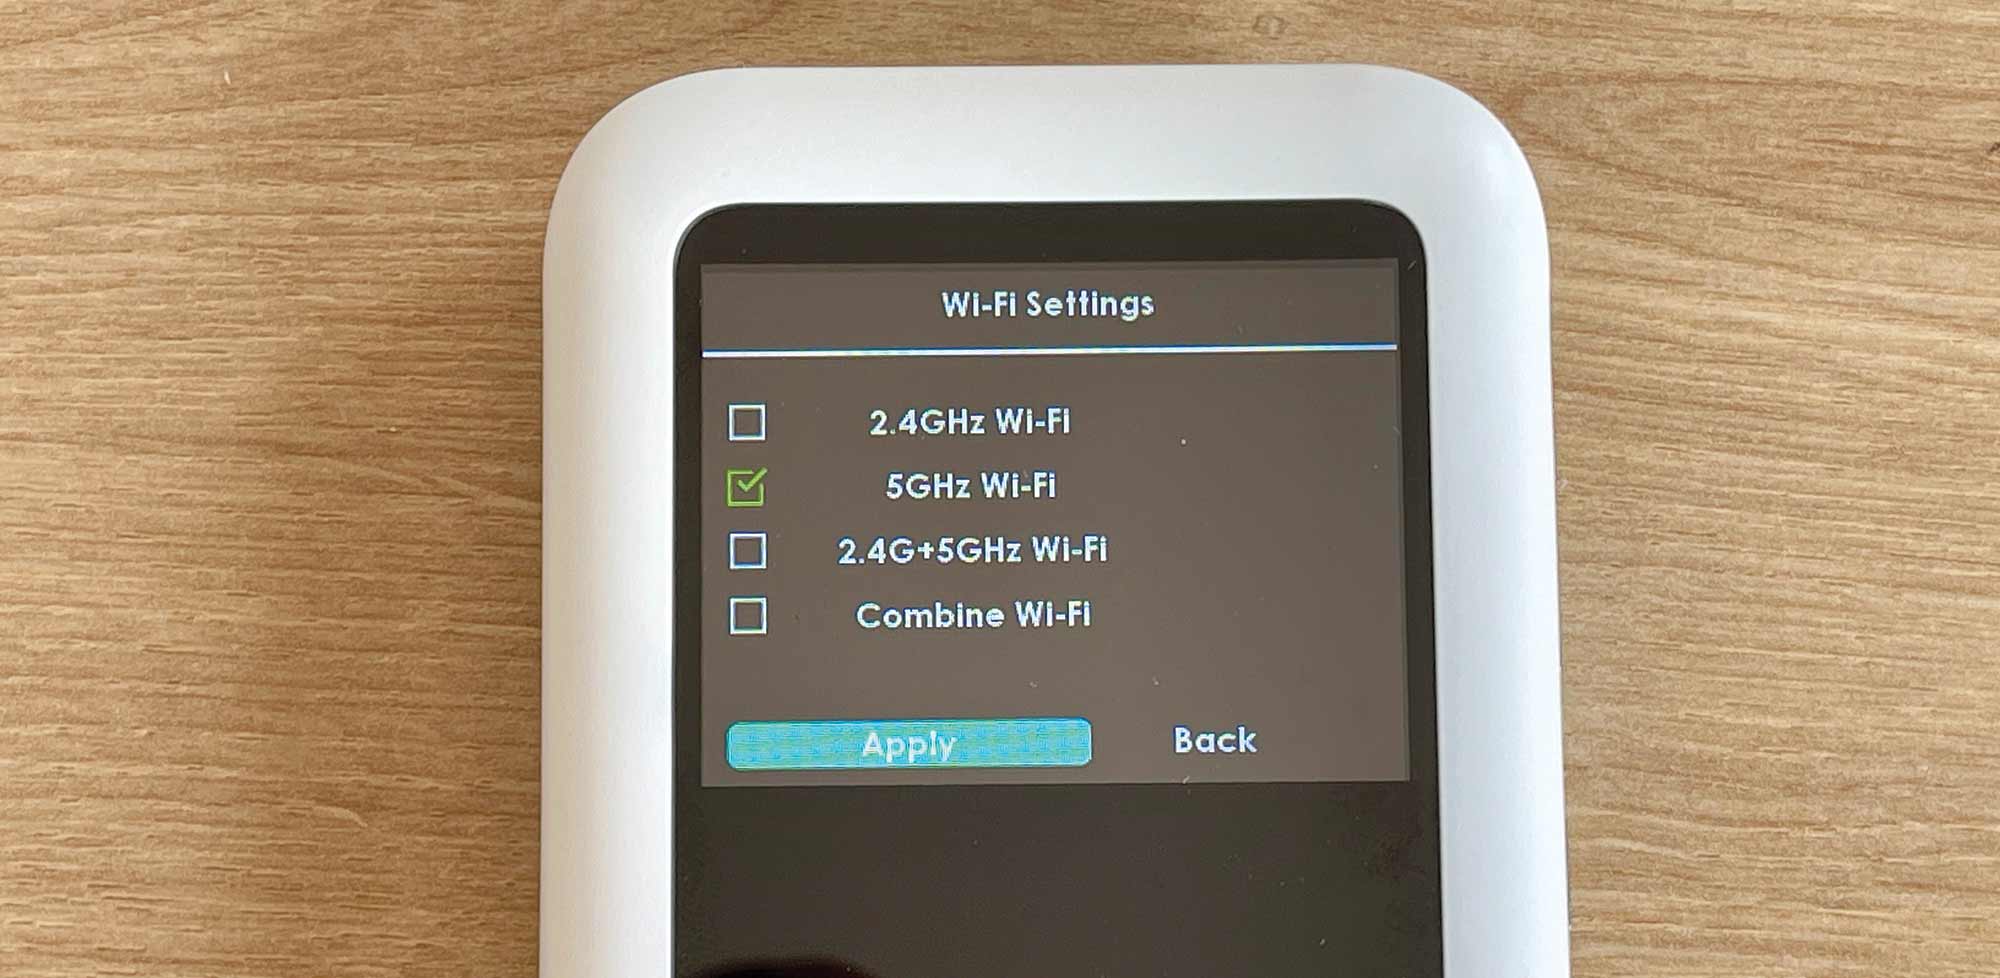
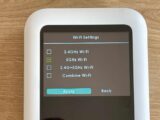
You’ll then need to select the appropriate 5G setting using the menu and ‘select and arrow’ button on the side. You’ll see a QR code displayed on the screen.
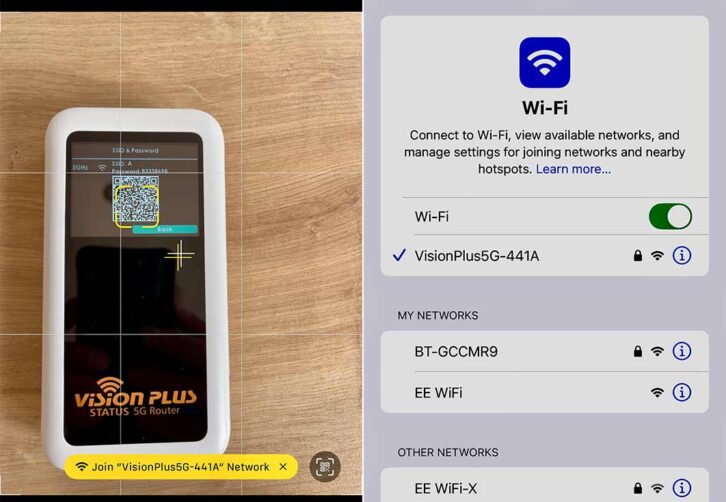
Scan this with your phone (noting the password) and you should see Vision Plus 5G as an internet option. Return to the Home screen.
Mount the modem on the power unit and plug the two TS-9 connectors (black leads from the antenna) into the modem, or it might be easier to connect them before mounting the modem. Either way is fine.
Plug the USB-C lead from the power unit into the modem.
Tidy the cables and turn on the power unit. You should see the battery charging icon on the modem screen. And that’s it, you have Wi-Fi in the van!
I connected my phone and iPad and it worked brilliantly straight away.
The modem is portable, so you can use it in your awning, for example, or if you’re with friends who haven’t got Wi-Fi.
Recently, it has been pointed out to me that we need a Smart TV for the caravan. And now that we have access to reliable Wi-Fi, I’m fighting a bit of a losing battle, aren’t I?
Future Publishing Limited, the publisher of Practical Caravan, provides the information in this article in good faith and makes no representation as to its completeness or accuracy. Individuals carrying out the instructions do so at their own risk and must exercise their independent judgement in determining the appropriateness of the advice to their circumstances and skill level. Individuals should take appropriate safety precautions and be aware of the risk of electrocution when dealing with electrical products. To the fullest extent permitted by law, neither Future nor its employees or agents shall have any liability in connection with the use of this information. You should check that any van warranty will not be affected before proceeding with DIY projects.
If you enjoyed reading this article, why not get the latest news, reviews and features delivered to your door or inbox every month? Take advantage of our brilliant Practical Caravan SUBSCRIBERS’ OFFER and SIGN UP TO OUR NEWSLETTER for regular weekly updates on all things caravan related.