


A caravan is nothing like your car, where the most complicated bit of kit you have to navigate is usually going to be the multimedia system.
In a caravan, you have the kitchen, the washroom, the lounge and the dining area to figure out, complete with plumbing systems, secondary heaters, ovens and all manner of electricals. The presence of all these complexities brings with it plenty of opportunity for error.
But don’t worry, that’s what we’re here for – to steer you through all these bits of kit, so you know exactly what you’re doing. Or at least how to fool most casual observers you encounter on a caravan site!
- Wondering what your options are in case you break down when towing? Then take a look at our caravan breakdown cover guide.
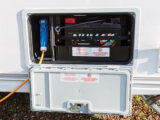
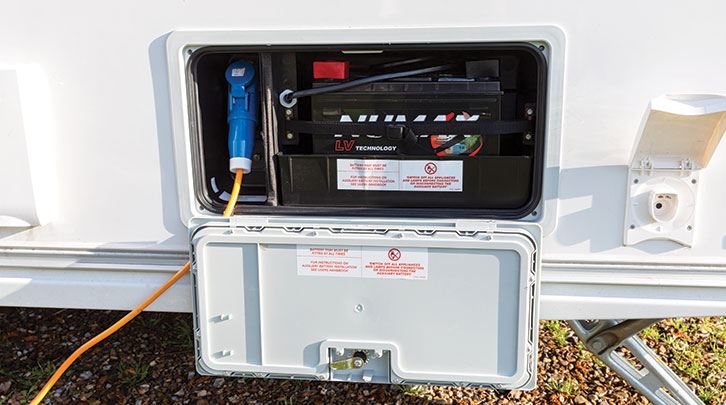
Caravan batteries
The thing that causes most difficulty on site is very often the leisure battery. Modern caravans rely on 12V DC from the leisure battery to power almost every item of equipment inside them. Your lights, taps, heating, fridge and oven all need an electrical supply to function, and the battery is a finite source of energy.
When you plug into a mains hook-up, you might think you’re out of the woods, but this all depends on your energy use.
If your caravan has a (say) 20A charger, but you are running a microwave off an inverter (which can easily draw 120A), you can see that you’re draining your battery six times faster than you’re replenishing it. So it will go flat.
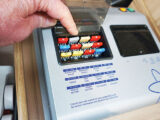
If your leisure battery goes flat, your habitation appliances will misbehave. Think of it like a human who has had a few too many in the campsite bar! Everything will work a little wonkily and data imparted by the control panel might not be as accurate as usual.
This is why it’s always wise to carry a multimeter or a plug-in voltage meter to get a second opinion. If any electrical device starts to misbehave, always suspect low voltage as the culprit, as a first step.
Traditional 12V batteries are considered to be flat (empty of charge) when they are below 12V (so roughly 50% discharged) and fully charged at around 12.7V.
Modern lithium batteries (lithium iron phosphate or LiFePo4) are fully recharged at 13.6V and are at 20% of their capacity at around the 12.9V level.
It’s understood that traditional lead acid/AGM and gel batteries will have a reduced lifespan if they’re regularly discharged to below 12V, and that they can be permanently damaged if they’re allowed to go into single-digit voltages.
Lithium batteries are thought to be far more tolerant of deeper levels of discharge. But with all types of battery, you can appreciate how important it is to have an accurate voltage reading, when just 0.7V can be the difference between full and empty.
If you’re like taking your caravan off-grid, lithium batteries, of as large a capacity as your storage space and payload allow, are the way to go. If you only stay on campsites with hook-ups, it’s less important.
If you don’t want to rely on hook-ups, there are other methods to keep your battery full of charge. A caravan solar panel is a must-have, so long as you understand their limitations and outputs.
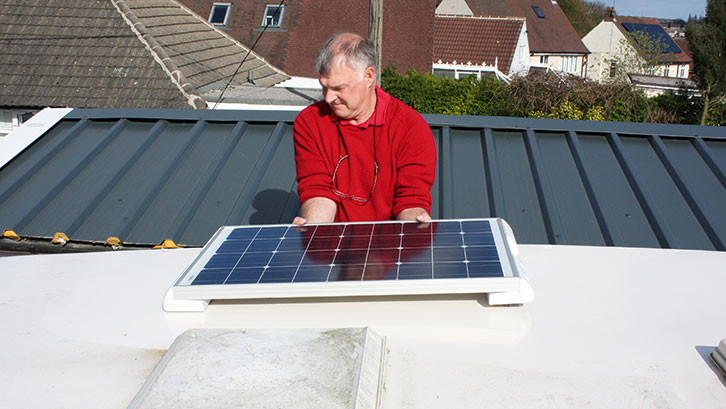
They are a trickle-charger for your battery, and they work very well during the summer months. In winter in the UK, owing to the angle of the sun and reduced daylight hours, their output is more variable and can’t always be relied on.
To compensate for this, it’s best to buy the largest solar array that you can afford and that will fit on your roof. Even then, it makes best sense to plug into the mains over the winter lay-up if you can.
Caravan appliances
The most common newbie error occurs when you first buy your van, especially if it is a brand-new model, which might have no touring kit or essential caravan accessories in it.
You will need a kettle, a toaster and perhaps a hairdryer when you’re away on holiday, so it might seem that the obvious thing to do is to pack your domestic items into your caravan. But the problem here is a simple one: domestic devices are too high-powered for use in a caravan.
If you’re on a mains hook-up, they will either run really slowly or trip out the hook-up on the campsite. This will then often involve taking the walk of shame to reception, to get them to reset it!
If you are running any of these devices on a large inverter (a gadget that converts 12V battery power to mains AC 230V), you will have a massive drain on your battery and can flatten it in minutes. Remember, too, that no, or low, battery power can make your van systems malfunction.
To give you some idea of the scale of the problem, most domestic kettles are around 3000W, which means they need 13A of current from a 230V hook-up.
Now switch on your 1500W toaster and you’ll be attempting to draw another 6.5A from the hook-up, making 19.5A in total. Most campsite hook-ups offer a maximum of 16A, so they will immediately trip as they are overloaded.
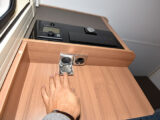
It’s a good idea to familiarise yourself with the location of your van’s consumer unit (for resetting the 230V RCDs) and fusebox (for protecting the wiring to your 12V devices).

Generally, if it cooks, heats or cools, it will be a high consumer of current. Look on the base of the device and you will see a label indicating the power in watts (W). Anything over 1000W will be a pretty heavy current consumer.
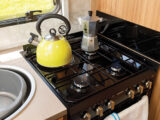
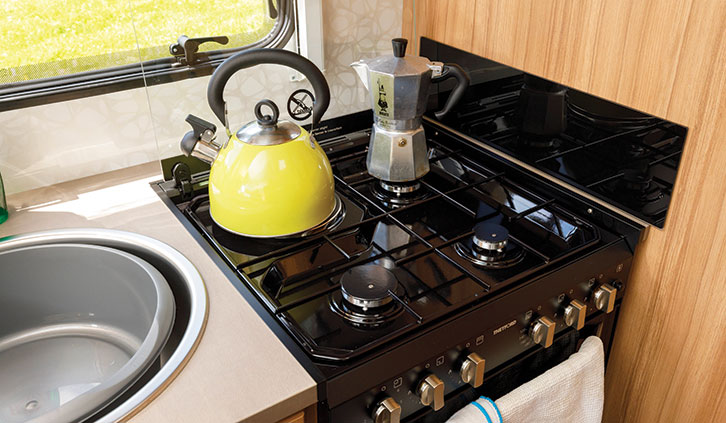
The solution to this problem is simple – you just need to buy low-powered, caravan kettle, toaster and curling tongs, and only use one device at a time. Better still is to boil water on the hob and use gas whenever possible.
Another electrical error
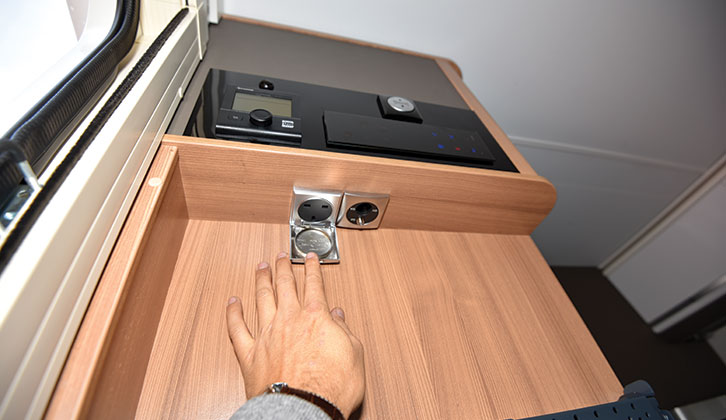
If we had £1 for every time we’ve seen somebody complaining on an internet forum that their “three-pin electrical sockets don’t work”, we’d be millionaires!
All of the 230V mains three-pin sockets in your van will only work when you’re plugged into the mains hook-up. Think of the caravan as simply a mobile mains extension lead and you’ll get the idea.
You can get all of the sockets to work directly off the battery via an inverter and a switchover contact, but this won’t be a good move, for several reasons.
First, converting from DC battery power to mains AC power loses energy in the process and isn’t as efficient as running devices directly on DC (for example, TVs and laptops). It massively increases the risk of depleting your finite battery resources.
Second, there are potential safety concerns to overcome with the use of inverters – such as their lack of an earth point and the risk of having an inverter and mains hook-up in use simultaneously.
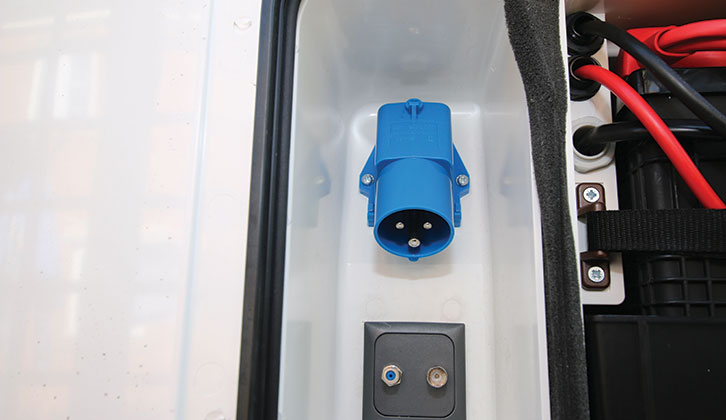
Plug into the mains hook-up
The first point to remember is simple, but essential – always fully unwind your electric hook-up cable before use (to avoid problems with overheating because of the magnetic heating effect of coiled wire), and plug the female end (with the lift-up cover) into your caravan first. Then plug into the hook-up point.
When leaving the site, always unplug the mains hook-up end first, before you unplug from the caravan.
You’ll find that the blue CEE plugs are fairly universal across Europe, but you’ll occasionally find a site that uses the older two-pin style plugs. You can buy adaptors for under a tenner in the UK, but most campsite shops will also sell you one.
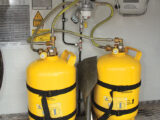
Using gas
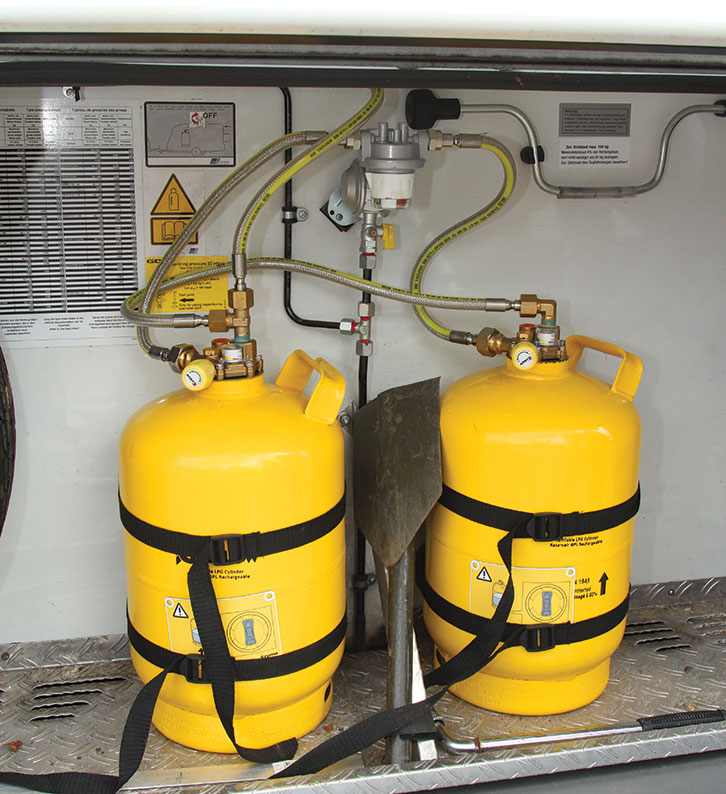
On my first-ever leisure vehicle test run, I had no clue about how to swap the gas bottle. Naturally, one of the cylinders ran out in the middle of a freezing cold night and of course, it was raining heavily and the site shop was shut.
After struggling for several minutes to undo the propane valve, I figured out that it had a reverse thread, and started to loosen it. The gas locker immediately filled with a high-pressure hissing sound. Ah, you have to switch the tap off first…
The whole process was quite scary and I left the site viewing gas bottles as evil. My opinion has changed over the years, but the fact remains, you really need to know what you’re doing when swapping cylinders or refilling any LPG unit. Read the manual, or better still, have it demonstrated at handover.
Bottled gas is the most expensive way to buy gas supplies and the smaller the bottle, the higher the cost per litre/kg. If you can do so, it might be preferable to switch to a refillable upright cylinder in your existing gas locker (for example, Safefill or Gaslow).
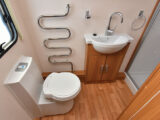
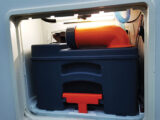
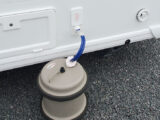
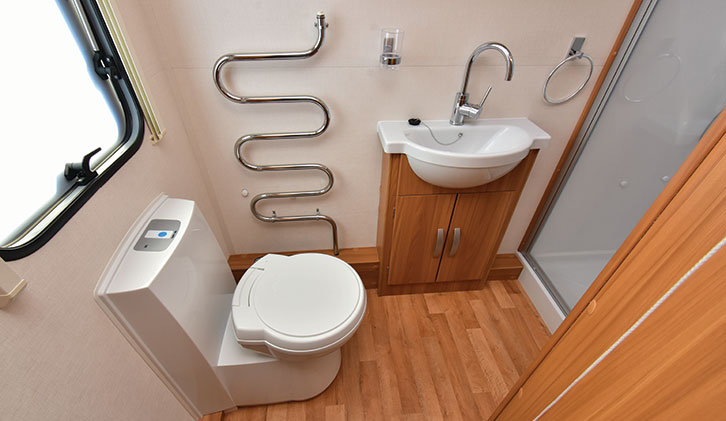
Cassette toilets
Knowing when and how to empty a caravan toilet will be an important touring skill. I was once pitched up on a French site and drew the curtains to see a fellow camper walking towards the Elsan disposal point carrying his Thetford cassette level at arm’s length, rather like it was a ticking bomb. This was a bit odd, because it was one of the well-designed modern ones, which have wheels and a pull-up, suitcase-style, handle.
He reached the empty point and then spent a little time carefully levering out the central slider. “Uh oh!” I thought and hastened over to warn him, calling out, “Monsieur! Monsieur!”
He didn’t hear me, upended the cassette and started to shake it, then reached for a water hose. I beat a hasty retreat and from a safe distance away, observed the ensuing carnage.

A large beige shower erupted from the cassette, reached an impressive height and seemed to hover in mid-air, before gracefully splattering down on his head, spectacles and shirt. The wall opposite received the remainder of the fallout. Later on that day, I spotted a series of dried brown footsteps sadly padding away from the Elsan point…
At this moment, I should add that I’m a huge fan of Thetford and Dometic toilet systems, which are very easy to use, when you empty them correctly.
Clearly, that hapless camper hadn’t emptied one before and didn’t read the instructions. Most cassettes easily slide out of the side of the caravan – often with a push-down catch to release them. If the cassette doesn’t slide out, something is wrong – don’t force it or you’ll break it.
The most common reason is that the toilet blade is still open and has locked the cassette in place – close the blade and the cassette should be freed.
These days, most cassettes will have wheels and/or a carrying handle to allow them to be carried to the empty point with one hand. Empty points come in all shapes and sizes, but are usually a dedicated toilet or a large stainless-steel or ceramic tray with a central hole (you should always use a dedicated facility to empty your cassestte).
Once there, retract the carrying handle and rotate out the pouring spout. Remove the cap and put it on the floor, in a place where it can’t fall into the toilet or empty tray. Don’t balance it on the toilet or the lip of the tray – that’s asking for trouble!
Hold down the pressure-release valve button on the top, then pour away the waste. Set the rinse hose to a gentle flow and add a litre or so to the tank. Rotate this around the tank, then empty it out.
Repeat until the cassette has next to no odour. Refit the cap and rotate the spout back into place. Back at your caravan, add some toilet fluid to the cassette.
It’s sensible to monitor how quickly you’re filling the cassette and to empty it before it fills to the brim.
A good tip for keeping your toilet bowl clean is to lay down toilet paper in a cross pattern over the hole. This encapsulates the waste and avoids the bowl being soiled.
If cassettes are emptied regularly and topped up with the right dose of fluid, they shouldn’t smell. See our best caravan toilet chemical guide if you’re looking for one.
If the cassette does smell, you can add a fan system, such as the SOG, which uses a small electric fan and a charcoal filter to vent to the outside.
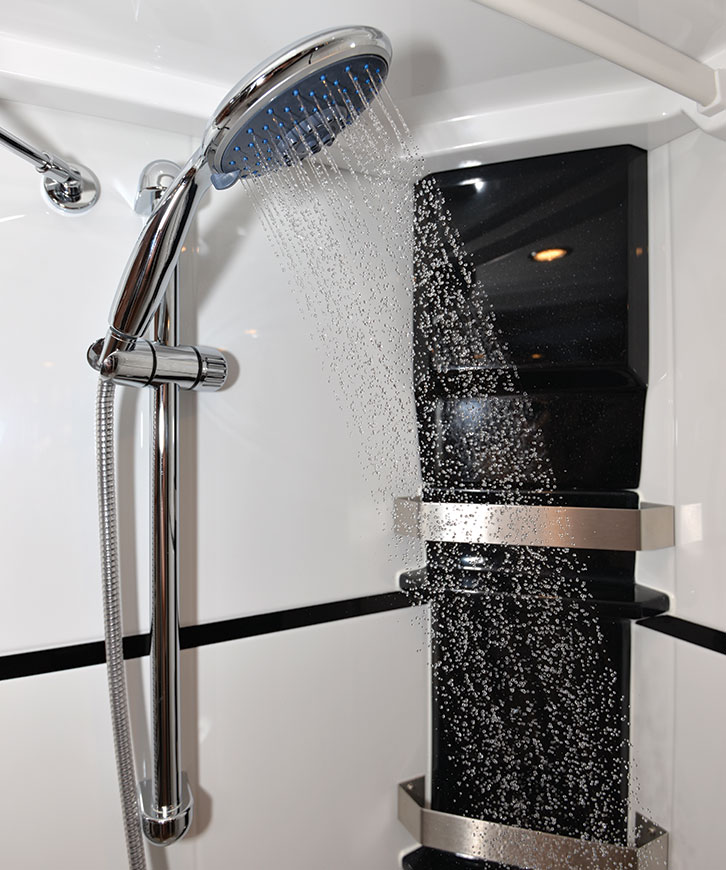
Shower tips
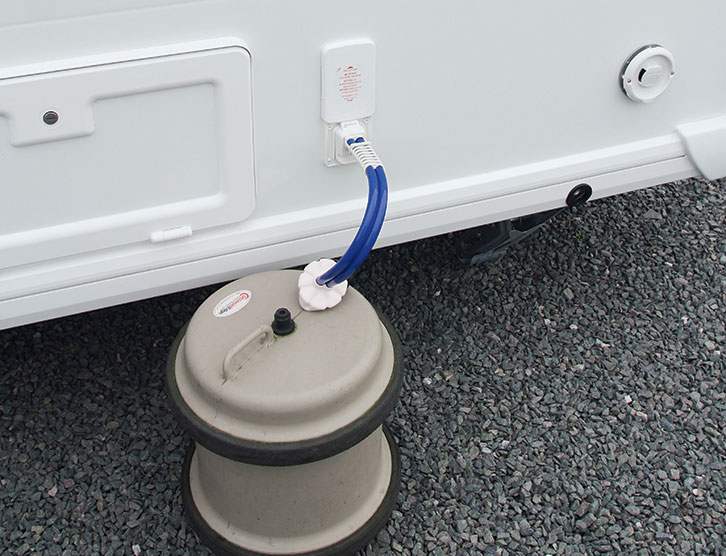
As with all of your caravan’s resources, the water supply is going to be relatively limited (unless you are attached to a water connection point). So if you don’t want to be obliged to refill your portable container a few times a day, it’s wise to use the water as sparingly as you can, especially while showering.
Most caravan water boilers are around 10 litres, so when mixed with cold water in the mixer tap, that still only gives you a maximum 20-30 litres of warm water. To avoid it running out or going cold, it’s best to soap up with the shower off, then use the water to rinse off, rather than running the shower continuously.
Take a look at our guide to caravan water systems to find out more about how they work and what can be done to maintain them too.
There are plenty of other errors that can occur when you’re away in your van – the team at Practical Caravan are sharing the 23 technical mistakes you’ll want to avoid in your caravan to help you avoid some of the more obvious ones that can occur.
If you’ve enjoyed reading this article, why not get the latest news, reviews and features delivered direct to your door or inbox every month. Take advantage of our brilliant Practical Caravan magazine SUBSCRIBERS’ OFFER and SIGN UP TO OUR NEWSLETTER for regular weekly updates on all things caravan related.