We’ve noticed a number of caravan maintenance tasks that have been ignored for a while, but a leaking toilet cassette was one that needed urgent attention.
While no one wants to talk about toilets, there was no getting away from the fact that the old Thetford C4 cassette toilet in our 1998 Bailey tourer we’d purchased off of Facebook Marketplace had plainly seen some action in its 25-plus years.
There are various symptoms of a leaking lip seal, but the one we couldn’t ignore was when we were emptying the caravan toilet cassette. Removing the cassette from the van and carrying it over to the disposal point, we were aware it was damp on the top, and there was definite evidence of leakage from the cassette as we walked across the field.
We found we needed to carry the cassette horizontally to prevent leaks. This is one of the symptoms of a tired lip seal.
This rubber gasket creates a watertight seal between the toilet bowl and the cassette.
It’s crucial for preventing leaks and smells from seeping into the van, and for the correct operation of the Thetford cassette toilet.
Happily, replacing a lip seal is pretty straightforward, so we headed off to Reading Caravans, our local accessory shop, and picked up the parts we needed to get the repair done.
While we’re talking toilets, don’t forget to make sure you have the best caravan toilet chemical to use in your van too.
Practical Caravan is supported by its audience. When you purchase through links on our site, we may earn an affiliate commission. Learn more
Fixing a leaking toilet cassette: a step-by-step guide
1. We picked up the new seal for our Thetford C4, but the guys at Reading Caravans told us there is a pre-2000 and a post-2000 version of the seal. Penny dates from 1998, so we got the early one.

2. We took the cassette from the van and put it on the bench. In order to ensure it was as pleasant as possible to work on, we thoroughly cleaned the cassette before we started the task. We dosed it with Thetford Duo Tank Cleaner.

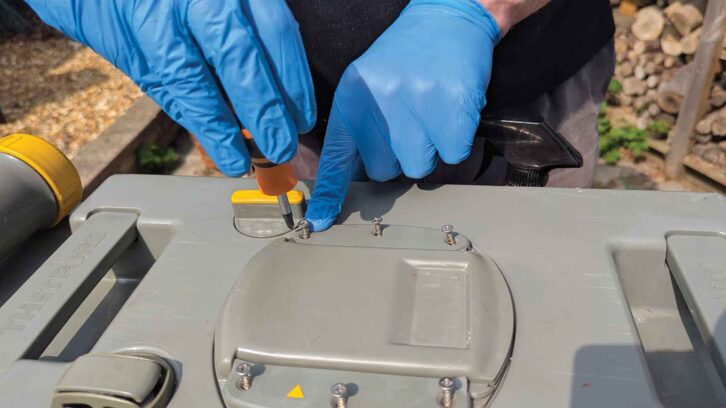
3. Knowing the cassette was now as clean as it could be, we set to work on the repair. The first thing to do was to remove the six stainless-steel screws around the blade mounting. There is no great science to this, but do make sure that you keep them safe.
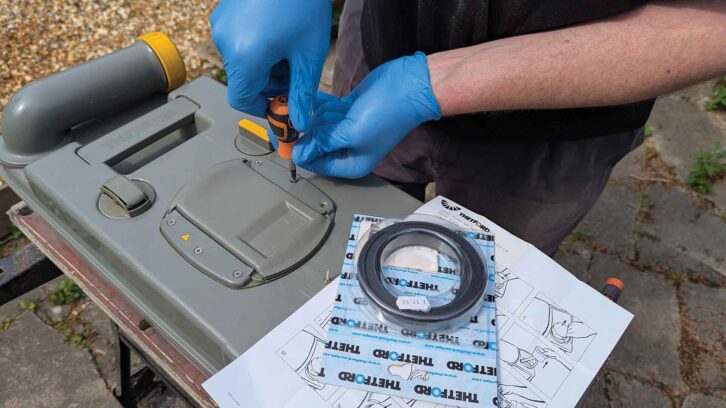
4. Once those were out, we slid the blade to one side to reveal two additional screws. These also need to be removed. They are identical to the previously removed screws, so can be stored with them.
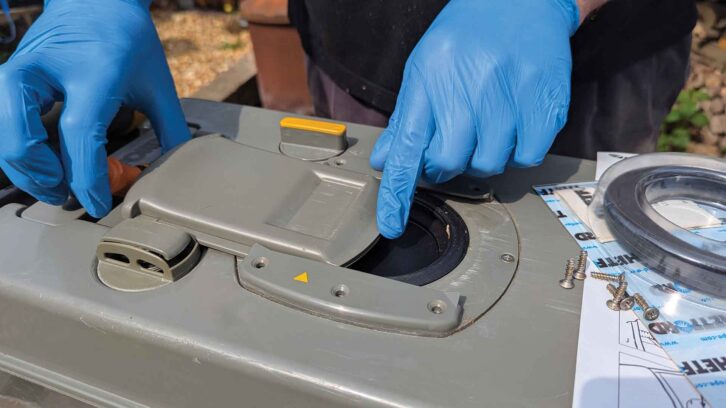
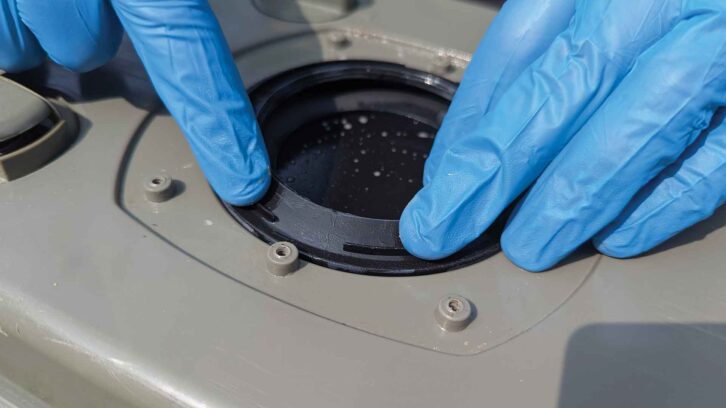
5. With that done, we could lift away the plastic retaining ring and reveal the lip seal. This is a good time to clean the whole area. We removed the old seal and thoroughly cleaned the whole thing with antibacterial cleaner.
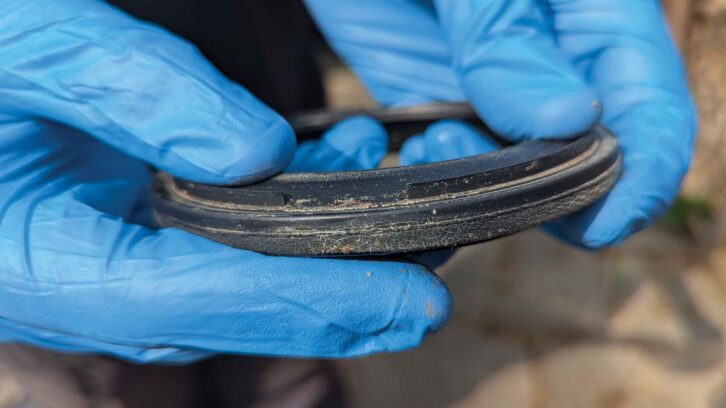
6. The old seal is not obviously damaged, apart from some age-related crazing after many years of service. The likely problem here is a lack of flexibility in the aged and old rubber. And this is not really surprising, given the hostile environment.
7. The new seal is removed from the packaging. We used Thetford Seal Lubricant – a silicone-based fluid that helps to ensure the seal is kept pliable and flexible. This meant that the seal was easy to press into position.

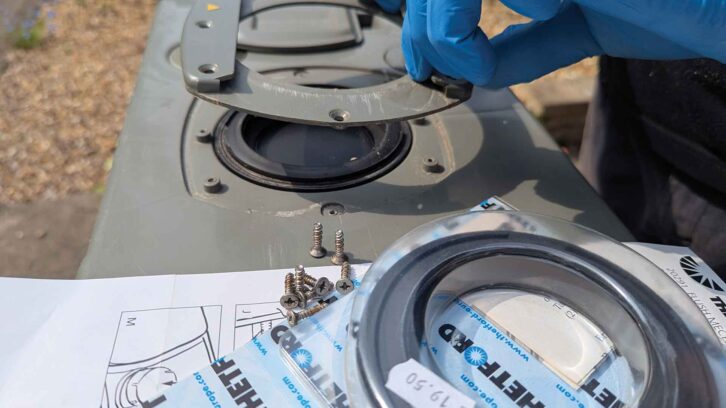
8. With pre-2000 toilets such as ours, there are two cut-outs in the seal. These should be lined up with the screws in the lower surround. Once the alignment has been checked, the first two securing screws can be replaced.
9. Slide the blade back into position – it looks like it won’t fit, but it will. Once that is back in place, the other six screws can be replaced. There is no specific order, but we did them all finger-tight, and then snugged them up afterwards.
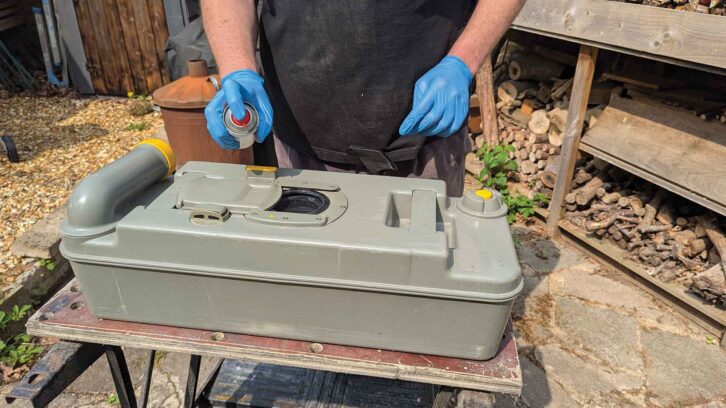
10. With the seal now replaced, we gave the whole cassette a good clean-down all over, lubricating all the moving parts using the Seal Lubricant. We filled it with clean water to ensure there were no leaks, then replaced it in the van.
While you’re getting your tourer ready for its next tour, one thing you will want to do is give it a good clean – check out our guide to how to clean a caravan roof if you’re after advice on how to clean what can be the dirtiest part of a van.
Don’t forget to make sure you know what chemicals to put in a caravan toilet too.
Future Publishing Limited, the publisher of Practical Caravan, provides the information in this article in good faith and makes no representation as to its completeness or accuracy. Individuals carrying out the instructions do so at their own risk and must exercise their independent judgement in determining the appropriateness of the advice to their circumstances and skill level. Individuals should take appropriate safety precautions and be aware of the risk of electrocution when dealing with electrical products. To the fullest extent permitted by law, neither Future nor its employees or agents shall have any liability in connection with the use of this information. You should check that any van warranty will not be affected before proceeding with DIY projects.
If you’ve enjoyed reading this article, why not get the latest news, reviews and features delivered direct to your door or inbox every month. Take advantage of our brilliant Practical Caravan magazine SUBSCRIBERS’ OFFER and SIGN UP TO OUR NEWSLETTER for regular weekly updates on all things caravan related.