We always love seeing what people have done with their ‘vans, and when we saw the renovation Bex Ambler and her partner Tom gave the interior of their caravan, we had to share it with you.
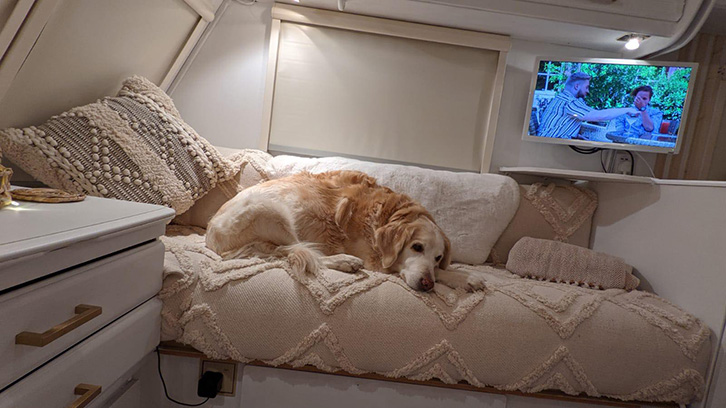
A used caravan can provide a great way of getting onto the touring scene, as Bex and Tom thought when they bought a 2002 Bailey Pageant Champagne this summer, with the aim being to take their two rescue dogs away with them.
What they didn’t realise was the significant damp problem it had. A quote of £2,000 to fix the damp made the couple decide to turn to some DIY to solve the issue.
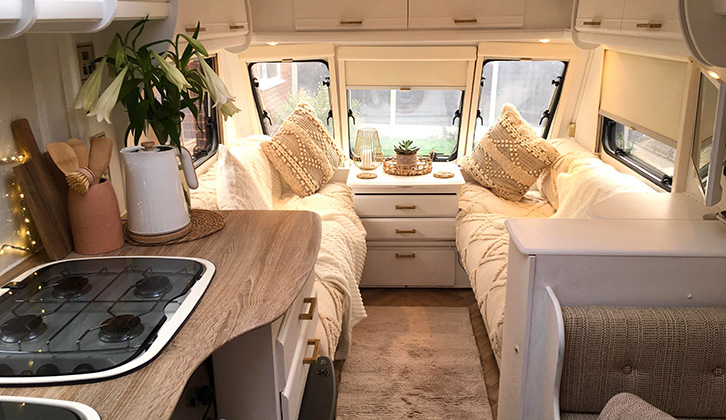
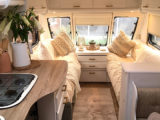
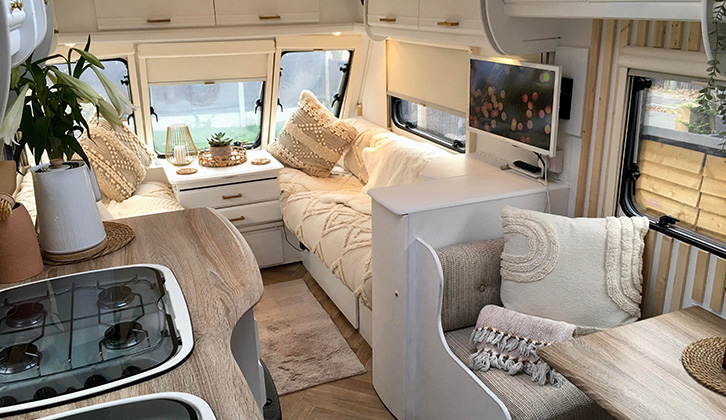
After five weeks of work – and using supplies including DC Fix and stick-on tiles, along with products from a variety of shops – they managed to revamp the van, with the end result being a stunning Scandi-inspired tourer.
Speaking to LatestDeals.co.uk, Bex, who volunteers for Second Chance Golden Retriever Rescue, said: “Myself and my boyfriend Tom renovated our 2002 Bailey Pageant Champagne this autumn in the hopes of being able to take our two rescue dogs Maddy and Ralph on lots of lovely holidays.”
“We started looking for a van at the end of the summer and it was so hard to find one we liked within our budget that hadn’t sold within a couple of hours of it going online.”

“We thought it was in perfect condition but unfortunately due to us being absolute amateurs, we didn’t take a damp metre which is my number one recommendation.”
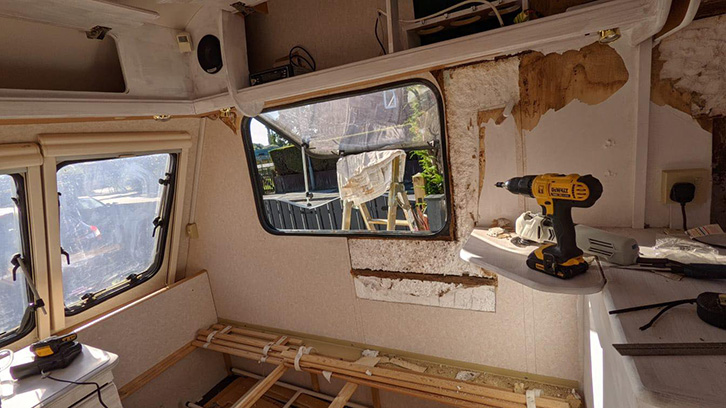
“Unfortunately we found loads of damp as soon as we started painting and taking things down”.
To combat this, the couple purchased a multi-tool from B&Q for £50, and started to strip their tourer back to its shell, before replacing the polystyrene, plyboard and batons.
The new polystyrene was glued in with No More Nails, which, combined with the replacement plywood, came to around £250 from B&Q.
The chic interior was created with Frenchic’s Dazzle Me, with the five tubs used coming to £20 each.
Gold handles from Amazon added to the look, with 20 for £25 providing the perfect touch.
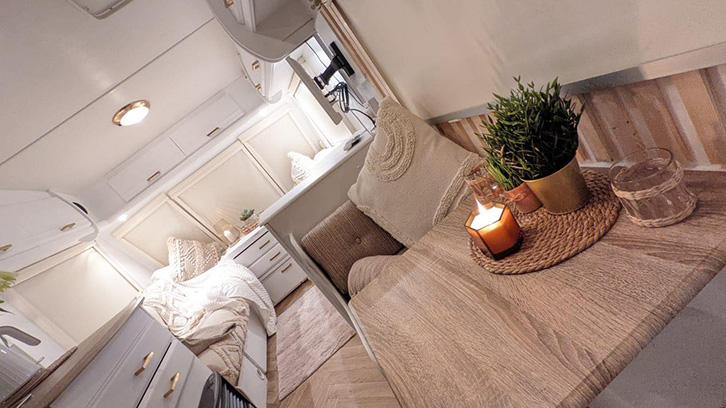
Two rolls of DC Fix Sonoma Oak (£8 a roll) were used for the worktop which was “an absolute pain to do but looks great when it’s finished”.
Bex added: “Make sure you have a smoothing tool and a hairdryer to get it tight on the edges, any small bubbles you can get out using a pin afterwards.”
The door cost £14 to sort, with DC Fix white gloss used, along with decals from Etsy on the top.
For the soft furnishings, the couple turned to high street shops: “The cushions are from Primark, Dusk and H&M Home. I think I spent about £60 including throws. The rugs are actually bath mats from Homesense and were £12 each.” These have the additional benefit of being washable – handy when touring with dogs!
The dining seats needed to be cut to size and stapled, and Bex was then able to find someone on eBay who could recover buttons. She said “I got 24 buttons for £6 and you just send your fabric off to him.”
If you’re thinking of changing the flooring of your caravan, Bex has a useful tip for you.
“The flooring is vinyl from eBay and was £95. Make sure you keep your old floor so you can cut it to size and trim it once it’s in your caravan. We used some spray adhesive to get it to stick around the edges.”
When it came to the kitchen area, a standard household tap was ordered for £60 from Amazon, while special pipes were also ordered from eBay, that would be suitable for a caravan, and came to £17.
For tiles, 10 packets of stick-ons were bought from One Below at £1 a pack, with PVA used to ensure both the tiles and wallpaper on the back wall stay in place – this was £10 from Dunelm.
£50 was spent on thin plywood from B&Q for the panelling as well.
Describing the work, Bex added: “In total, we spent around £800 on the renovation. The whole process has taken about five weeks as we both work full-time so have done most things in the dark on an evening”.
“I’m so happy now it’s complete and I absolutely love it.”
Now that the hard work is out of the way, the couple can’t wait to take their first trip in their new van: “We cannot wait to get out on our first trip and are planning a tour of France next year: roll on the wine and cheese!”
You can find out more about the renovations by visiting their Instagram page @champagne_van_reno.
Images courtesy of Bex Ambler
If you’re thinking of carrying out your own renovation project, you should keep a careful eye on weights for safe, legal towing – our guide to caravan weights and measures will fill you in on all you need to know.
Find out more about what you can do around your tourer to keep it in top condition with our guide to DIY caravan servicing. Our roundup of the best caravan cleaners are sure to help you keep your van in the best of conditions too.
Alternatively, head to our caravan reviews section to see our latest impartial reviews of the best caravans on the market.
Future Publishing Limited, the publisher of practicalcaravan.com, provides the information in this article in good faith and makes no representation as to its completeness or accuracy. Individuals carrying out the instructions do so at their own risk and must exercise their independent judgement in determining the appropriateness of the advice to their circumstances. Individuals should take appropriate safety precautions and be aware of the risk of electrocution when dealing with electrical products. To the fullest extent permitted by law, neither Future nor its employees or agents shall have any liability in connection with the use of this information. You should check that any van warranty will not be affected before proceeding with DIY projects.
If you’ve enjoyed reading this article, why not get the latest news, reviews and features delivered direct to your door or inbox every month. Take advantage of our brilliant Practical Caravan magazine SUBSCRIBERS’ OFFER and SIGN UP TO OUR NEWSLETTER for regular weekly updates on all things caravan related.